Blog

  • How to Make Oleo Saccharum Citrus Syrup (Bartender’s Guide)

    How to Make Oleo Saccharum Citrus Syrup (Bartender’s Guide)

    Learning how to make oleo saccharum citrus syrup unlocks the single most aromatic mixer in classic beverage craft. Citrus juice supplies acidity, but the colored skin holds the plant’s volatile aromatic compounds. When dry sugar pulls those oils out through pure osmotic pressure, you get an electric, concentrated syrup that transforms punches, sodas, and sours.

    Over a decade behind craft cocktail bars taught me that traditional bowl-and-muddler methods waste half the oils. Here is the exact friction-and-vacuum method I use to extract every drop of flavor from discarded citrus rinds.

    The Chemistry of Osmotic Citrus Oil Extraction

    The Chemistry of Osmotic Citrus Oil Extraction

    Oleo saccharum translates directly from Latin as “oily sugar.” The process relies on hygroscopic osmosis. Granulated sucrose draws water and volatile terpenes out of the oil glands located in the citrus flavedo. The primary aromatic compound here is limonene, as detailed by botanical research hosted on the National Center for Biotechnology Information (NCBI).

    Muddling rinds against a ceramic bowl ruptures only the top layer of oil pockets. Surrounding each peel with fine sucrose crystals triggers a slow collapse of the cellular walls. As the sugar dissolves in the escaping moisture, it forms an intensely fragrant liquid solution saturated with cold-pressed citrus oil.

    Why Essential Oils Beat Citrus Juice in Cocktail Architecture

    Citrus juice contains citric and malic acids that alter the pH balance of a drink. Juice spoils within 24 to 48 hours as oxidation sets in, turning bright flavors stale and flat.
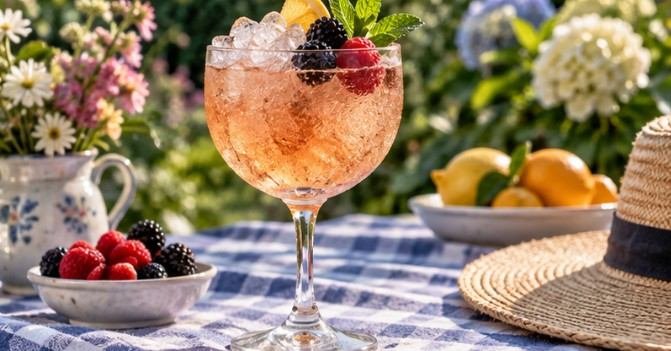
    Oleo saccharum captures pure citrus aroma without shifting acidity. You control the tartness of your final drink separately using fresh juice, while the syrup carries the heavy aromatic top notes.

    Unlike cooked syrups, this ambient extraction protects heat-sensitive aromatics, mirroring the technique used by bar directors on Punch Drink.
    Ingredients and Essential Tools for Citrus Oil Extraction

    Ingredients and Essential Tools for Citrus Oil Extraction

    Quality ingredients make a measurable difference in yield. Always reach for unwaxed, organic fruit whenever possible to avoid commercial food-grade shellac or synthetic coatings.

    • Citrus Fruit: 6 medium lemons, naval oranges, grapefruits, or limes
    • Sugar: 1 cup (200 grams) superfine caster sugar
    • Peeling Tool: Sharp carbon steel Y-peeler
    • Container: 1-quart heavy-duty freezer zip-top bag
    • Filtration: Fine-mesh conical strainer and clean glass storage bottle

    Selecting the Right Citrus Variety and Sugar Crystal Size

    Selecting the Right Citrus Variety and Sugar Crystal Size

    Standard granulated sugar crystals are large and sharp, but they take excessive time to dissolve into heavy oils. Confectioners’ sugar contains cornstarch and ruins the syrup. Caster sugar, or superfine baker’s sugar, hits the optimal sweet spot. The smaller surface area accelerates oil dissolution without turning chalky.

    Lemons and grapefruits yield the most punchy, expressive syrups due to their thick flavedo layer. Limes contain delicate aromatics but possess thinner skins that tear easily. Blood oranges and Meyer lemons create rich, floral profiles that pair well alongside herbal infusions like dried lavender simple syrup.

    Step-by-Step Method: The High-Yield Ziplock Technique

    Skip the wooden muddler and mixing bowl. Enclosing the mixture in a flexible plastic bag creates immediate surface-to-surface contact between the crystals and the peels.

    Phase 1: Precision Peeling Without the White Pith

    Precision Peeling Without the White Pith

    Thoroughly scrub your fruit under warm running water using a produce brush to remove dirt. Dry the fruit completely before cutting into it.

    Hold the fruit firmly and glide your Y-peeler across the surface in smooth, shallow ribbons. Remove only the colorful outer skin. The white spongy layer underneath is the albedo, which contains bitter limonin compounds that muddy the bright fruit profile. If you see white pith on the backside of your peeled ribbons, scrape it off gently with a paring knife.

    Phase 2: Maceration, Massage, and Osmotic Rest

    Weigh your prepared peels on a digital kitchen scale. Measure an equal weight of caster sugar for a 1:1 ratio. Transfer both ingredients into the heavy-duty freezer bag.

    Seal the bag, leaving a small opening at one corner. Press out all excess air to pull the plastic tight against the contents, then seal it completely. Massage the bag firmly between your palms for two minutes. You will feel the sugar turn into a wet, abrasive paste as the crystals break open the oil glands.

    Lay the bag flat on your kitchen counter at room temperature. Let it rest for 4 to 8 hours. Shake and knead the bag once every hour to redistribute the pooling syrup over dry patches.

    Phase 3: Straining and Recovering the Trapped Sugar

    Straining and Recovering the Trapped Sugar

    After resting, you will see a pool of rich, translucent liquid surrounding shriveled, translucent peels. Snip a bottom corner off the plastic bag and drain the syrup through a fine-mesh conical strainer into a sanitized glass bottle. Press firmly against the peels using the back of a stainless steel spoon to force out the trapped liquid.

    If undissolved sugar clings to the peels, add one tablespoon of boiling water or fresh citrus juice directly to the bag. Shake vigorously for thirty seconds to dissolve the remaining crystals, then pass that final liquid through the strainer.

    How to Fix, Stabilize, and Store Citrus Oleo Saccharum

    How to Fix, Stabilize, and Store Citrus Oleo Saccharum

    Raw oleo saccharum lasts roughly two weeks in an airtight container kept in the coldest section of your refrigerator. Because the sugar concentration is high, spoilage usually occurs from airborne mold spores rather than yeast fermentation.

    To extend the shelf life to six weeks, stir half an ounce of 80-proof neutral grain spirit or unaged vodka into the finished syrup. The alcohol halts bacterial development without masking the citrus perfume. Never freeze oleo saccharum, as cold separation damages the delicate emulsion between the water content and the suspended essential oils.

    For deep-dive food science on cold-solvent extractions, Serious Eats details extensive tests on sugar-to-peel weight efficiencies.

    Creative Ways to Build Drinks Around Citrus Syrup

    Oleo saccharum acts as an exceptional foundation for large-format punches, where it forms the aromatic base alongside tea, rum, and Cognac, following historical techniques archived on Difford’s Guide.

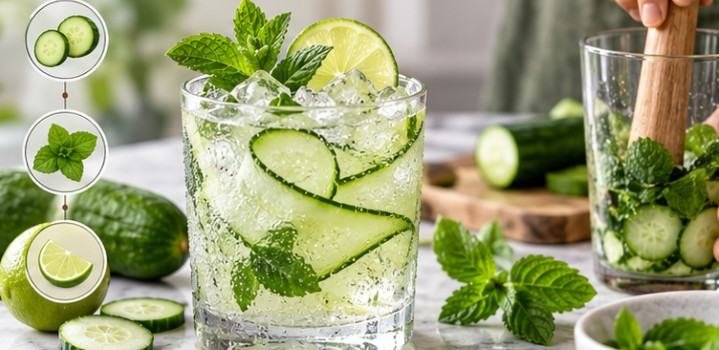
    In single-serve drinks, swap standard simple syrup for lemon oleo saccharum in a Gin Collins to add depth. For stirred drinks, use orange oleo saccharum in a classic Old Fashioned to replace both the sugar cube and the expressed twist. You can also alternate citrus syrup with herbal bases like fresh mint simple syrup to make crisp sodas and iced teas.

    Frequently Asked Questions About Oleo Saccharum

    1. Can I use brown sugar instead of white sugar?

    Yes, but demerara or brown sugar introduces heavy molasses notes that overpower subtle lemon or lime oils.

    2. How long can oleo saccharum sit at room temperature?

    Let it rest on the counter for a maximum of 12 hours before straining and transferring it into refrigeration.

    3. What should I do with the leftover candied peels?

    Toss the drained peels in extra granulated sugar, let them dry overnight on parchment paper, and use them as garnishes.

    4. Why did my oleo saccharum turn cloudy?

    Cloudiness simply means the citrus oils formed a dense, natural suspension with the dissolved sugar crystals.

    Stop Throwing Out Citrus Peels

    Throwing away citrus peels means discarding the most aromatic portion of the fruit. Turning those skins into oleo saccharum saves kitchen scrap, boosts home bar efficiency, and delivers brighter, more complex cocktails. Grab a bag of lemons, peel them clean, and let the sugar do the heavy lifting tonight.

  • Dried Lavender Simple Syrup Recipe Ratio: The Perfect Pour

    Dried Lavender Simple Syrup Recipe Ratio: The Perfect Pour

    Finding the right dried lavender simple syrup recipe ratio makes the difference between a luxurious cafe-quality drink and a beverage that tastes like liquid French bath soap. Lavender holds high concentrations of aromatic terpenes and volatile camphor compounds. Overdo the flower volume or steep time, and your sweetener ruins an expensive espresso or gin cocktail instantly.

    I tested multiple sugar densities and infusion windows in my kitchen to establish the exact sweet spot. Whether you want a light syrup that dissolves cleanly into iced drinks or a heavy cordial that lasts for months, the measurements below deliver balanced, sweet floral notes every single time.

    The Exact Dried Lavender Simple Syrup Recipe Ratio

    The Exact Dried Lavender Simple Syrup Recipe Ratio

    A balanced floral syrup requires a baseline formula that complements the herbal bitterness rather than magnifying it.

    Standard 1:1 Ratio for Cocktails and Lattes

    The standard ratio consists of one cup of filtered water, one cup of granulated white cane sugar, and two to two-and-a-half tablespoons of culinary dried lavender buds. This equal-parts ratio creates a pourable, light syrup that blends seamlessly into cold liquids like iced matcha, lemonade, and shaken cocktails. It provides clean sweetness without altering the final viscosity of your beverage.

    Rich 2:1 Ratio for Longer Shelf Life

    If you want a thicker mouthfeel and extended preservation, use a rich syrup formula: two cups of sugar to one cup of water, paired with three level tablespoons of dried lavender. According to beverage science principles highlighted by Serious Eats, higher sugar concentrations lower the water activity of a solution, making it difficult for wild mold or bacteria to colonize. The rich version pours like warm maple syrup and coats the tongue beautifully in hot drinks.

    Culinary Lavender vs. Craft Store Lavender

    Culinary Lavender vs. Craft Store Lavender

    Never brew simple syrup using dried lavender from a floral shop or sachet display. Ornamental lavender varieties often receive commercial synthetic pesticide sprays not approved for human consumption. Furthermore, ornamental strains often come from Lavandula stoechas (Spanish lavender) or Lavandula dentata, which contain harsh concentrations of camphor.

    Always verify you are purchasing food-grade Lavandula angustifolia, often labeled English culinary lavender. 

    The USDA Plants Database details the distinct agricultural profile of true English lavender, which produces lower camphor levels and higher sweet linalool content. This culinary botanical yields a delicate, soft perfume ideal for culinary syrups and baking.

    Step-by-Step Infusion Method

    Step-by-Step Infusion Method

    Great syrup relies on heat control rather than prolonged boiling. Follow this extraction process to keep the floral aromatics pristine:

    Measure one cup of granulated sugar and one cup of water into a heavy-bottomed saucepan. Set the heat to medium and stir gently until the sugar crystals dissolve completely. Do not let the liquid boil violently; excessive boiling evaporates your water volume and throws off the balance.

    Stir in two-and-a-half tablespoons of dried culinary lavender buds. Lower the burner to its lowest setting, cover the pan, and maintain a bare simmer for exactly five minutes to bloom the dried botanicals. Remove the pot from the heat element immediately.

    The 20-Minute Steep Window (Avoiding the Soap Flavor)

    Leaving dried flowers in hot sugar water too long ruins the syrup. During testing, an infusion steeped for 45 minutes produced sharp, medicinal notes that lingered unpleasantly on the palate.

    Set a timer for 15 to 20 minutes the moment the pan leaves the heat. This gives the hot water enough time to extract the delicate linalool and geraniol oils while leaving the bitter plant tannins trapped inside the dried calyx. 

    Once your timer chimes, pour the liquid through a fine-mesh stainless steel strainer into a heatproof glass vessel. Press the lavender flowers very gently with the back of a spoon to collect residual syrup, but do not crush them aggressively.

    Achieving That Elusive Natural Violet Hue

    Achieving That Elusive Natural Violet Hue

    Authentic lavender syrup does not turn purple on its own. Natural flower extraction yields an uninspiring, pale yellowish-amber tint. If you see neon purple syrup in coffee shops, you are drinking artificial dye.

    You can create an organic, pastel-violet hue using standard kitchen chemistry. Drop eight to ten fresh or frozen blueberries into your saucepan during the final two minutes of your simmer. As the blueberries soften, they release anthocyanins—natural water-soluble plant pigments. Strain them out alongside the lavender buds, then whisk in one teaspoon of freshly squeezed lemon juice.

    The citric acid shifts the anthocyanin pH, turning the muddy liquid into an ethereal lavender-violet tone without altering the floral flavor profile.

    Botanical Blends and Herb Cabinet Pairings

    Mastering this core recipe allows you to build complex herbal variations. If you enjoy garden-forward profiles, pair lavender with other earthy notes.

    Try splitting the botanical volume in half by combining lavender with mint to craft a refreshing twist on fresh mint simple syrup. The cool menthol sharpens the floral notes and cuts through heavy milk drinks.

    Storage Realities and Spoilage Indicators

    Homemade botanical simple syrups lack chemical preservatives, so proper refrigeration is non-negotiable.

    Store your finished syrup in a glass bottle with an airtight seal. Wash and sterilize the bottle with boiling water before filling. The National Center for Home Food Preservation emphasizes clean containers to prevent microbial contamination in homemade syrups and preserves.

    A standard 1:1 ratio syrup remains fresh in the refrigerator for two to three weeks. A rich 2:1 syrup lasts up to three months under cold storage. If your syrup develops a cloudy haze, exhibits white sediment along the bottom, or develops a sour, fermented cider aroma, discard it immediately.

    If you prefer woodsy, savory tones in fall and winter cocktails, blend dried lavender with crushed herbs using the method from this rosemary simple syrup. One sprig of fresh rosemary simmered alongside a tablespoon of lavender adds resinous depth that pairs exceptionally well with aged whiskey or dark rum.

    Frequently Asked Questions

    1. Why does my homemade lavender simple syrup taste like soap?

    You steeped the dried buds longer than 20 minutes, extracting bitter camphor compounds and astringent tannins.

    2. Can I use fresh lavender flowers instead of dried buds?

    Yes, but you must double the amount to five tablespoons because fresh flowers contain higher water weight and less concentrated oils.

    3. How do I make sugar-free lavender syrup?

    Replace the granulated cane sugar with an equal volume of allulose or erythritol, simmering just until the crystals dissolve.

    4. Can I freeze lavender simple syrup for long-term storage?

    Yes, pour the cooled syrup into clean silicone ice cube trays and freeze for up to six months.

    Stop Drinking Bland Lattes

    Elevating your home beverage routine does not require an artisanal pantry or costly barista equipment. Measure out your sugar, keep an eye on your steeping timer, and strain the infusion before the botanicals turn astringent. 

    Whip up a batch this morning, pour a splash into an iced latte or crisp sparkling water, and leave commercial flavored syrups behind for good.

  • How to Make Rosemary Simple Syrup With Fresh Herbs

    How to Make Rosemary Simple Syrup With Fresh Herbs

    Nothing ruins a craft cocktail faster than artificial flavoring. When you learn how to make rosemary simple syrup with fresh herbs, you master the easiest way to bring woodsy botanical aromatics into your home bar. 

    Most kitchen attempts turn out either aggressively bitter or disappointingly faint. After months of testing herbal extractions behind my bar, I discovered that treating rosemary like delicate tea leaves—rather than hard candy—makes all the difference.

    The Science of Extracting Piney Terpenes Without Bitterness

    Rosemary (Rosmarinus officinalis) owes its pine-forward, resinous fragrance to volatile terpenes: mainly alpha-pinene, camphor, and 1,8-cineole. Peer-reviewed research indexed on NCBI demonstrates that these aromatic compounds are heat-sensitive. 

    Prolonged boiling degrades their delicate botanical character and leaves behind astringent, wood-derived tannins.

    Why Boiling Fresh Herbs Ruins the Profile

    Most online recipes instruct you to boil herbs directly in bubbling sugar syrup for several minutes. That approach extracts harsh chlorophyll and bitter compounds from the plant cell walls. You end up with a murky, brownish syrup that tastes like boiled lawn clippings rather than fresh pine.

    Selecting Tender Tops Over Woody Stems

    Strip only the tender, green needle clusters from the top third of each stem. The thick, bark-like lower stems contain high concentrations of astringent resins. Keeping these woody segments out of your pan ensures a clean, crystalline sweetness that lets the herbal finish shine.

    Ingredients and Ratios for Herbal Simple Syrup

    Ingredients and Ratios for Herbal Simple Syrup

    Standard mixology relies on a 1:1 volume ratio of sweetener to liquid. This ratio keeps cocktails balanced without altering the water volume needed for proper dilution during shaking.

    • 1 cup granulated white cane sugar: Avoid raw sugars here; their heavy molasses notes compete with fresh herbs. If you want deep caramel richness for bourbon drinks, consider whipping up a batch of homemade demerara syrup instead.
    • 1 cup filtered water: Tap water with high mineral or chlorine content dulls botanical aromatics.
    • 5 to 6 fresh rosemary sprigs: Look for vibrant green, aromatic stalks that snap cleanly when bent.

    Step-by-Step Brewing Method

    Grab a small stainless steel saucepan, a fine-mesh conical strainer, and a clean glass bottle.

    Step 1: Create the Neutral Base

    Create the Neutral Base

    Place the water and cane sugar into your saucepan over medium heat. Stir continuously with a silicone spatula until the liquid turns completely clear and the crystals dissolve. Bring the mixture to a faint simmer, then cut the heat immediately.

    Step 2: The Off-Heat Herbal Steep

    The Off-Heat Herbal Steep

    Drop your prepared rosemary sprigs directly into the hot, non-boiling liquid. Submerge the needles completely with the back of a spoon. Cover the pan tightly with a lid to trap evaporating aromatic oils inside the vessel. 

    Let the herbs steep undisturbed for 20 minutes. If you enjoy bright fruit pairings, this is the exact moment you can toss in crushed berries, similar to how I make fresh blackberry simple syrup for summer sodas.

    Step 3: Clarifying and Bottling

    Clarifying and Bottling

    Pour the infused liquid through a fine-mesh strainer into a heat-safe glass vessel. Never press, squeeze, or mash the rosemary needles against the mesh. Forcing plant solids through the sieve introduces cloudiness and accelerates spoilage. Discard the spent herbs into your compost bin and allow the syrup to cool to room temperature.

    How to Store and Extend Shelf Life Safely

    Sugar acts as a natural humectant, binding free water molecules to inhibit microbial growth. However, standard 1:1 syrups maintain a water activity level ($a_w$) high enough for mold spores to take hold over time. Guidelines from the National Center for Home Food Preservation emphasize the importance of sanitized storage vessels and temperature control for low-acid liquid preserves.

    Pour the cooled syrup into a freshly scalded, airtight glass bottle. Stored in the coldest section of your refrigerator, it remains fresh for 14 days. If you want to double that lifespan to a full month, add a half-ounce of 80-proof neutral vodka right before sealing. The alcohol prevents yeast fermentation without altering the flavor profile.

    Mixology Pairings and Culinary Uses

    Mixology Pairings and Culinary Uses

    This herbaceous sweetener transforms classic beverage recipes across spirits:

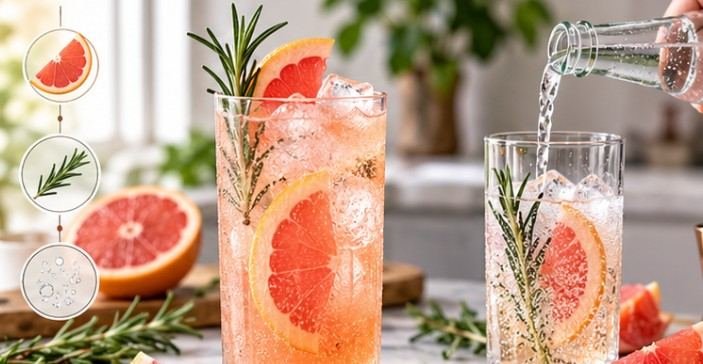
    • The Herbal Greyhound: Shake two ounces of gin or vodka with three ounces of fresh ruby red grapefruit juice and three-quarter ounces of rosemary syrup. The piney notes slice straight through the tart, bitter grapefruit oil.
    • The Smoked Bourbon Old Fashioned: Stir two ounces of rye whiskey, one-third ounce of rosemary syrup, and two dashes of aromatic bitters over ice. Express an orange peel over the rim and garnish with a lightly torched rosemary sprig.
    • Sparkling Mocktails: Combine an ounce of syrup with fresh Meyer lemon juice, topped with club soda and crushed ice for an elevated zero-proof cooler.
    • Morning Kitchen Uses: Drizzle a spoonful over hot buttermilk biscuits, poach sliced pears in the liquid, or whisk it into olive oil with Dijon mustard for an herbaceous salad dressing.

    Frequently Asked Questions

    1. Why does my rosemary simple syrup taste bitter?

    You boiled the herb directly over heat instead of using a flame-off steeping process.

    2. Can I substitute honey or maple syrup for white sugar?

    Yes, but earthy sweeteners overpower delicate pine notes; stick to mild clover honey if substituting.

    3. How do I tell if the syrup has spoiled?

    Discard the batch if you notice cloudiness, floating strands of mold, or a sour, yeasty odor.

    4. Can I freeze rosemary simple syrup for later use?

    Freeze the cooled syrup in silicone ice cube trays for up to six months with zero flavor loss.

    Stop Settling for Boring Drinks

    Mastering your own cocktail components saves money and instantly upgrades your hospitality game. Once you taste how clean a true off-heat infusion is, commercial cocktail mixers will never earn shelf space in your pantry again. 

    Pick fresh stems from your garden or grocery produce section, bottle a batch tonight, and start pouring drinks worth talking about.

  • How to Make Rich Simple Syrup 2 to 1: The Bar Pro’s Guide

    How to Make Rich Simple Syrup 2 to 1: The Bar Pro’s Guide

    Every home bartender eventually hits a wall with watery Old Fashioneds and limp whiskey sours. I spent years wondering why my cocktails tasted thin despite using premium rye and fresh citrus. The culprit was not the liquor; it was the standard 1:1 simple syrup watering down each pour. 

    Learning how to make rich simple syrup 2 to 1 fundamentally changed my drinks. This heavy-density syrup introduces concentrated sweetness alongside luxurious mouthfeel without dumping unwanted water into spirit-forward drinks.

    Why 2:1 Ratio Syrups Outperform Standard Bar Syrups

    Standard simple syrup splits white sugar and water down the middle at a 1:1 ratio. While fine for high-acid long drinks, it introduces unnecessary water into cocktails that require restraint. Rich simple syrup doubles the sugar volume against the water base, producing a concentrated sweetener that behaves differently in a glass.

    The Dilution Problem in Spirit-Forward Cocktails

    Shaking and stirring drinks naturally melt ice, providing essential dilution that opens up ethanol flavors. When your sweetening agent is already 50% water, you lose control over total water volume. According to cocktail science insights detailed on Serious Eats, uncalibrated water in simple syrups causes over-dilution before a drink hits proper serving temperature. Using a 2:1 rich syrup lets your ice chilling do the work it was meant to do without drowning spirit nuances in your favorite classic cocktail recipes.

    Viscosity, Brix, and Mouthfeel

    In professional beverage development, sweetness density is measured on the Brix scale. Standard 1:1 syrup measures approximately 50° Brix. Rich 2:1 syrup sits at roughly 66° to 67° Brix. 

    At this exact concentration, sucrose molecules create noticeable silkiness. The syrup clings to the palate, coats your tongue, and carries aromatic bitters across taste buds with far more weight than standard bar syrup could ever manage.

    Equipment and Ingredient Proportions (Weight vs. Volume)

    Precision dictates consistency. Measuring dry sugar by volume introduces error because granulated crystals pack unevenly depending on humidity and scoop density.

    Metric Imperial (Volume) Metric (Weight)
    White Cane Sugar 2 cups 400 grams
    Filtered Water 1 cup 200 grams

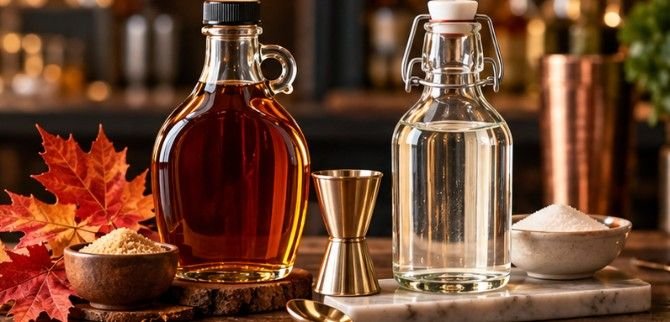
    For the cleanest flavor profile, use pure cane granulated sugar. Demerara or turbinado works wonderfully for dark spirits, but standard white sugar preserves neutral versatility. Always opt for filtered water; municipal chlorine distorts delicate aromatics.

    You need a small saucepan, an accurate digital kitchen scale, a funnel, and a clean glass swing-top bottle.

    Two Reliable Methods to Make Rich Simple Syrup 2 to 1

    Most traditional recipes instruct you to boil your mixture on high. That instruction is wrong. Boiling causes rapid water evaporation, instantly skewing your carefully measured 2:1 ratio into unpredictable candy territory. Here are the two ways I produce crystal-clear syrup behind the bar.

    Method 1: The Gentle Warm Dissolve (Stovetop)

    Method 1: The Gentle Warm Dissolve (Stovetop)

    1. Combine ingredients: Place your saucepan on the digital scale, tare to zero, and pour in 200 grams of water. Tare again, then add 400 grams of white granulated sugar.
    2. Apply low heat: Set your stove burner to medium-low.
    3. Stir continuously: Whisk gently. Keep the liquid moving so the sugar does not settle against the hot bottom and scorch.
    4. Dissolve without boiling: Watch the mixture turn from opaque sludge to clear amber, and finally into transparent liquid. The internal temperature needs to reach only 120°F to 135°F to dissolve sucrose entirely.
    5. Cool and bottle: Remove from heat the instant the liquid turns completely transparent. Let it settle to room temperature, then funnel it into a sanitized bottle.

    Method 2: The Zero-Evaporation Blender Method

    Method 2: The Zero-Evaporation Blender Method

    If you want zero water loss and perfectly uniform syrup, skip the stove entirely.

    Pour 200 grams of warm tap water (about 110°F) and 400 grams of white sugar directly into a high-speed blender jar. Secure the lid tightly and run the blender on high speed for 60 to 90 seconds. 

    The mechanical shear forces and gentle friction dissolve the sugar completely without heating the liquid to evaporation points. Let the micro-bubbles settle for 10 minutes; you will be left with diamond-clear, velvety rich syrup.

    Converting Legacy Recipes from 1:1 to 2:1 Syrup

    You cannot swap rich simple syrup directly into cocktail recipes built for standard 1:1 syrup without over-sweetening your glass. Because 2:1 syrup is roughly 33% sweeter by volume, apply a standard reduction factor:

    $$\text{Volume of 2:1 Syrup} = \text{Volume of 1:1 Syrup} \times 0.75$$

    • If a recipe demands 1 oz of standard simple syrup, use 0.75 oz of rich simple syrup.
    • If a recipe calls for 0.5 oz of standard simple syrup, drop to 0.375 oz (3/8 oz) of rich simple syrup.

    This mathematical tweak cuts the volume of supplemental liquid while hitting the exact intended sweetness, making it a reliable base for experimenting with homemade infused syrups.

    Storage Realities: Shelf Life, Crystallization, and Preservation

    Storage Realities: Shelf Life, Crystallization, and Preservation

    High sugar density makes rich simple syrup naturally shelf-stable. According to water activity data compiled by the USDA FoodData Central, solutions above 65° Brix create an osmotic environment that inhibits most common bacterial and mold growth.

    • Refrigerated: Kept cold in an airtight glass container, 2:1 syrup maintains fresh quality for up to six months.
    • Room Temperature: Safe on a dark bar cart for four to six weeks.
    • The Pro Bartender Hack: Add half a barspoon (roughly 0.25 oz) of high-proof neutral spirit, like unflavored 80-proof vodka, to your finished batch. The spirit prevents surface mold spores from finding traction whenever the bottle opens.

    If white sugar crystals gather around the neck or bottom of the bottle after several months, place the bottle in a warm water bath for ten minutes to dissolve them back into solution.


    Frequently Asked Questions

    1. Can I make 2:1 rich simple syrup using brown sugar or demerara?

    Yes, using brown or demerara sugar at the exact same 2:1 weight ratio yields a rich, molasses-forward syrup ideal for whiskey and rum cocktails.

    2. Why did my rich simple syrup crystallize in the bottle?

    Crystallization happens when excess water evaporates during cooking or when sugar crusts on the bottle rim seed crystal formation throughout the syrup.

    3. Do I need to boil the water to make 2:1 syrup?

    No, sugar dissolves fully at temperatures well below boiling, and avoiding a boil keeps your measured liquid proportions perfectly accurate.

    4. How long does rich simple syrup last compared to 1:1 simple syrup?

    Rich simple syrup lasts up to six months refrigerated, whereas standard 1:1 simple syrup typically spoils within three to four weeks.

    Stop Diluting Your Drinks

    Ditching watery 1:1 syrup is the single fastest upgrade you can make to your cocktail program. Measure your sugar by weight, dissolve it with gentle heat or mechanical blender shear, and stash it in a clean glass bottle. 

    Once you experience the concentrated punch and velvety glide of true 2:1 rich syrup, standard bar syrups will never touch your shaker again.