Blog

  • How to Make Pumpkin Spice Latte at Home Without the Coffee-Shop Line

    How to Make Pumpkin Spice Latte at Home Without the Coffee-Shop Line

    The first cool morning of fall usually makes me want something more interesting than my everyday coffee. Instead of driving to a café and paying for a seasonal drink, I make my own version with real pumpkin, bold coffee, warm spices, and creamy milk. Once I learned how to make a pumpkin spice latte at home, I found that getting that familiar fall flavor was less about fancy equipment and more about balancing the ingredients correctly.

    The combination is simple, but the details matter. Strong coffee keeps the drink from tasting like sweet pumpkin milk, gently heated milk creates a smoother texture, and real pumpkin puree adds body without relying on flavored syrup. With a few grocery-store ingredients and about 10 minutes, I can make a rich, customizable pumpkin spice latte that feels right at home on a crisp fall morning.

    What Ingredients Do You Need for a Homemade Pumpkin Spice Latte?

    For one generous serving, I use 1 cup of dairy or plant-based milk, 1 to 2 tablespoons of plain pumpkin puree, 1/2 cup of strong brewed coffee or 2 shots of espresso, 1 to 2 tablespoons of maple syrup or sugar, 1/4 to 1/2 teaspoon of pumpkin pie spice, and 1 teaspoon of vanilla extract.

    Plain canned pumpkin works best. Pumpkin pie filling already contains sugar and spices, making it harder to control the final flavor. For a richer drink, I usually choose whole milk or creamy barista-style oat milk. When comparing the best non-dairy milk for coffee, I find oat milk especially suitable for a pumpkin spice latte because its creamy texture complements both espresso and warm fall spices.

    How Do You Make a Pumpkin Spice Latte Step by Step?

    Heat the Milk, Pumpkin, Sweetener, and Spice

    I add the milk, pumpkin puree, maple syrup or sugar, and pumpkin pie spice to a small saucepan. I whisk the ingredients together over medium-low heat until the mixture becomes hot and steaming.

    I do not let it boil. Gentle heating helps the milk remain smooth and prevents the pumpkin mixture from developing an overly cooked taste.

    Add Vanilla After Heating

    Once the pumpkin-milk mixture is hot, I remove the saucepan from the burner and stir in the vanilla extract.

    Adding vanilla after heating helps preserve more of its aromatic flavor instead of exposing it to several minutes of direct heat.

    Froth for 20 to 30 Seconds

    Add Vanilla After Heating

    Next, I froth the warm pumpkin-milk mixture for about 20 to 30 seconds. A handheld milk frother is the easiest option, but a whisk or immersion blender can also work.

    I look for fine, light foam rather than large bubbles. This simple step gives a homemade pumpkin spice latte a texture much closer to a drink from a coffee shop.

    Brew Espresso or Strong Coffee

    I prepare two shots of espresso or about 1/2 cup of strong brewed coffee and pour it into a large mug.

    A moka pot, AeroPress, French press, drip coffee maker, or instant espresso can all work if I do not own an espresso machine.

    Assemble and Serve

    I slowly pour the frothed pumpkin milk over the coffee and stir gently.

    For a classic café-style finish, I top the latte with whipped cream and add a light dusting of pumpkin pie spice or cinnamon.

    Can You Make a Pumpkin Spice Latte Without an Espresso Machine?

    Can You Make a Pumpkin Spice Latte Without an Espresso Machine?

    Absolutely. I can brew regular coffee stronger than usual, use instant espresso, or prepare concentrated coffee with a moka pot or AeroPress.

    The key is avoiding weak coffee. Pumpkin, milk, vanilla, and warm spices can easily overpower a mild brew. If my latte tastes more like sweet pumpkin milk than coffee, I strengthen the coffee before changing the other ingredients.

    This approach also makes the recipe practical for US households that have a standard drip coffee maker but no dedicated espresso machine.

    What Is the Best Milk for a Pumpkin Spice Latte?

    Whole milk gives the drink a rich, creamy texture and usually froths easily. Two-percent milk creates a slightly lighter latte while still providing good body.

    For a dairy-free pumpkin spice latte, oat milk is one of my favorite choices because its creamy texture pairs naturally with pumpkin and cinnamon. Soy milk also works well. Almond milk produces a lighter drink, although its texture can be thinner.

    Barista-style plant milks are especially helpful when I want better foam because they are formulated specifically for coffee drinks.

    Why Does My Pumpkin Spice Latte Taste Grainy?

    Some settling is normal because real pumpkin puree and ground spices contain solids. Too much pumpkin or spice, however, can make the latte noticeably gritty.

    I keep the pumpkin at about 1 to 2 tablespoons per serving and whisk the mixture thoroughly while heating. For an especially smooth drink, I can briefly blend the warm pumpkin-milk mixture before frothing.

    I also keep the spices balanced. Cinnamon should usually lead, while ginger, nutmeg, and cloves stay in the background. Too much clove or nutmeg can quickly overwhelm the coffee.

    How Do You Make an Iced Pumpkin Spice Latte?

    An iced pumpkin spice latte uses essentially the same flavors but requires a slightly different method.

    I warm a small amount of milk with the pumpkin puree, sweetener, and spice first so everything combines smoothly. I stir in the vanilla, allow the mixture to cool, and then pour it into a glass filled with ice, chilled espresso or strong coffee, and cold milk.

    Cold foam is optional, but it gives the finished drink a more polished coffee-shop texture.

    Can You Make the Pumpkin Mixture Ahead of Time?

    Can You Make a Pumpkin Spice Latte Without an Espresso Machine?

    Yes. I can combine pumpkin puree, sweetener, vanilla, and pumpkin pie spice ahead of time and refrigerate the mixture in a sealed container for a short period.

    When I want a latte, I stir a portion into warm milk and add freshly brewed coffee.

    I prefer making small batches because pumpkin naturally settles and is easier to remix when the mixture is fresh.

    Frequently Asked Questions (FAQs)

    1. Can I use canned pumpkin instead of fresh pumpkin?

    Yes. Plain canned pumpkin puree is convenient and gives consistent results. I avoid pumpkin pie filling because it usually contains added sugar and spices that can make the finished latte too sweet.

    2. Can I make a pumpkin spice latte with regular coffee?

    Yes. Strong regular coffee works well. I simply brew it more concentrated than my everyday cup so its flavor remains noticeable after I add the milk and pumpkin.

    3. What sweetener works best for pumpkin spice latte?

    Maple syrup pairs naturally with pumpkin and warm spices. Brown sugar creates a deeper caramel-like flavor, while regular granulated sugar also works if that is what I already have in my pantry.

    4. Can I make a pumpkin spice latte less sweet?

    Yes. I start with about 1 tablespoon of sweetener, taste the finished drink, and add more only when needed. Stronger coffee, vanilla, and balanced pumpkin pie spice can add plenty of flavor without excessive sweetness.

    A Better Fall Coffee at Home

    Once I have the basic method down, this seasonal drink becomes incredibly easy to customize. I can use oat milk, reduce the sugar, add stronger espresso, serve it over ice, or create a thicker layer of foam.

    For me, the best results come from bold coffee, real pumpkin puree, gently heated milk, and controlled spice. Those simple choices turn how to make pumpkin spice latte at home into a dependable fall coffee recipe instead of a once-a-year experiment.

  • How To Make Brown Sugar Syrup On The Stove: The Barista Guide

    How To Make Brown Sugar Syrup On The Stove: The Barista Guide

    You can turn plain water and brown sugar into coffee-shop-grade syrup in under eight minutes. When learning how to make brown sugar syrup on the stove, the real challenge is not dissolving the crystals; it is preventing premature crystallization while managing water loss. Master this straightforward technique once, and you will never spend six dollars on a watered-down drive-thru latte again.

    The Chemistry of Cane Sugar and Thermal Control

    Brown sugar is not just sucrose. Standard brown sugar consists of refined white sucrose crystals coated in varying levels of cane molasses, as documented by the USDA FoodData Central nutritional database. That small layer of molasses introduces invert sugars (fructose and glucose), mineral ash, and organic acids that behave differently in a saucepan than pure white sucrose.

    Excess heat ruins good syrup. Bringing brown sugar to an uncontrolled rolling boil flashes off water too fast. When the sucrose concentration surpasses saturation before the molasses compounds break down, jagged crystals form along the sides of the pan. Heat your mixture gently over medium-low to protect the subtle, toffee-like nuances of the molasses from scorching.

    Light vs. Dark Brown Sugar: Moisture and Brix Variance

    Light vs. Dark Brown Sugar: Moisture and Brix Variance

    According to processing metrics detailed by King Arthur Baking, light brown sugar contains approximately 3.5% molasses by volume, whereas dark brown sugar contains nearly 6.5%. That difference changes both moisture content and flavor intensity.

    Light brown sugar delivers soft caramel, butterscotch, and honeyed undertones, which complement delicate drinks like iced matcha or light-roast pour-overs. 

    Dark brown sugar supplies rich malt, roasted toffee, and rum-like depth, pairing naturally with dark espresso and boba milk tea. 

    Because dark brown sugar carries higher levels of dissolved solids, it produces a slightly denser syrup body at the exact same liquid ratio.

    Equipment and Ingredient Proportions

    Equipment and Ingredient Proportions

    A standard batch relies on a 1:1 ratio by volume for everyday drinks:

    • 1 cup (200g) packed brown sugar, light or dark
    • 1 cup (240ml) filtered water
    • 1 whole cinnamon stick, optional for bakery notes
    • 1 teaspoon pure vanilla extract, stirred in off the heat

    For a lower-glycemic alternative, try our recipe for sugar-free simple syrup using allulose or monk fruit.

    Step-by-Step Stovetop Brewing Technique

    Step-by-Step Stovetop Brewing Technique

    1. Combine in the Pan: Add your brown sugar and filtered water to the saucepan. Drop in the cinnamon stick now if you want an infused spiced syrup.
    2. Dissolve Under Medium-Low Heat: Set the burner to medium-low. Stir gently with a silicone spatula, sweeping the bottom corners of the pan. Continue heating until every grain dissolves completely, which takes about 3 to 4 minutes.
    3. Control Your Target Temperature: Keep an eye on the surface. Small pin-sized bubbles will form along the outer rim as the liquid approaches a simmer.

    If you need a heavy bar syrup for craft cocktails, you can also make rich simple syrup 2 to 1 by doubling your sugar weight.
    Set aside a heavy-bottomed stainless steel saucepan, a heat-resistant silicone spatula, and a clean glass jar with a tight lid. Avoid non-stick pans with flaking surfaces, as small scratches can trigger crystallization.

    Thin vs. Rich Viscosity Adjustments

    Thin vs. Rich Viscosity Adjustments

    Culinary temperature testing published by Serious Eats highlights that syrup viscosity depends on moisture loss rather than cooking duration. Use a digital candy thermometer to match your intended drink style:

    • Thin Beverage Syrup (50° Brix): Pull the saucepan off the burner the instant all sugar granules dissolve (around 212°F / 100°C). This creates a light, pourable liquid that disperses into cold brew, iced lattes, and cocktails without sinking to the bottom.
    • Thick Boba & Pancake Drizzle (65° Brix): Lower the heat to maintain a slow simmer at 215°F to 218°F (102°C to 103°C) for 5 to 7 minutes. Water evaporates, concentrating the sugars into a slow-pouring, glossy glaze that clings to boba pearls and waffles.

    Kill the heat immediately once your target consistency is reached. Stir in the vanilla extract after removing the pan from the burner so the aromatic compounds do not evaporate in the steam.

    Preventing Crystallization: The Inversion Principle

    Syrups often turn grainy after three days in the fridge because sucrose molecules lock back together into rigid crystal lattices. In commercial kitchens, we combat this through acid inversion.

    Simmering sucrose alongside an acid splits a portion of the disaccharide into single units of glucose and fructose. These irregular monosaccharides physically block sucrose molecules from aligning, stopping crystallization entirely.

    If you plan to store your batch for more than two weeks, add 1/4 teaspoon of fresh lemon juice or 1 teaspoon of light corn syrup directly to the saucepan while heating. The minuscule amount of lemon juice is imperceptible to taste, but it keeps the liquid silky smooth.

    Shelf Life and Cold Storage Protocol

    Let the syrup cool in the pan for 30 minutes. Funnel the cooled liquid into a glass bottle that has been sanitized with boiling water.

    Store the sealed bottle in the refrigerator at or below 40°F (4°C), where a standard 1:1 brown sugar syrup remains fresh for 3 to 4 weeks. For longer preservation, pour the syrup into silicone ice cube trays and freeze for up to 6 months, thawing individual portions directly in hot morning espresso. Always discard the batch immediately if you observe cloudiness, surface mold, or a sour, fermented smell.

    Brown Sugar Syrup FAQs

    1. Can I use raw turbinado sugar instead of brown sugar?

    Yes, but the syrup will have a lighter molasses flavor and requires an extra minute of stirring to dissolve the coarse crystals.

    2. Why did my brown sugar syrup harden like candy in the fridge?

    You simmered the syrup past 220°F (104°C), evaporating too much water and driving the sugar into the thread stage.

    3. Can I make this syrup without boiling it?

    Yes, brown sugar dissolves in lukewarm water with steady stirring, creating a delicate cold-process syrup ideal for fast cocktail prep.

    4. Does brown sugar syrup need to be refrigerated?

    Yes, because 1:1 simple syrup retains enough water activity to allow mold growth if left at room temperature past 48 hours.

    Stop Settling for Watered-Down Drinks

    Ditch artificial coffee syrups and expensive store-bought squirts. With ten minutes and two pantry staples, you have a rich, molasses-forward sweetener that rivals any craft espresso bar. Bottle a fresh batch this weekend, keep it chilled, and upgrade your morning cup.

  • How to Make Orgeat Syrup from Almond Milk (Fast 5-Minute Recipe)

    How to Make Orgeat Syrup from Almond Milk (Fast 5-Minute Recipe)

    Traditional tiki cocktail prep often turns into an exhausting kitchen chore. Blanching, peeling, blending, and hand-straining raw nuts through cheesecloth takes hours just to produce two cups of mixer. 

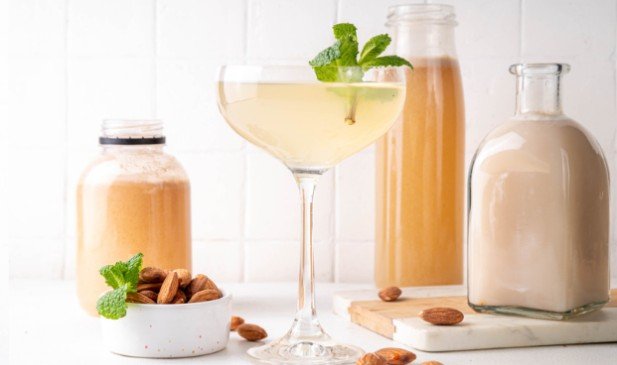
    Once I learned how to make orgeat syrup from almond milk, my home cocktail routine changed permanently. With the right technique and aromatic ratios, you achieve the exact velvety mouthfeel and nutty floral lift essential for a genuine 1944 Mai Tai in under five minutes.

    Why Traditional Orgeat Takes Hours (And Why Almond Milk Wins)

    Classic orgeat relies on natural almond oils creating a temporary suspension with sugar and water. Culinary pros at Serious Eats highlight how whole-nut extraction releases delicate plant proteins. That multi-step scratch method produces unpredictable fat ratios batch after batch.

    Carton almond milk provides a streamlined, uniform alternative. Because commercial manufacturers mill blanched nuts under high-shear pressure, the liquid features an ultra-fine particle distribution that standard home blenders cannot replicate.

    The Role of Commercial Emulsifiers in Cocktails

    Commercial brands routinely add tiny amounts of food-grade hydrocolloids like gellan gum, sunflower lecithin, or acacia gum. Bartenders frequently view commercial additives with skepticism. 

    However, behind the bar, these stabilizers keep your syrup silky and uniform. They prevent high-proof rum from curdling or breaking the almond suspension when shaken hard over pebble ice.

    whipping up a spicy ginger simple syrup from scratch gives you the foundation for fiery coolers, highballs, and fizzes.

    Ingredients and Essential Gear

    Ingredients and Essential Gear

    Great cocktail mixers require tight precision. Grab a digital gram scale, a small stainless saucepan, a silicone whisk, and a clean funnel.

    Measure out your core components:

    • 1 cup (240 ml) plain, unsweetened almond milk
    • 2 cups (400 g) granulated white cane sugar
    • ½ tsp (2.5 ml) pure bitter almond extract
    • ¼ tsp (1.25 ml) orange blossom water
    • ¼ tsp (1.25 ml) rose water
    • 1 pinch kosher salt
    • 1 tbsp (15 ml) neutral overproof spirit or Cognac (optional preservative)

    Selecting the Right Almond Milk

    Never grab sweetened or vanilla-flavored cartons. Excess vanilla clashes with the delicate floral waters and disrupts your sugar ratios. Look at the nutritional benchmarks on USDA FoodData Central for standard nut milks: most supermarket cartons contain about 2.5 to 3 grams of fat per cup.

    Whenever possible, pick a “barista blend” almond milk. These specialty cartons contain slightly higher fat levels and added dipotassium phosphate. In my side-by-side tests, barista milks yield a luxurious viscosity indistinguishable from small-batch artisan bottles referenced on Liquor.com.

    Step-by-Step Almond Milk Orgeat Method

    Step-by-Step Almond Milk Orgeat Method

    1. Warm the base liquid. Pour your almond milk into a saucepan over low heat. Bring the liquid to warm, roughly 120°F to 135°F (50°C to 57°C).
    2. Dissolve the sugar crystals. Add the granulated sugar gradually, whisking gently. Maintain low heat for three minutes until the sugar granules dissolve completely and the liquid turns translucent.
    3. Remove from heat immediately. Pull the pan off the burner. Residual heat will finish the dissolution without scorching fragile nut solids.
    4. Infuse the botanicals. Let the syrup rest until it feels barely warm. Whisk in the almond extract, orange blossom water, rose water, salt, and optional spirit.
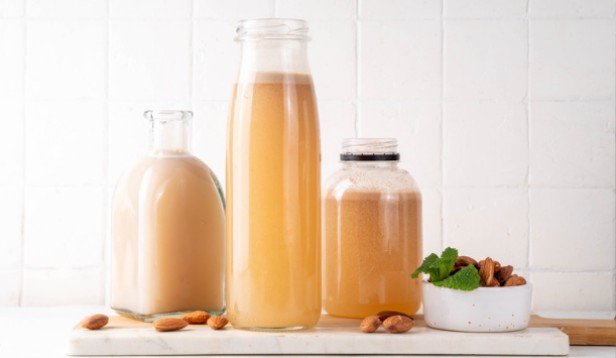
    5. Bottle and chill. Funnel the finished syrup into a sterilized swing-top glass bottle. Seal tightly and store in the refrigerator.

    Managing Temperature to Prevent Separation

    Never allow your almond milk to boil. Exceeding 160°F (71°C) breaks the plant milk’s structural emulsion, causing tiny, grainy curdles of nut pulp to float to the surface. Keeping your pan below 140°F preserves a clean, glossy sheen and silky mouthfeel.

    Texture and Stability Breakdown

    To see how carton milk compares to whole-nut methods, I ran testing across three separate bases:

    • Standard Grocery Almond Milk: Requires just 5 minutes of active cooking with zero soaking time. It yields a clean syrup with minimal sediment and finishes at roughly 66° Brix.
    • Barista-Grade Almond Milk: Matches the 5-minute cook time without soaking. Thanks to added fat and buffering agents, it shows exceptional emulsion stability and produces a dense, velvety syrup at roughly 68° Brix.
    • Traditional Raw Almond Extraction: Demands 8 to 12 hours of nut soaking followed by 45 minutes of active straining and cooking. The finished syrup clocks around 62° to 65° Brix and tends to separate much faster in the fridge.

    Pro Bartender Tips for Balance and Longevity

    • Measure floral waters with care. Orange blossom and rose waters are intensely aromatic. An accidental heavy pour turns a crisp cocktail into liquid soap. Use an eye dropper or a precise ⅛-teaspoon measuring spoon.
    • Never skip the almond extract. Because commercial almond milk is heavily filtered, quality pure bitter almond extract supplies the necessary benzaldehyde aroma. It provides that classic marzipan punch.
    • Preserve with high-proof alcohol. Adding a tablespoon of unaged overproof vodka or 100-proof white rum raises alcohol content to about 2.5%, preventing early mold and yeast growth.
    • Track the shelf life. Unfortified batches last about two weeks under refrigeration. Adding spirits extends stability up to five weeks. Always toss the bottle if you notice cloudiness or off odors.

    Beyond the Mai Tai: Expanding Your Bar Cart

    Beyond the Mai Tai Expanding Your Bar Cart

    A good batch of orgeat opens up classics like Japanese Cocktails, Army & Navy sours, and iced almond lattes. If you like keeping custom mixers on hand, this method pairs naturally with other scratch-made bar staples. Simmering a warm batch of cinnamon stick simple syrup adds sweet spice to autumn rums. 

     Frequently Asked Questions

    1. Can I use homemade almond milk for this recipe?

    Yes, but pass it through an ultra-fine nut milk bag twice to remove gritty sediment.

    2. Why did my almond milk orgeat separate in the fridge?

    Natural settling occurs over time; simply give the bottle a quick shake before pouring.

    3. Can I use raw Demerara sugar instead of white sugar?

    Demerara sugar works well and adds deep caramel notes, though it darkens the syrup’s color.

    4. How do I thicken my orgeat without cooking it down?

    Whisk in a quarter-teaspoon of food-grade xanthan gum or powdered gum arabic while warm.

    Shake Your Mai Tai, Ditch the Bottled Junk

    Pre-made commercial orgeat on retail shelves often relies on high-fructose corn syrup, artificial flavorings, and synthetic stabilizers. 

    Now that you understand the mechanics behind this quick stovetop alternative, you can turn out a fresh, aromatic batch whenever the craving strikes. 

    Grab a bottle of aged funky rum, slap a sprig of mint, and serve a cocktail that carries real body, floral depth, and balance.

  • Cold Brew Coffee Ratio for 64 oz: Exact Mason Jar Recipe

    Cold Brew Coffee Ratio for 64 oz: Exact Mason Jar Recipe

    Making a half-gallon batch of cold brew sounds simple until I try to fit coffee grounds and water into the same 64-ounce Mason jar. Coffee takes up space, absorbs water, and reduces the amount of finished brew I get after straining. That is why blindly pouring 64 ounces of water into a 64-ounce jar does not work.

    When I calculate the cold brew coffee ratio for 64 oz, I first decide whether I want ready-to-drink coffee or a concentrated base. For a smooth drink I can pour directly over ice, I start around 1:10. For concentrate that I plan to dilute later, I use approximately 1:5.

    How Much Coffee Do I Put in a 64 oz Mason Jar?

    For a standard half-gallon Mason jar, these measurements give me a practical starting point while leaving enough room for the grounds.

    Brew Style Coffee-to-Water Ratio Ground Coffee Water How I Serve It
    Ready-to-drink About 1:10 130 g, roughly 1.5 cups About 44 fl oz Pour over ice
    Concentrate About 1:5 225 g, roughly 2.5 cups About 40 fl oz Dilute before drinking

    I treat cup measurements as approximate because coffee volume changes with roast level and grind size. Whenever possible, I weigh my beans in grams.

    The concentrate measurement is also an approximate jar-friendly ratio rather than laboratory precision. Forty US fluid ounces of water weigh roughly 1,183 grams, so 225 grams of coffee produces a ratio close to 1:5.3.

    Why Can’t I Add 64 oz of Water to a 64 oz Jar?

    Why Can't I Add 64 oz of Water to a 64 oz Jar?

    A 64-ounce container has a total physical capacity of about half a gallon. Once I add several ounces of coarse coffee grounds, there is no longer room for a full 64 ounces of water.

    The grounds also swell as they become saturated.

    This distinction matters because “64 ounces of water” and “cold brew made in a 64-ounce container” describe two different recipes. If I actually use 64 fluid ounces of brewing water, I need a container larger than 64 ounces.

    For example, 64 fluid ounces of water weigh about 1,893 grams. At a 1:10 ratio, I would need roughly 189 grams of coffee. At a 1:8 ratio, I would need about 237 grams. Neither combination comfortably fits inside a standard half-gallon Mason jar.

    What Is the Best Ready-to-Drink Ratio for a 64 oz Jar?

    For ready-to-drink coffee, I like approximately 130 grams of coarse-ground beans with 44 fluid ounces of water.

    That works out close to a 1:10 coffee-to-water ratio by weight and gives me a smooth brew that usually does not require significant dilution. This balanced strength can also work well when making a latte at home, especially if I want to use cold brew as the coffee base.

    If I want a stronger glass, I can use a slightly higher coffee dose or reduce the water. I avoid making large changes until I have tasted the finished batch because cold brew strength also depends on grind size, bean choice, temperature, and extraction time.

    What Ratio Should I Use for Cold Brew Concentrate?

    When I want concentrate, I use about 225 grams of coffee with approximately 40 fluid ounces of water.

    The finished coffee will be intentionally bold. I normally begin by combining roughly equal parts concentrate and cold water or milk, then adjust according to taste.

    A concentrate works especially well when I want flexibility. I can pour it over ice, add dairy milk, use oat milk, or dilute it with water without brewing another batch.

    How Do I Make 64 oz Mason Jar Cold Brew?

    Step 1: How Coarse Should I Grind Coffee for Cold Brew?

    I grind the beans very coarse, aiming for a texture similar to coarse sea salt or raw sugar.

    Fine grounds expose more surface area and can make filtration difficult. They may also leave sediment in the finished coffee and create a muddier cup during a long extraction.

    Step 2: How Should I Mix Coffee and Water?

    I add the ground coffee to the Mason jar first and slowly pour filtered cold or room-temperature water over it.

    I gently stir until all visible grounds are wet. I do not aggressively shake the jar because my goal is simply to saturate the coffee evenly.

    I also avoid filling to the rim. A little headspace makes stirring and handling easier.

    Step 3: How Long Should I Steep a 64 oz Batch?

    How Long Should I Steep a 64 oz Batch?

    At room temperature, I generally start with about 12 to 16 hours.

    When brewing entirely in the refrigerator, I allow approximately 18 to 24 hours because extraction generally progresses more slowly at colder temperatures.

    I use these numbers as starting points rather than rigid rules. If my beans produce a strong brew quickly, I strain earlier. If the result tastes weak, I review the ratio, grind, and extraction time before changing everything at once.

    Step 4: What Is the Best Way to Strain Cold Brew?

    Once steeping is complete, I remove the grounds using a fine-mesh filter, reusable cloth coffee bag, or paper coffee filter.

    I avoid aggressively squeezing fine sediment through the filter because clarity improves the final texture.

    After filtering, I transfer the coffee to a clean, sealed container and refrigerate it.

    Why Do I Get Less Coffee Than the Water I Added?

    Coffee grounds retain a considerable amount of water in brewing, so final yield is always lower than starting water volume.

    If I put 44 ounces of water into my ready-to-drink recipe, I should not expect to collect 44 ounces after filtration. Some liquid remains trapped in the wet grounds, filter, and brewing vessel.

    This is one reason I focus on ratio rather than expecting the number printed on the jar to equal my final coffee yield.

    Can I Use a Stainless Steel Mason Jar Filter Basket?

    Yes, but capacity can become a limitation.

    Many built-in filter baskets are better suited to ready-to-drink recipes because they may hold only around 1 to 1.5 cups of coarse coffee comfortably. The exact amount varies by filter design.

    A large concentrate dose can overflow or become packed too tightly for effective water contact. When my filter basket is small, I use the ready-to-drink recipe or brew concentrate with a separate larger filter bag.

    How Do I Fix Cold Brew That Is Too Strong or Too Weak?

    If the coffee tastes too strong, I add cold water or milk gradually until it reaches the strength I want. This is particularly useful with concentrate.

    If it tastes weak, I first check whether I used enough coffee. Increasing the coffee dose during my next batch is usually more predictable than extending steeping indefinitely.

    I also check the grind. Excessively coarse grounds paired with a short extraction can taste thin, while fine grounds left too long may produce an unpleasantly heavy or bitter cup.

    How Long Does Homemade Cold Brew Last in the Refrigerator?

    How Long Does Homemade Cold Brew Last in the Refrigerator?

    I keep strained cold brew in a clean, tightly sealed container in the refrigerator. Some home cold-brew recipes suggest refrigerated storage for up to two weeks. For flavor, however, I prefer drinking my batch sooner rather than treating two weeks as a target. 

    While people often discuss the health benefits of coffee, proper storage still matters for preserving freshness, aroma, and overall drinking quality. I also remove all coffee grounds after brewing because leaving them submerged allows extraction to continue and can gradually change the flavor.

    FAQs About Making a 64 oz Batch

    1. How much coffee should I use for 64 oz of cold brew?

    If I mean a 64-ounce Mason jar rather than 64 ounces of water, I start with around 130 grams of coffee and 44 fluid ounces of water for ready-to-drink cold brew. For concentrate, I use roughly 225 grams with around 40 fluid ounces of water.

    2. Is a 1:10 ratio good for ready-to-drink cold brew?

    Yes. I find approximately 1:10 smooth enough to drink directly while still giving cold brew plenty of body. People who prefer stronger coffee can move toward a stronger ratio.

    3. Should I steep cold brew on the counter or in the refrigerator?

    Either method can work. I typically use 12 to 16 hours at room temperature or around 18 to 24 hours in the refrigerator, then adjust based on taste.

    4. Do I need to dilute cold brew concentrate?

    Usually, yes. A roughly 1:5 concentrate is designed to be stronger than normal ready-to-drink coffee. I start around a 1:1 dilution with water or milk and adjust from there.

    Final Thoughts

    The easiest way I have found to make consistent half-gallon cold brew is to stop treating jar capacity as water volume. Grounds require space and hold onto liquid, so I build the recipe around what actually fits.

    My preferred cold brew coffee ratio for 64 oz starts with approximately 130 grams of coffee and 44 ounces of water for an easy ready-to-drink batch. When I want concentrate, I move toward 225 grams of coffee with about 40 ounces of water and dilute it after brewing.

    Once I have the cold brew coffee ratio for a 64 oz set, the rest is straightforward: use coarse grounds, fully wet the coffee, allow enough extraction time, strain thoroughly, and refrigerate the finished brew. That gives me a repeatable Mason jar method without wasting beans or guessing at every batch.

  • Whole Cardamom Simple Syrup Recipe: The Barista’s Guide

    Whole Cardamom Simple Syrup Recipe: The Barista’s Guide

    Cardamom simple syrup turns flat morning coffees and ordinary gin cocktails into layered, aromatic showstoppers. Making a fragrant whole cardamom simple syrup recipe at home requires just three ingredients and twenty minutes at the stove.

    After testing dozens of batches across home espresso machines and craft cocktail shakers, I found that whole green pods yield an incomparably smooth, floral profile. Unlike ground spice, which leaves your liquid murky and bitter, whole pods release bright terpenes without clouding the bottle.

    Why Whole Green Pods Make a Superior Infusion

    Green cardamom (Elettaria cardamomum) houses volatile essential oils—specifically terpinyl acetate and 1,8-cineole—inside protective black seeds. When exposed to heat, these compounds deliver citrusy, herbal, and sweet notes that instantly elevate beverages.

    Ground grocery-store cardamom oxidizes rapidly. Using ground powder turns syrup into a muddy, gritty mess that catches in your throat. Whole pods protect those delicate oils right up to the second you brew.

    Cracking vs. Grinding: The Physics of Flavor Extraction

    Cracking vs. Grinding: The Physics of Flavor Extraction

    You do not want to pulverize the seeds. Heavy grinding exposes astringent cellulose compounds from the outer husk, muddying the pure eucalyptus-sweet aroma you want.

    My bench tests showed that lightly bruising the green outer husk allows water and sugar to pull the aromatic oils out cleanly. Cracking them open just enough to reveal the black pearls inside maximizes extraction while keeping bitter tannins locked away.

    Ingredients and Essential Gear

    Ingredients and Essential Gear

    Great syrup depends on precise ratios. Here is what you need on your counter:

    • Whole Green Cardamom Pods: 1/4 cup (approximately 20 grams or 25 whole pods). Select plump, vibrant green pods rather than faded, yellowed varieties.
    • Granulated Sugar: 1 cup. Clean white cane sugar provides a transparent flavor backdrop.
    • Filtered Water: 1 cup. Water quality matters; tap chlorine alters delicate spice aromatics.

    For gear, grab a small stainless steel saucepan, a mortar and pestle (or heavy chef’s knife), and a fine-mesh sieve. If you want alternative sweetness profiles for wellness drinks, you can adjust these ratios using a sugar free simple base.

    Step-by-Step Whole Cardamom Simple Syrup Recipe

    Follow these exact steps to ensure crystal clarity and maximum aroma.

    Step 1: Crush the Pods Correctly

    Crush the Pods Correctly

    Place 1/4 cup of whole pods into your mortar. Press downward firmly with the pestle until each pod pops open. Alternatively, lay the pods on a cutting board, place the flat side of a broad chef’s knife over them, and press with the heel of your hand.

    Stop as soon as you see the pods split and release loose black seeds. Do not grind them into a powder or paste.

    Step 2: Dissolve and Simmer

    Dissolve and Simmer

    Add your cup of water, cup of sugar, and cracked pods into the saucepan over medium heat. Stir continuously until the sugar crystals vanish completely into clear syrup.

    According to thermal solubility data tracked by USDA FoodData Central, dissolved sucrose remains stable without scorching if heat stays controlled. Bring the liquid to a light, lazy simmer. Lower the flame and let it gently simmer for 10 to 15 minutes, allowing heat to soften the seed coats.

    Step 3: The Critical One-Hour Steep

    The Critical One-Hour Steep

    Turn off the heat entirely. Put a tight-fitting lid on the saucepan. Leave the pot undisturbed on the counter for a full hour.

    This passive cool-down phase is where magic happens. Trapping condensation underneath the lid forces volatile top notes back into the liquid instead of losing them to kitchen steam. The syrup deepens from clear to a rich, warm champagne hue.

    Step 4: Double-Strain and Bottle

    Double-Strain and Bottle

    Set your fine-mesh sieve over a sanitized glass jar or swing-top bottle. Pour the cooled syrup through, filtering out the empty husks and loose seeds.

    If you notice tiny black sediment escaping into your bottle, line the sieve with a layer of cheesecloth or a rinsed paper coffee filter for crystal-clear clarity.

    How I Balance Ratios for Cocktails and Coffee

    How I Balance Ratios for Cocktails and Coffee

    This 1:1 simple syrup shines anywhere sweet aromatics belong. Professional mixologists profiled on Food & Wine frequently reach for spiced syrups to lift dark spirits and dry botanicals.

    • The Cardamom Espresso Tonic: Fill a highball glass with ice, add 4 ounces of crisp tonic water, stir in 3/4 ounce of cardamom syrup, and float a fresh double shot of espresso over the top.
    • Nordic Cold Brew: Swirl 1 ounce into cold brew alongside a splash of whole milk or oat milk.
    • Botanical Gimlet: Shake 2 ounces of London Dry gin, 3/4 ounce fresh lime juice, and 3/4 ounce cardamom syrup over ice for 12 seconds. Strain into a chilled coupe.

    Shelf Life, Safety, and Storage Realities

    Water content directly determines syrup stability. In food science reviews by Serious Eats, standard 1:1 simple syrups retain peak quality for about one month under refrigeration before mold spores can develop.

    Store your syrup in an airtight glass container in the coldest part of your refrigerator. Never leave it sitting on the counter at room temperature once cooled. If you see clouds, sediment floaters, or detect sour aromas, discard the batch immediately. To extend freshness up to three months, add a half-ounce of high-proof neutral vodka directly to the finished, cooled batch.

    If you want alternative sweetness profiles for wellness drinks, you can infuse warm clover nectar with a honey simple syrup approach.

    Frequently Asked Questions

    1. Can I substitute ground cardamom if I run out of whole pods?

    Yes, but use only 1 teaspoon of ground cardamom, simmer gently, and strain through a paper coffee filter to avoid a gritty texture.

    2. Why is my cardamom syrup bitter?

    Bitterness occurs when pods are boiled aggressively instead of simmered gently, or ground so fine that husk tannins leach into the syrup.

    3. Can I make a richer 2:1 ratio with this recipe?

    Yes, double the sugar to two cups while keeping water at one cup; this increases mouthfeel and doubles shelf life.

    4. How do I tell if my simple syrup has expired?

    Look for visual cloudiness, floating strands of mold, or a sour, fermented smell that indicates microbial growth.

    Liquid Gold Awaits: Your Bar Cart’s New Secret Weapon

    Stop settling for plain sugar water when fifteen minutes at the stove can totally transform your home beverage setup. Crack a few pods, breathe in that rich citrus-herbal steam, and claim your status as your household’s favorite bartender. Mix up your first iced cardamom latte this afternoon—your palate will thank you.

  • Best Milk for Lattes: What Actually Makes a Creamier Cup

    Best Milk for Lattes: What Actually Makes a Creamier Cup

    I used to think a better latte depended almost entirely on stronger espresso or a more expensive machine. But after paying closer attention to what was happening in the milk pitcher, I realized that milk can completely change the drink. The same espresso can taste rich and balanced with one milk, then thin, sharp, or overly foamy with another.

    For me, choosing the best milk for lattes comes down to how well it balances creaminess, sweetness, microfoam, and espresso flavor. Whole dairy milk remains my most reliable choice for a classic café-style latte, while barista oat milk comes remarkably close when I want a plant-based option. 

    The real secret, however, is understanding why different milks behave so differently once heat and steam enter the equation.

    What Makes Milk Good for a Latte?

    Protein and fat matter most. Milk proteins help stabilize the tiny air bubbles created during steaming, while fat adds body and a smoother mouthfeel. A latte needs fine, integrated microfoam rather than a thick cap of stiff foam.

    I start with cold milk because it gives me more time to introduce air and create a smooth whirlpool. A useful target is about 140°F to 150°F. Whole Latte Love and Clive Coffee recommend roughly this range for sweetness and good texture.

    Is Whole Milk Best for a Creamy Latte?

    Is Whole Milk Best for a Creamy Latte?

    Whole milk is my most dependable choice for a traditional latte. In the United States, whole milk must contain at least 3.25% milkfat under federal standards. That fat gives the drink richness, while the protein helps create stable foam.

    It is also forgiving for latte art. Properly steamed, it becomes glossy and fluid enough for hearts, tulips, and rosettas. If creaminess and easy steaming matter most, whole milk is the benchmark I use.

    Is 2% Milk Good for Lattes?

    Yes. I use 2% milk when I want a lighter drink without losing too much body. It froths readily and can still form fine microfoam, although the finished latte feels slightly thinner than one made with whole milk.

    Can You Make a Latte With Skim Milk?

    You can, but the texture changes. Skim milk contains very little fat, so it can create plenty of foam but less of the velvety mouthfeel associated with a classic latte.

    I choose skim when reducing fat matters more than richness. For latte art or fuller texture, I prefer whole or 2% milk.

    What Is the Best Plant-Based Milk for Lattes?

    Oat milk is my first choice when I am avoiding dairy. A good barista oat milk has enough body to make the drink feel creamy, and its mild, lightly sweet flavor usually works well with espresso.

    I pay attention to “barista” or “barista edition” on plant-milk cartons. Oatly Barista Edition sold in the US, for example, contains rapeseed oil and dipotassium phosphate. Oatly says the latter acts as an acidity regulator that helps prevent separation in acidic coffee.

    Is Soy Milk Good for Frothing?

    Soy milk is a strong option because its protein can support stable foam. Its flavor is more noticeable than oat milk, and some products can separate when exposed to too much heat or acidic espresso.

    I get better results by starting cold, avoiding excessive steaming, and choosing a barista formula when possible.

    Is Almond Milk Good in a Latte?

    Is Almond Milk Good in a Latte?

    Almond milk makes a lighter latte with a distinct nutty flavor. Regular versions can feel thin and may be harder to texture consistently, so I prefer a barista-style almond milk for hot drinks.

    For maximum creaminess and latte art, I usually choose oat over almond. Almond works better when I want a lighter body and toasted flavor.

    What About Pea Milk and Lactose-Free Milk?

    Pea-protein milk can foam better than some lower-protein plant drinks, although flavor varies by brand. Lactose-free dairy milk can still provide familiar dairy texture and foam for people who avoid lactose but consume dairy protein.

    Does Barista Milk Really Make a Difference?

    For plant-based lattes, it often does. Barista versions are designed with foaming, heat stability, and coffee performance in mind. Formulas vary, though, so I compare taste, foam stability, ingredients, and nutrition labels rather than assuming every carton performs the same way.

    How Do I Steam Milk for Better Microfoam?

    How Do I Steam Milk for Better Microfoam?

    I begin with cold milk and introduce only a small amount of air near the start of steaming. Then I position the wand so the milk spins, helping larger bubbles break down into fine microfoam.

    For a latte, I use less aeration than I would for a cappuccino. I stop around 140°F to 150°F, swirl the pitcher, and pour soon afterward. Starting cold gives me a longer working window, while overheating can reduce sweetness and make the milk taste scorched. 

    The same steaming approach is useful when testing the best non-dairy milk for coffee, especially barista-style oat, soy, or almond milk, because these alternatives can react differently to heat.

    Frequently Asked Questions (FAQs)

    1. What Milk Do Most Coffee Shops Use for Lattes?

    Whole milk is a common default because it produces a creamy texture and consistent microfoam. Many US cafés also offer 2%, nonfat, oat, almond, soy, and other alternatives.

    2. What Is the Best Milk for Lattes for Latte Art?

    I recommend whole dairy milk for beginners because it is forgiving and creates glossy microfoam. Barista oat milk is my preferred dairy-free alternative.

    3. Is Oat Milk Better Than Almond Milk for Lattes?

    For texture, I usually prefer oat milk because it feels fuller and steams more smoothly. Almond milk works when I want a lighter body and nuttier flavor.

    4. Why Does Plant Milk Separate in Coffee?

    Heat and coffee acidity can destabilize some plant milks. A barista formulation, moderate steaming temperature, and careful pouring can reduce separation.

    Final Takeaway

    When I want a classic café-style latte, whole milk remains my first choice because it balances richness, protein, and reliable steaming performance. For a dairy-free drink, barista oat milk is the most versatile alternative I use.

    Soy, almond, pea, skim, 2%, and lactose-free milk can all work depending on what I value most. I match the milk to my priorities: creaminess, nutrition, flavor, dietary needs, or latte-art performance. That approach gives me a more satisfying cup.

  • Homemade Hibiscus Syrup Using Dried Flowers

    Homemade Hibiscus Syrup Using Dried Flowers

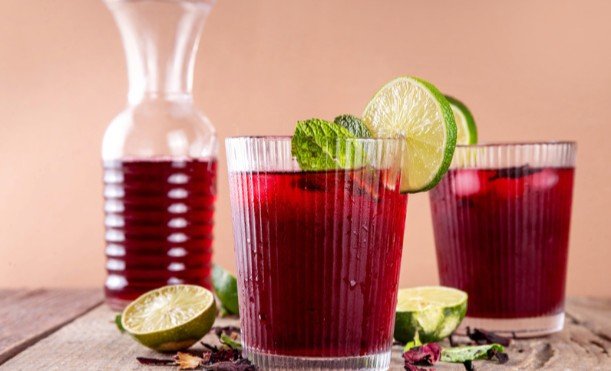
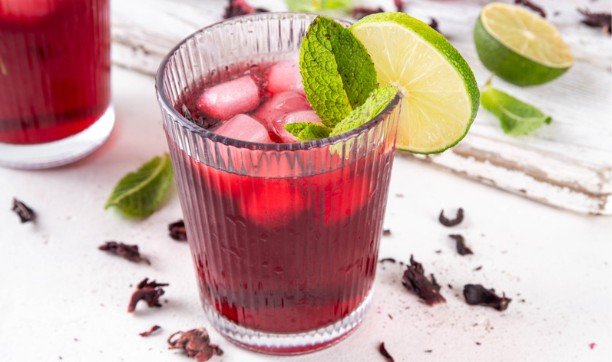
    Making homemade hibiscus syrup using dried flowers transformed how I build cocktails at home. When you infuse whole dried calyces into a warm simple syrup base, you get an electric magenta hue and an assertive, cranberry-like bite that artificial bar syrups cannot replicate.

    Most recipes tell you to boil the dried flowers directly in the pot. That is a mistake. Boiling scorches the delicate floral oils and pulls out chalky, bitter tannins that overwhelm the natural fruit profile. After testing dozens of batches, I found that an off-heat steep yields a clean, ruby-red infusion with perfectly balanced natural acidity.

    Why Dried Hibiscus Flowers Make the Best Cocktail Syrup

    Why Dried Hibiscus Flowers Make the Best Cocktail Syrup

    Dried hibiscus flowers—commercially labeled as flor de jamaica or zobo—are actually the dried, fleshy sepals (calyces) of the Hibiscus sabdariffa plant. Unlike fresh petals, dried calyces concentrate high levels of malic, citric, and hibiscus acids, according to analytical botanical data from the USDA FoodData Central. This natural acidity provides built-in balance, meaning your syrup acts as both a sweetener and an acid modifier in craft drinks.

    The deep crimson pigment comes from anthocyanins, powerful water-soluble antioxidants documented by the National Center for Biotechnology Information (NCBI). These compounds break down under aggressive, prolonged heat, shifting from brilliant ruby red to a murky, rusty brown. Treating the calyces gently preserves their vivid color profile.

    Sourcing Whole Dried Calyces vs. Crushed Tea

    Buy whole, intact dried calyces rather than bagged hibiscus tea or fine hibiscus cut-and-sift. Whole flowers let you strain the liquid completely clear without sediment. Crushed tea bags release microscopic botanical dust that turns syrups cloudy and gritty. You can pick up whole dried jamaica flowers at Hispanic grocery stores, Middle Eastern specialty markets, or bulk spice merchants for a fraction of the cost of pre-made cocktail mixers.

    The Off-Heat Steep Method (And Why Boiling Ruins Flavor)

    The Off-Heat Steep Method (And Why Boiling Ruins Flavor)

    Culinary extraction works best when you manage thermal shock. The sugar and water need heat to dissolve into a stable solution, but the hibiscus flowers do not need active boiling to release their pigments and tart acids.

    When you boil hibiscus calyces over an open flame for 10 or 15 minutes, the water evaporates unevenly, and the vegetable fibers release astringent vegetal notes. Instead, bring your water and sugar to a clear simmer, kill the flame completely, and add your dried flowers to the hot liquid.

    Cover the saucepan with a tight lid. The trapped radiant heat gently hydrates the dried tissue over 15 to 20 minutes. This draws out clean tartness without breaking down the cellular structure of the calyx. You get maximum flavor saturation, zero bitterness, and a crystal-clear syrup.

    Master Hibiscus Simple Syrup Recipe

    Master Hibiscus Simple Syrup Recipe

    This formula yields approximately 12 ounces of syrup, perfectly measured for a standard swing-top glass bottle.

    Equipment You Will Need

    • 1 small stainless steel saucepan
    • 1 fine-mesh sieve
    • 1 unbleached coffee filter or piece of cheesecloth
    • 1 clean 12-ounce glass bottle or jar with an airtight seal

    Step-by-Step Instructions

    1. Dissolve the base: Combine 1 cup of filtered water and 1 cup of white granulated cane sugar in your saucepan. Place the pan over medium heat and whisk gently until the sugar granules dissolve completely and the liquid looks clear.
    2. Infuse off the heat: Cut the heat immediately once the syrup reaches a low, gentle simmer. Stir in ½ cup of whole dried hibiscus flowers.
    3. Cover and steep: Place a lid tightly over the pan. Allow the petals to steep undisturbed in the residual heat for 18 minutes.
    4. Strain cleanly: Place your fine-mesh sieve over a glass measuring cup. Pour the warm syrup through the strainer. Press the soaked flowers very lightly with the back of a spoon to release absorbed liquid, but do not crush the solids into pulp. Discard or compost the spent flowers.
    5. Add citrus and chill: Stir in 1 teaspoon of freshly squeezed lime or lemon juice. The citric acid acts as a natural flavor enhancer and lowers the pH to protect the anthocyanin pigments. Cool the syrup to room temperature before capping and transferring it to the refrigerator.

    Flavor Variations and Mixology Pairings

    Flavor Variations and Mixology Pairings

    The berry-like tartness of hibiscus pairs cleanly with clear spirits, agave, and dry botanicals.

    • The Hibiscus Paloma: Shake 2 ounces of blanco tequila, ¾ ounce of hibiscus syrup, and ½ ounce of fresh lime juice with ice. Strain into a highball glass over fresh ice and top with 3 ounces of grapefruit soda.
    • Ruby French 75: Combine 1 ounce of London dry gin, ½ ounce of hibiscus syrup, and ½ ounce of lemon juice in a shaker. Strain into a champagne flute and top with chilled brut sparkling wine.
    • Non-Alcoholic Spritz: Stir 1 ounce of syrup into 5 ounces of sparkling mineral water over crushed ice with a sprig of fresh mint.

    Crafting Floral-Savory Syrups for Home Bars

    If you enjoy building complex flavor profiles, you can layer herbs and heat alongside the dried hibiscus flowers. For savory cocktails, infusing garden botanicals into a rosemary simple syrup with fresh herbs creates an earthy balance that suits aged whiskeys and gins. 

    To add warm spices directly into your hibiscus base, toast a cracked cinnamon stick and two whole allspice berries in your dry saucepan for 60 seconds before pouring in your water and sugar. The baking spices complement the natural tannins of the flower sepals without masking their bright fruit character.

    Shelf Life, Storage, and Prevention of Crystallization

    Because this recipe uses a standard 1:1 sugar-to-water ratio by volume, it falls into the medium-water-activity category. Store your finished syrup in an airtight glass container inside the refrigerator. It stays fresh, aromatic, and free of mold for up to 4 weeks.

    If you notice tiny crystals forming at the bottom of your storage jar, the sucrose molecules have begun re-crystallizing. To prevent this, add 1 tablespoon of light corn syrup or a few drops of citrus juice during the simmer stage. The glucose and inverted sugars interrupt crystal formation.

    For shelf stability beyond a month, either freeze the syrup in silicone ice cube trays or convert the recipe into a 2:1 rich syrup by increasing the sugar to 2 cups per 1 cup of water.

    If you prefer fiery margaritas, blending hibiscus with a spicy jalapeno simple syrup delivers a sweet-heat contrast that cuts clean through rich food.

    Frequently Asked Questions

    1. Can I use hibiscus tea bags instead of whole dried flowers?

    Yes, use 4 to 5 pure hibiscus tea bags, but cut the steep time to 10 minutes to avoid cloudiness.

    2. How do I make this hibiscus syrup keto or sugar-free?

    Replace the granulated sugar with an equal measure of allulose, which dissolves cleanly without recrystallizing when chilled.

    3. Why did my hibiscus syrup turn brown instead of red?

    The syrup turned brown because the flowers were boiled too hard or exposed to an alkaline water source.

    4. Can I reuse the strained hibiscus calyces?

    Yes, toss the leftover steeped flowers with a spoonful of sugar and dehydrate them for chewy, candied garnishes.

    Pour Yourself Something Vivid

    Ditch the factory-made grenadine and chemical mixers. Keep a bottle of this vibrant syrup in your fridge door, and you are always two minutes away from an elevated highball or a crimson mocktail. Grab a bag of whole dried calyces, fire up your kettle, and start your first batch today.

  • Sugar Free Simple Syrup Recipe With Allulose: The Best Low-Carb Sweetener

    Sugar Free Simple Syrup Recipe With Allulose: The Best Low-Carb Sweetener

    Finding a low-carb sweetener that actually behaves like real cane sugar in liquid form used to feel impossible. Erythritol crystallizes the second your cocktail hits the ice, and maltitol wreaks havoc on digestion. 

    Testing batches behind the bar and in my home kitchen proved that finding a true-to-life formulation required abandoning traditional sugar alternatives altogether. Mastering a reliable sugar free simple syrup recipe with allulose completely changes how keto and low-carb mixology works.

    Crafting the ultimate sugar-free sweetener requires understanding precise ratios, heat thresholds, and texture modifiers. This guide covers everything needed to build a foolproof batch that pours, chills, and sweetens just like the classic version.

    Why Allulose Outperforms Other Sweeteners in Liquid Form

    Traditional sweeteners fail in cold beverages because of solubility physics. Erythritol and xylitol lack the high solubility needed to stay dissolved at lower temperatures, leading to gritty crystal deposits at the bottom of a glass. 

    Allulose is a rare monosaccharide that occurs naturally in small quantities in figs and raisins. It mimics sucrose almost identically without spiking blood glucose or triggering insulin responses.

    Unlike standard sugar substitutes, allulose stays completely dissolved even when chilled to refrigerator temperatures. This makes a keto simple syrup behave identically to standard bar syrup. The only catch is relative sweetness. 

    Because pure allulose sits at roughly 70 percent of the sweetness of table sugar, adjusting the ratio is non-negotiable for achieving an authentic mouthfeel.

    Ingredients and Precision Measurements

    Ingredients and Precision Measurements

    Precision matters when working with alternative sugars. Eyebrows raise at the modified ratio required to match classic sweetness, but the math ensures zero compromise on flavor profile.

    • 1⅓ cups granulated allulose
    • 1 cup filtered water
    • Optional: ⅛ teaspoon xanthan gum for enhanced viscosity
    • Optional: ½ teaspoon vanilla extract or fresh citrus peels

    Weighing ingredients on a digital scale yields the most consistent results across batches. For more background on sweetener alternatives, check out the Healthline guide on allulose. To explore alternative sweetening profiles, compare this with a traditional honey simple syrup for baking applications.

    Step-by-Step Preparation Method

    Executing this recipe demands attention to thermal control. Allulose behaves as a reducing sugar, meaning it caramelizes and browns much faster than sucrose.

    Combining and Dissolving the Base

    Combining and Dissolving the Base

    Add the granulated allulose and filtered water into a small, clean saucepan. Place the pan over medium heat. Whisk the liquid frequently to encourage rapid dissolution. The granules should disappear into the water within three to five minutes, creating a crystal-clear solution.

    Managing Heat and Thickeners

    Managing Heat and Thickeners

    Bring the liquid to a light, controlled simmer. Avoid aggressive boiling, which rapidly alters the volume and concentrates the solution unpredictably. If you prefer a heavier, more viscous mouthfeel that mimics a rich simple syrup, sprinkle in the ⅛ teaspoon of xanthan gum right now. 

    Whisk vigorously to prevent clumping. Xanthan gum hydrates instantly and adds a luxurious weight to low-carb beverages. Let the mixture simmer for exactly one more minute, then pull it off the heat source immediately.

    Customization and Flavor Infusions

    Customization and Flavor Infusions

    Standard syrup serves as a blank canvas. Upgrading your sweetener with aromatic elements transforms everyday iced coffee or low-carb cocktails.

    Botanical and Spice Additions

    Dropping fresh mint sprigs, bruised lemongrass, or cinnamon sticks into the hot liquid creates deep aromatic profiles. For citrus notes, peel wide strips of lemon or orange zest, avoiding the bitter white pith.

    Steeping and Straining Protocols

    Let botanical additions steep in the hot syrup off the heat for ten minutes. This extracts essential oils without scorching delicate flavors. Pass the cooled liquid through a fine-mesh strainer lined with cheesecloth to catch microscopic herb fragments before bottling.

    Storage and Shelf-Life Management

    Storage and Shelf-Life Management

    Proper storage protects your batch from microbial activity and extends usability. Pour the completely cooled syrup into a sterilized glass bottle or mason jar equipped with an airtight lid.

    Storing the container in the back of the refrigerator keeps the product fresh for three to four weeks. Adding a tiny splash of fresh lemon juice drops the pH level slightly, acting as a natural preservative that extends usability safely. For deep dives into food preservation and safety standards, review documentation from the USDA Food Safety and Inspection Service.

    Frequently Asked Questions

    1. Does allulose spike blood sugar?

    Clinical studies show that allulose has a glycemic index of zero and does not raise blood glucose or insulin levels.

    2. Can I use this syrup in hot coffee?

    Yes, it handles heat perfectly and stirs seamlessly into hot beverages without separating.

    3. Why did my allulose syrup turn brown?

    Allulose undergoes the Maillard reaction faster than table sugar, so excessive heat causes caramelization and discoloration.

    4. Can I freeze this syrup?

    Freezing works well and extends shelf life for up to three months, though slight separation may occur upon thawing.

    Pour the Good Stuff

    Stop settling for watery keto drinks and gritty iced coffees. Swapping out conventional sugar for this perfectly calibrated formula keeps your low-carb lifestyle completely seamless. Mix up a batch today, toss it in the fridge, and elevate your drink game without missing a beat.

  • Savory Cocktails to Make at Home: 7 Bold, Briny Drinks

    Savory Cocktails to Make at Home: 7 Bold, Briny Drinks

    A cocktail does not need syrup to taste balanced. Salt, acid, herbs, pepper, brine, broth, and umami can do the structural work usually assigned to sugar—often with more complexity and less sweetness. That is why savory cocktails to make at home are especially appealing to martini drinkers, brunch hosts, and anyone who prefers a drink that feels more like an appetizer than dessert.

    There is one important catch: savory flavors can soften the perception of alcohol. The National Institute on Alcohol Abuse and Alcoholism standard-drink guide defines 1.5 ounces of 80-proof spirits as one U.S. standard drink. A cocktail containing 2 ounces of 40% ABV gin or vodka therefore has about 1.3 standard drinks before alcoholic modifiers are added. Measuring beats free-pouring.

    Why Savory Cocktails Work Without Much Sugar

    Sweet cocktails often balance spirit, sugar, and acid. Savory drinks use a wider toolkit. Brine contributes salt and acidity, tomatoes provide tartness and natural glutamates, miso adds fermented depth, and herbs supply aroma.

    The objective is not to make a cocktail taste like soup. Strong savory ingredients still need contrast: salty ingredients need brightness, richer ingredients need acidity, and aggressive aromatics require restraint.

    Savory element Starting amount Pairs well with
    Olive, pickle, caper, or pepperoncini brine 1/4–1/2 oz gin, vodka, tequila
    Miso solution 1/4 oz whiskey, tequila
    Chilled broth 3–4 oz vodka, gin
    Fresh herbs 1 small sprig gin, tequila, vodka
    Worcestershire or hot sauce 1–3 dashes tomato, broth

    Seven Savory Drinks Worth Making

    1. Dill Pickle Martini

    Shake 2 ounces vodka or London dry gin, 1/2 ounce dry vermouth, and 1/2 ounce dill pickle brine with ice. Strain into a chilled coupe and garnish with dill or a small pickle.

    For a sharper drink, reduce the vermouth slightly. Gin gives the cocktail more herbal complexity, while vodka allows the pickle character to dominate.

    2. Properly Dirty Martini

    2 Properly Dirty Martini

    Stir 2 1/2 ounces gin or vodka, 1/2 ounce dry vermouth, and 1/2 ounce olive brine with ice. Strain into a chilled martini glass and garnish with olives.

    The common mistake is assuming dirtier always means better. Excess brine can flatten the botanical or grain character of the spirit. Start with 1/2 ounce and make further adjustments by teaspoons.

    If you’re new to mixing at home, starting with simple recipes can make it easier to understand how a few ingredients work together. Try these 3-ingredient cocktails for beginners before experimenting with more complex savory combinations.

    3. Chilled Bullshot

    Combine 1 1/2 ounces vodka, 4 ounces cold beef broth, 1/2 ounce lemon juice, one dash Worcestershire sauce, black pepper, and a pinch of celery salt. Roll gently with ice instead of shaking aggressively, then strain over fresh ice.

    Broth changes the food-safety equation.  USDA food-safety guidance recommends refrigerating meat broth at 40°F or below and generally using it within three to four days. Keep homemade or opened broth properly chilled until mixing.

    4. Tomato-Celery Gin Cooler

    Shake 1 1/2 ounces gin, 2 ounces tomato juice, 1/2 ounce lemon juice, two dashes of hot sauce, and a pinch of celery salt. Strain over ice and top with 2 ounces soda water.

    It has some Bloody Mary character without the weight of a large brunch drink. A celery leaf, cucumber ribbon, or cracked black pepper adds aroma without turning the garnish into a meal.

    5. Miso-Ginger Whiskey Highball

    Whisk 1 teaspoon white miso with 1 tablespoon warm water until smooth. Add 1 1/2 ounces bourbon, 1/4 ounce miso solution, 1/2 ounce lemon juice, and a thin ginger slice to an ice-filled highball. Top with 3 ounces soda water.

    White miso is easier to control than darker varieties. The final drink should taste lightly saline and nutty rather than strongly reminiscent of soup.

    The final drink should taste lightly saline and nutty rather than strongly reminiscent of soup. For a lighter, more textured variation, you can also explore cocktail foam without egg white.

    6. Pepperoncini Tequila Cooler

    6 Pepperoncini Tequila Cooler

    Shake 1 1/2 ounces blanco tequila, 1/2 ounce pepperoncini brine, and 3/4 ounce fresh lime juice with ice. Strain over fresh ice and top with 2 to 3 ounces soda water.

    For more aroma and texture, use a half-rim of coarse salt mixed with crushed coriander seed. Leaving half the rim bare lets the drinker alternate between seasoned and unseasoned sips.

    7. Caper-and-Herb Gibson

    Stir 2 ounces gin, 3/4 ounce dry vermouth, and 1/4 ounce caper brine with ice. Strain into a chilled coupe and garnish with a cocktail onion and a small thyme or rosemary sprig.

    Caper brine is assertive, so keep the first pour small. If the drink feels excessively salty, increasing the vermouth slightly works better than simply adding water.

    The 3-Step Savory Cocktail Test

    Before serving an experimental recipe, test three things.

    First, assess salt. If the cocktail tastes dull, add one teaspoon of brine rather than another large pour.

    Second, check acidity. Lemon or lime should make the finish cleaner and brighter without becoming sharply sour.

    Third, evaluate aroma. Dill, rosemary, citrus peel, cracked pepper, or celery leaves can dramatically change the first impression of a drink while barely changing the liquid itself.

    This teaspoon-by-teaspoon approach is much easier than trying to repair a cocktail after it becomes over-seasoned.

    Handle Fresh Ingredients Like Food

    Cocktail garnishes are still raw produce. The FDA’s produce-safety guidance recommends washing fruits and vegetables under running water and advises against using soap, detergent, or commercial produce washes.

    Penn State Extension’s recipe-safety guidance specifically recommends gently rinsing fresh herbs under cold running water. The produce-washing guidance also advises using cool water for delicate produce such as herbs and avoiding prolonged soaking.

    Wash herbs shortly before use, dry them, and keep them refrigerated. Broth, tomato juice, brines, and homemade savory mixtures should also be properly refrigerated after opening or preparation.

    If a perishable mixer has sat warm for hours or is outside its safe storage window, discard it rather than assuming the alcohol in the cocktail will make it safe.

    Mistakes That Ruin Savory Cocktails

    Mistakes That Ruin Savory Cocktails

    The biggest error is confusing savory with salty. Worcestershire sauce, miso, olives, capers, brines, and pickled vegetables can all contribute salt. Combining several aggressively can quickly overwhelm the base spirit.

    Another mistake is over-infusing. Dried mushrooms, herbs, peppercorns, and spices can shift from aromatic to bitter or medicinal. Test small batches, taste regularly, and strain once the desired flavor becomes obvious.

    Finally, do not assume savory drinks contain less alcohol simply because they taste less boozy. Alcohol content depends on the measured volume and ABV of the ingredients, not how sweet, salty, or smooth the drink tastes.

    Frequently Asked Questions

    1. What savory cocktails to make at home are easiest for beginners?

    Start with a dirty martini, pickle martini, or pepperoncini tequila cooler. Each uses familiar spirits and one dominant savory ingredient, making adjustments relatively simple.

    2. Can I use pickle juice directly from the jar?

    Yes, provided the pickles have been stored according to the label and the brine smells and tastes normal. Begin with 1/4 to 1/2 ounce because brands vary considerably.

    3. What can I use instead of olive brine?

    Try dill pickle, caper, pepperoncini, pickled-onion, or jalapeño brine. Add gradually because each provides a different balance of salt, vinegar, spice, and aroma.

    4. Can savory cocktails be alcohol-free?

    Absolutely. Combine tomato juice, vegetable broth, herb tea, pickle brine, citrus, soda water, or alcohol-free spirits. The same salt-acid-aroma balancing method still applies.

    A Better Way to Think About Savory Drinks

    Savory cocktails work more like seasoning food than sweetening a beverage. Salt exposes flavor, acid prevents richness from becoming heavy, herbs create aroma, and umami gives the finish greater depth.

    Start with one powerful savory ingredient, measure it carefully, and adjust in teaspoons. A pickle martini or pepperoncini cooler is enough to learn the system. Once you can identify whether a drink needs more salt, brightness, dilution, or aroma, the possibilities expand quickly. The best home cocktail may already be hiding in the pickle jar, herb drawer, or refrigerator door.

  • Fat Washed Cocktails for Beginners: A No-Grease Guide to Bigger Flavor

    Fat Washed Cocktails for Beginners: A No-Grease Guide to Bigger Flavor

    The strange thing about fat-washing is that the finished spirit should not taste oily. Done correctly, bacon fat, brown butter, coconut oil, or sesame oil leaves behind aroma while most of the actual fat is removed. That makes fat washed cocktails for beginners less intimidating than the name suggests: it is essentially an infusion followed by chilling and filtration.

    It captures flavors simple syrup cannot. Smoke, browned butter, toasted nuts, and savory oils carry aromas that do not translate cleanly into sugar-and-water mixers.

    What Fat-Washing Actually Does

    Fat-washing became a signature modern-bar technique after Don Lee’s Benton’s Old Fashioned at PDT in New York helped popularize bacon-washed bourbon.

    Ethanol has both polar and nonpolar characteristics. An American Chemical Society study on ethanol-water mixtures describes ethanol as containing both polar and nonpolar regions, an important clue to why it can interact with a broad range of flavor compounds. The NIH PubChem profile for ethanol also lists ethanol as miscible with water and compatible with numerous organic solvents.

    That matters because a spirit can pick up aromatic compounds associated with a flavorful fat. Chilling then hardens much of the fat so it can be removed. What remains is not “liquid bacon grease,” but a spirit with a changed aroma profile.

    The technique will not copy every taste of the original ingredient. Salt and sugar behave differently from fat-soluble aroma compounds, so bacon-washed whiskey can smell smoky without tasting as salty as bacon.

    The Beginner Ratio: Test Five Ounces, Not a Bottle

    A full 750-milliliter bottle is a poor first experiment. Start with 5 ounces of spirit. A practical upper starting point is about 1 ounce of melted fat to 5 ounces of spirit, then scale downward for aggressive ingredients.

    Campari Academy says its team often works around 15% to 20% infusion material relative to spirit, while noting that the ideal amount changes with the fat source. One ounce of coconut oil is far milder than one ounce of toasted sesame oil.

    If the fat smells powerful on its own, begin closer to 1/2 ounce per 5 ounces of spirit.

    Fat Beginner spirit Starting amount per 5 oz spirit Likely result
    Brown butter Bourbon or rye 0.75–1 oz Nutty, caramel-like
    Coconut oil Rum 0.75–1 oz Soft tropical aroma
    Bacon fat Bourbon 0.5–0.75 oz Smoky, savory
    Olive oil Vodka or tequila 0.5–0.75 oz Grassy, rounded
    Toasted sesame oil Gin or vodka 0.25–0.5 oz Intense roasted aroma

    A Reliable First Batch in Five Steps

    A Reliable First Batch in Five Steps

    For fat washed cocktails for beginners, consistency matters more than novelty. Use a clean glass jar, measured ingredients, a freezer, a fine strainer, and a coffee filter.

    1. Melt or render the fat gently. Brown butter should smell nutty, not burnt. Bacon fat should come from fully cooked bacon and be strained free of food particles.
    2. Combine the fat and spirit in a clean jar. Seal and shake for 15 to 20 seconds so the phases make broad contact.
    3. Infuse for about two hours as a first test, then taste a small sample. The USDA Food Safety and Inspection Service advises that perishable foods should not remain at room temperature beyond two hours, or one hour when temperatures exceed 90°F.
    4. Freeze until the fat is fully solid. Overnight is convenient and usually produces a firm cap.
    5. Remove the solid fat, strain the spirit, then pass it through a coffee filter. If oil droplets remain, chill and filter again.

    Troubleshooting Cloudiness and Weak Flavor

    Cloudiness usually means tiny fat droplets survived the first separation. Freeze the batch again and filter slowly through paper.

    Filtration is also central to other clarified cocktail techniques, including clarified milk punch for beginners, where a curd bed helps remove suspended particles.

    More heat is not the answer; you want the fat solid enough to remove.

    Weak flavor usually means the fat was too mild, the ratio too low, or the infusion too short. Change one variable in the next batch so you know what improved the result.

    Discard a batch that smells stale, waxy, or paint-like. Penn State Extension’s guidance on edible oils explains that oils can oxidize and form compounds associated with rancidity and undesirable flavors. Cooler, protected storage can help slow quality loss.

    Three Easy Cocktails That Reveal the Difference

    Three Easy Cocktails That Reveal the Difference

    An Old Fashioned is a clear test for brown-butter- or bacon-washed bourbon because only sugar, bitters, and citrus peel stand between you and the altered whiskey.

    Serve the drink in the right glass as well; an Old Fashioned is one of the classic drinks where the appropriate glassware helps complete the presentation. See essential home bar glassware for beginners for the basic glasses worth keeping at home.

    Coconut-washed rum works well in a Daiquiri with fresh lime and simple syrup; acidity keeps the richer aroma from feeling heavy. Olive-oil-washed vodka can work in a dry Martini, where grassy notes complement an olive garnish.

    The idea is simple: use one changed ingredient in a stripped-down drink so you can judge whether the wash actually improved it.

    Food Safety and Alcohol Strength Still Matter

    Alcohol does not make careless food handling automatically safe. Use fresh, fully cooked fats; clean jars and tools; avoid putting raw meat into spirits; chill promptly; and refrigerate finished washes made with animal or dairy fats.

    Fat-washing changes flavor, not drinking math. The National Institute on Alcohol Abuse and Alcoholism’s standard-drink guidance defines one U.S. standard drink as 0.6 fluid ounce, or 14 grams, of pure alcohol. About 1.5 ounces of 40% ABV distilled spirits equals one standard drink.

    That point is easy to miss with a smooth fat-washed whiskey. A softer or rounder sensation does not mean the alcohol has disappeared.

    What Beginners Often Misunderstand

    What Beginners Often Misunderstand

    Fat-washing is not the same as adding butter or oil directly to a finished cocktail. Most of the bulk fat is removed before service.

    It is also not automatically shelf-stable. Campari Academy specifically cautions that fat-washed infusions are not shelf stable. For home batches, keep quantities small, refrigerate when appropriate, and discard anything with an off odor.

    Stronger is not always better. If the wash erases the base spirit, use less fat or shorten the contact time next round. The best version should still taste recognizably like bourbon, rum, tequila, gin, or vodka.

    Frequently Asked Questions

    1. Can I fat-wash vodka?

    Yes. Vodka is a useful neutral base for olive oil, sesame, butter, or coconut experiments because fewer existing flavors compete with the infusion.

    2. How long should a fat-washed spirit freeze?

    Overnight is the easiest beginner rule. The goal is a hard, removable fat layer. If the spirit still looks oily, freeze longer and filter again.

    3. Can I reuse the fat after washing?

    Discarding it is the safer, more predictable home approach, especially with animal or dairy fats. It has contacted alcohol and may contain flavors pulled from the spirit.

    4. Do fat-washed cocktails contain less alcohol?

    Do not assume they do. Some liquid is lost during separation and filtration, but the finished spirit remains alcoholic and should be measured normally.

    The Takeaway

    The best first fat wash is not the wildest combination; it is the batch you can understand and repeat. Start with five ounces of a familiar spirit, a measured amount of fresh fat, a short infusion, a hard freeze, and careful filtration. Taste it beside the original spirit before mixing a drink.

    That comparison turns a trendy bar trick into a usable technique. Once you recognize what brown butter does to bourbon or coconut does to rum, you can adjust ratios deliberately instead of guessing. The real skill is not adding fat. It is deciding exactly how much flavor to leave behind.