Blog

  • How to Make Cold Foam Without Heavy Cream That Stays Fluffy

    How to Make Cold Foam Without Heavy Cream That Stays Fluffy

    That velvety layer floating over a cold brew may look like something that requires cream and professional café equipment, but I can recreate it at home with ordinary refrigerated milk. The secret is not adding more fat—it is choosing a milk with enough protein and aerating it correctly so tiny bubbles stay suspended.

    When I learned how to make cold foam without heavy cream, I found that cold skim milk often produced some of the lightest, fluffiest results. Low-fat dairy milk also works well, while high-protein soy milk and barista-style oat milk give me reliable dairy-free alternatives. With a handheld frother, French press, blender, whisk, or even a Mason jar, I can turn a few ounces of milk into a smooth topping for cold brew or iced coffee in minutes.

    What Is the Easiest Cold Foam Recipe Without Cream?

    For one serving, I use 1/4 cup of very cold skim, 1%, or 2% milk. If I want sweetness, I add 1 to 2 teaspoons of vanilla syrup, maple syrup, simple syrup, or powdered sugar. I may also add 1/4 teaspoon vanilla extract, a pinch of cinnamon, or a tiny pinch of salt. For a dairy-free version, I also consider the best non-dairy milk for coffee, especially options that froth well and maintain a smooth texture.

    I pour everything into a tall, narrow glass, leaving room for the milk to expand. Then I position a handheld frother just beneath the surface and move it gently up and down for about 20 to 30 seconds.

    I stop when the milk has expanded substantially, sometimes close to double its original volume, and the surface looks smooth and velvety rather than full of large, soapy bubbles.

    I serve the cold foam immediately over cold brew, iced coffee, an iced Americano, or an iced latte. Starbucks Coffee at Home also uses 1/4 cup of milk in several of its cold-foam recipes.

    Why Does Skim Milk Work So Well for Cold Foam?

    Why Does Skim Milk Work So Well for Cold Foam?

    Cold foam and whipped cream get their structure differently. Whipped cream relies heavily on fat, while milk foam depends more on proteins surrounding and stabilizing trapped air.

    Those small air pockets form the light microfoam that gives cold foam its cloud-like texture.

    Skim milk usually gives me the greatest volume. I use 1% or 2% milk when I want slightly more richness. Whole milk can still foam, but the finished topping generally feels denser and less airy.

    Milk proteins such as casein play an important structural role in dairy systems, while coffee-focused frothing guidance also identifies milk protein as important for trapping air and producing foam.

    Which Milk Is Best for Cold Foam?

    For a classic light topping, skim milk is my first choice. For something slightly creamier, 1% and 2% milk strike a useful balance between airy foam and richer mouthfeel.

    For dairy-free cold foam, I usually choose high-protein soy milk or barista-style oat milk. Plant-based products can behave very differently because protein levels, oils, stabilizers, and other ingredients vary between brands.

    Starbucks also notes that alternative milks can work for cold foam when you choose varieties that froth well, such as barista-style plant milks.

    Standard almond milk can foam, but I find the results less predictable. If it remains watery, I switch to a barista formulation rather than simply frothing it longer.

    How Can I Make Cold Foam Without a Frother?

    How Can I Make Cold Foam Without a Frother?

    You do not need dedicated coffee equipment to create homemade cold foam.

    Can I Make Cold Foam in a Mason Jar?

    Yes. I fill a clean Mason jar no more than halfway with cold milk, secure the lid tightly, and shake vigorously for about 30 to 60 seconds.

    The space inside the jar gives the milk room to expand. Starbucks’ general Mason jar frothing method similarly recommends filling the jar halfway before shaking it vigorously.

    The bubbles may be slightly larger than those produced by an electric frother, but this is one of the simplest no-equipment methods.

    Can I Make Cold Foam With a French Press?

    I pour cold milk into a clean French press, leave plenty of space above it, and rapidly move the plunger up and down until the milk becomes airy and noticeably increases in volume.

    I prefer watching the texture instead of following an exact time. Milk quantity, French press size, and pumping speed can all change how quickly the foam develops.

    Can I Use a Blender or Whisk?

    A blender works well when I am preparing several servings. I blend the cold milk for roughly 20 to 30 seconds and stop once fine foam appears.

    A hand whisk also works, although it requires more effort and usually creates a less uniform texture.

    How Do I Make Cold Foam Thicker?

    Temperature is one of the first things I check. I always use milk directly from the refrigerator.

    I also avoid adding too much sweetener. One or two teaspoons is usually enough for a single serving without weighing down the foam.

    A tall, narrow container helps a handheld frother incorporate air efficiently. I keep the frother close to the surface initially, then lower it slightly once the milk begins expanding. This helps refine large bubbles into finer microfoam.

    Why Is My Cold Foam Watery or Not Foaming?

    Milk choice is often the problem. Some low-protein plant milks struggle to hold air, so switching to soy milk or barista-style oat milk can improve the texture.

    Frother position matters as well. If I hold the frother too deep, it simply circulates the milk. If I hold it too high, it creates large bubbles and splashes.

    I keep the whisk just beneath the surface while introducing air and lower it slightly as the foam builds.

    I also make cold foam immediately before drinking my coffee. Foam naturally begins losing trapped air as it sits, so fresh foam gives me the best texture.

    Cold Foam vs Sweet Cream Cold Foam: What Is the Difference?

    Cold Foam vs Sweet Cream Cold Foam: What Is the Difference?

    Regular cold foam is primarily aerated milk and does not need added sugar. It produces a lighter topping that allows the flavor of cold brew or iced coffee to remain prominent.

    Sweet cream cold foam tends to be richer and sweeter. Recipes may contain milk, cream, vanilla, sugar, or flavored syrup.

    However, heavy cream is not mandatory for every sweet foam. Starbucks publishes a vanilla cold-foam recipe made with 2% milk, powdered sugar, and vanilla extract.

    Frequently Asked Questions (FAQs)

    1. Can I make cold foam with regular 2% milk?

    Yes. I use 2% milk when I want a creamier topping than skim milk provides while still keeping the foam relatively light and airy.

    2. Can I make cold foam with oat milk?

    Yes. Barista-style oat milk is usually my first choice because it is formulated to perform better when frothed. Regular oat milk can work, but the results depend on the brand.

    3. Can I make cold foam without sugar?

    Absolutely. Sugar is optional. Plain refrigerated milk can foam without maple syrup, vanilla syrup, simple syrup, or powdered sugar.

    4. What is the easiest way to learn how to make cold foam without heavy cream?

    I start with 1/4 cup of refrigerator-cold skim milk and a handheld frother. I froth just beneath the surface for about 20 to 30 seconds, watch for a major increase in volume and fine microbubbles, and serve it immediately.

    Final Thoughts

    Once I mastered how to make cold foam without heavy cream, I stopped treating cream as essential for a café-style iced drink. Skim milk gives me a light and airy topping, 1% and 2% add more body, and barista oat milk or soy milk provide practical dairy-free alternatives.

    The technique makes the biggest difference. I start with cold milk, introduce air gradually, watch for fine microfoam, and avoid excessive sweetener, including artificial sweeteners, when I want the milk’s natural flavor to stand out. I also serve the foam immediately. With that simple approach, I can give homemade iced coffee or cold brew a creamy coffee-shop finish without making the drink unnecessarily heavy. 

  • Homemade Cinnamon Stick Simple Syrup Recipe: The Barista Method

    Homemade Cinnamon Stick Simple Syrup Recipe: The Barista Method

    Most spiced syrups taste either sickly sweet or unpleasantly gritty. I spent years perfecting this homemade cinnamon stick simple syrup recipe behind the bar to solve that exact issue. By moving away from ground powders and relying on whole bark extraction, you get a clean, luminous amber syrup that melts smoothly into cold brews, cocktails, and weekend bakes.

    Why Whole Cinnamon Sticks Beat Ground Cinnamon Every Time

    Stirring powdered cinnamon into hot water seems like an easy shortcut. In reality, ground cinnamon does not dissolve. It forms a slimy, suspended sludge that settles at the bottom of your cup and catches in your throat.

    Whole cinnamon quills behave differently. When heated in a balanced sucrose solution, whole bark releases essential aromatic oils without breaking down its fibrous pulp.

    Ceylon vs. Cassia: Choosing the Right Bark

    Ceylon vs. Cassia: Choosing the Right Bark

    The variety of cinnamon you choose dramatically shapes the finished syrup:

    • Cassia Cinnamon: The thick, hard bark common in US supermarkets. High in cinnamaldehyde, it yields the bold, punchy “red hot” profile Americans expect in seasonal drinks.
    • Ceylon Cinnamon (“True” Cinnamon): Thinner, papery layers that crumble easily. It delivers delicate, floral, and citrus-edged warmth, making it the preferred choice for lighter rum cocktails and delicate teas.

    I prefer Cassia for espresso-based drinks because espresso requires a heavy spice profile to cut through roasted milk notes. For delicate applications, Ceylon wins.

    The Extraction Science: Temperature and Tannins

    Extracting spice is a delicate thermodynamic exercise. Cinnamon contains both aromatic volatile oils and bitter tannins. If you boil cinnamon vigorously, you burn off the subtle top notes and extract harsh, astringent wood compounds.

    According to culinary extraction studies documented by Serious Eats, sugar acts as a flavor carrier while water serves as the solvent. I found the sweet spot: bring the water and sugar just to a low simmer for 10 minutes, then kill the heat completely.

    Cover the saucepan and let the mixture steep as it naturally cools down to around 135°F. This sealed steep captures escaping aromatics under the lid, forcing them back down into the syrup while leaving astringent wood compounds behind in the bark.

    Ingredients and Equipment for the Batch

    Ingredients and Equipment for the Batch

    A standard 1:1 simple syrup ratio creates a syrup that dissolves instantly in cold drinks while preserving sufficient moisture for hot drinks. Nutritional databases like USDA FoodData Central document how sucrose stabilization behaves in simple liquid reductions.

    You need three core ingredients:

    • 1 cup filtered water: Clear water ensures clean spice expression without chlorine interference.
    • 1 cup granulated white sugar: Standard cane sugar delivers a neutral, crystal-clear sweetness. Substitute light brown sugar if you prefer deep molasses undertones.
    • 3 to 4 whole cinnamon sticks: Crack them in half with your fingers right before cooking to expose inner air pockets and surface area.
    • ½ teaspoon pure vanilla extract (optional): Rounds out the finish with warm, creamy aromatics.

    For equipment, gather a small heavy-bottom saucepan, a fine-mesh stainless steel strainer, and a sterilized glass bottle or mason jar with an airtight lid.

    Step-by-Step Instructions: The Tested Infusion Method

    Step-by-Step Instructions: The Tested Infusion Method

    1. Dissolve the Base: Pour the water and granulated sugar into your saucepan over medium heat. Stir continuously for 2 minutes until the liquid turns completely clear and no sugar granules scrape against the bottom of the pan.
    2. Crack and Introduce the Bark: Snap the cinnamon sticks in half and place them into the warm syrup.
    3. Gentle Simmer: Bring the liquid to a light simmer where tiny bubbles form along the interior perimeter of the pan. Lower the flame immediately to maintain a gentle simmer for 10 minutes. Do not let it boil vigorously.
    4. The Sealed Steep: Remove the pan from the heat source. Cover tightly with a secure lid. Leave the pan undisturbed on the counter for 60 minutes. The residual heat extracts the deep bark oils while the lid traps the evaporated aromatics.
    5. Strain and Bottle: Place your fine-mesh strainer over a clean glass bottle. Pour the liquid through to catch the bark and micro-fragments. Stir in the vanilla extract, seal the bottle, and transfer it to the refrigerator.

    If you enjoy building seasonal pantries, this technique mirrors the process used for crafting a spicy ginger simple syrup.

    How to Use Spiced Cinnamon Syrup Across Drinks and Desserts

    How to Use Spiced Cinnamon Syrup Across Drinks and Desserts

    This syrup integrates seamlessly into hot and cold liquids without separating.

    Stir two tablespoons into a double shot of espresso, pour over ice, and top with creamy oat milk for an iced spiced latte. 

    In evening mixology, swap out standard plain syrup for cinnamon syrup in an Old Fashioned; the spice links the charred oak vanillin of bourbon directly to the Angostura bitters. 

    Drizzle it over warm pancakes, poach firm pears directly in it, or brush it over fresh sponge cake layers before frosting.

    This technique is also used for making of hibiscus syrup using dried flowers

    Shelf Life, Preservation, and Storage Benchmarks

    Water activity controls shelf stability. Guidelines from the National Center for Home Food Preservation show that standard 1:1 simple syrups retain enough moisture to support mold growth over time if left unchilled.

    Keep your cinnamon syrup in an airtight glass container inside the refrigerator. It stays fresh and potent for up to 4 weeks.

    If you want to stretch the lifespan to 3 months, add a half-ounce of high-proof neutral spirit (such as 80-proof vodka) to the cooled syrup right before bottling. The alcohol raises the preservation threshold without altering the flavor profile. Discard the batch immediately if the liquid turns cloudy or develops an off odor.

    Frequently Asked Questions

    1. Can I make this recipe with ground cinnamon instead of sticks?

    Yes, but you must filter the syrup through a paper coffee filter to remove the gritty residue.

    2. Why did my cinnamon simple syrup turn cloudy?

    Cloudiness during storage indicates microbial or mold growth, which means you should discard the batch.

    3. Can I freeze cinnamon simple syrup for longer storage?

    Yes, pour the syrup into silicone ice cube trays and freeze for up to 6 months.

    4. Does cinnamon simple syrup need to be refrigerated?

    Yes, 1:1 simple syrups lack sufficient sugar saturation to remain shelf-stable at room temperature.

    Ditch the Store-Bought Squeeze Bottle

    Pre-made spiced coffee syrups rely on artificial flavor compounds, sodium benzoate, and high-fructose corn syrup to simulate freshness. Simmering whole cinnamon quills on your stove gives you real essential oils, balanced sweetness, and a rich spice profile you cannot buy off a shelf. Crack a few sticks into a saucepan this weekend, bottle your batch, and elevate your daily brew.

  • What Is a Cortado Coffee? The Small Drink With a Bold 1:1 Balance

    What Is a Cortado Coffee? The Small Drink With a Bold 1:1 Balance

    Some coffee drinks are designed to be sipped slowly from a large cup, while others deliver their character in just a few concentrated ounces. A cortado belongs firmly in the second group. The first time I look at one, its simplicity stands out: espresso, a small amount of silky milk, and almost no thick foam competing for attention.

    So, what is a cortado coffee? It is a compact espresso drink traditionally made with roughly equal parts espresso and lightly steamed milk. A typical version combines about 2 ounces of espresso with 2 ounces of milk, creating a drink close to 4 ounces. That simple 1:1 balance lets the milk soften the espresso while keeping the coffee’s flavor noticeably bold.

    What Makes a Cortado Different From Other Espresso Drinks?

    A classic cortado uses roughly a 1:1 balance of espresso and milk. In many US specialty coffee shops, that means about 2 ounces of espresso plus 2 ounces of steamed milk for a drink close to 4 ounces.

    I treat 1:1 as a benchmark because cafés use different doses and glass sizes. The milk should soften the espresso without overwhelming it. For anyone comparing the best non-dairy milk for coffee, barista-style oat or soy milk can work especially well in a cortado because they can create a smooth texture without masking the espresso.

    The name comes from the Spanish verb cortar, meaning “to cut.” In this case, the milk cuts the intensity of the espresso.

    What Should Cortado Milk Texture Be Like?

    A cortado should not have the tall foam cap you expect on a cappuccino. The milk should stay smooth, glossy, and fluid, with fine microfoam that blends into the espresso.

    Too much air can make it feel like a miniature cappuccino, while too much milk can push it toward latte territory. Modern recipes commonly use a small 4- to 5-ounce glass.

    What Does a Cortado Taste Like?

    What Does a Cortado Taste Like?

    To me, a good cortado tastes concentrated but rounded. The milk softens sharp edges while leaving the espresso’s roast character, acidity, sweetness, and body noticeable.

    It suits drinkers who find straight espresso too intense but a latte too milky. Chocolate, caramel, nutty, and fruit-forward notes can still come through.

    Because there is much less milk than in a latte, the quality and flavor of the espresso become more important. A poorly extracted shot will be harder to hide, while a balanced espresso can create an especially flavorful cortado.

    Why Is a Cortado Served in a Small Glass?

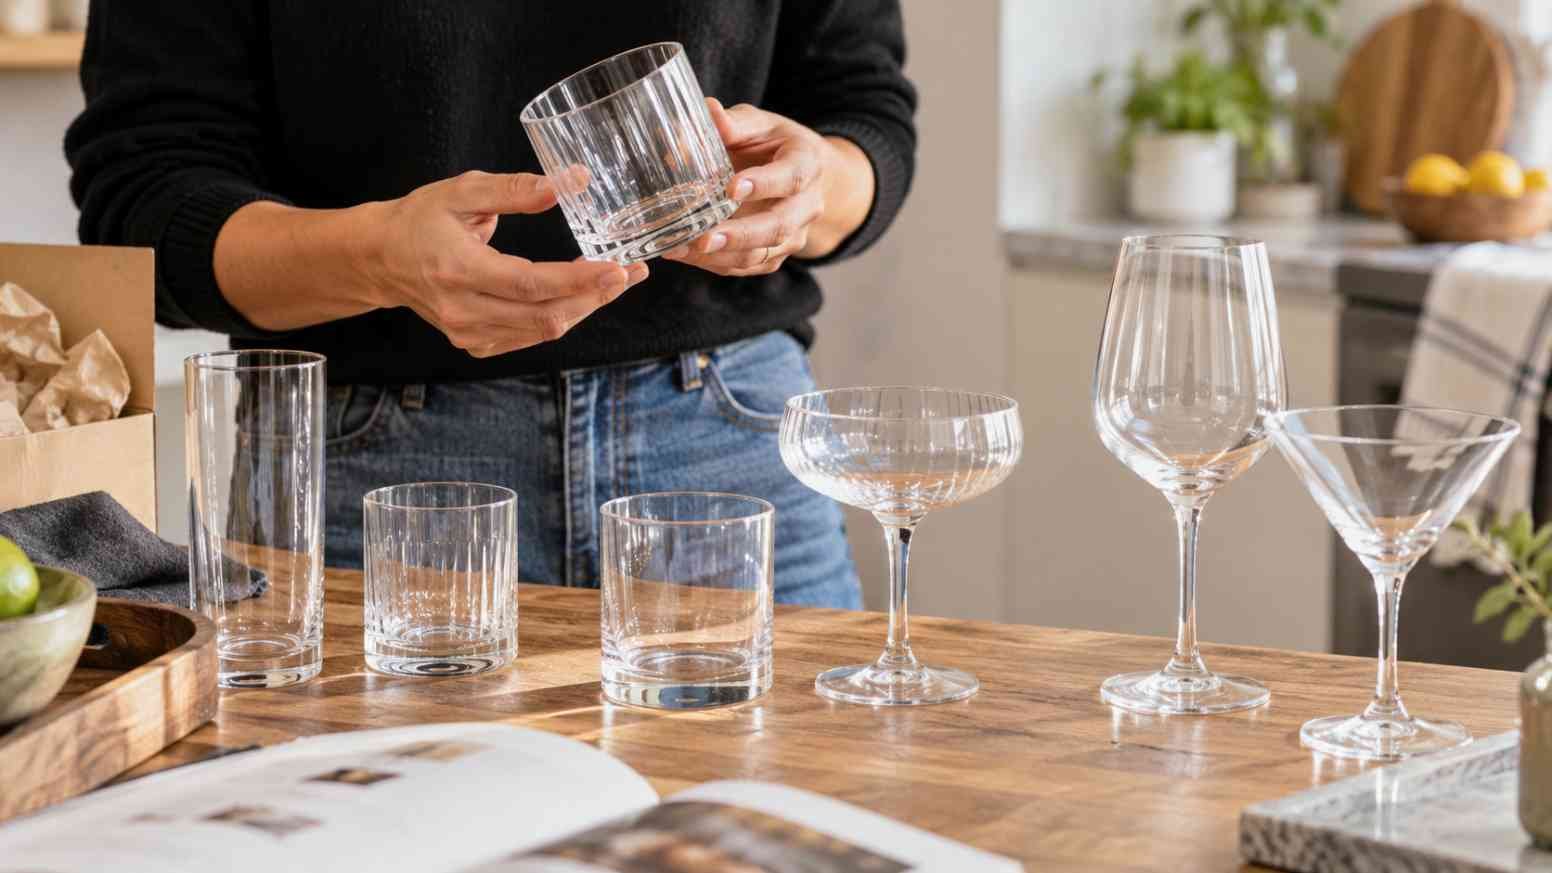
    Cortados are often served in a small clear glass instead of a large ceramic mug. In US specialty coffee culture, the drink is strongly associated with the Gibraltar-style tumbler, often around 4 to 4.5 ounces.

    The glass matches the compact serving size. Some American coffee shops even use “Gibraltar” for a closely related drink, although recipes can differ.

    The clear presentation also makes the drink visually distinctive. Instead of receiving a large cup filled mostly with milk, you get a compact espresso-and-milk drink designed to be finished while it is still warm.

    Cortado vs Latte, Flat White, Macchiato, and Cappuccino

    These figures are approximate because café recipes vary.

    Coffee Drink Typical Size Approximate Espresso-to-Milk Balance Milk Texture
    Cortado About 4 oz Around 1:1 Fine microfoam, minimal thick froth
    Macchiato About 2–3 oz Mostly espresso with a little milk Small amount of milk or foam
    Flat white Often about 5–6 oz or larger More milk than a cortado Silky microfoam
    Latte Usually 8 oz or larger Often around 1:3 or more More steamed milk, light foam
    Cappuccino Commonly around 5–6 oz More milk and foam than a cortado Aerated, foamy texture

    Cortado vs Latte: Which Tastes Stronger?

    Cortado vs Latte: Which Tastes Stronger?

    A cortado usually tastes stronger because it contains much less milk. US lattes commonly come in larger sizes, so the espresso flavor is more diluted.

    If I want a long, creamy coffee, I would choose a latte. When I want to taste more of the espresso while still having some milk, a cortado makes more sense.

    Cortado vs Flat White: Are They the Same?

    No. A flat white usually contains more steamed milk and emphasizes silky microfoam. A cortado stays smaller and closer to equal parts espresso and milk.

    Both drinks are smoother than a foam-heavy cappuccino, but the cortado generally gives the espresso more presence.

    Cortado vs Macchiato: Which Has More Milk?

    The cortado has more milk. A traditional espresso macchiato uses only a small amount of milk or foam, while a cortado adds enough to noticeably soften the shot.

    That makes a macchiato more intense and espresso-forward, while a cortado offers a more balanced middle ground.

    Cortado vs Cappuccino: What Changes Most?

    Foam is the clearest difference. Cappuccino milk is more aerated; cortado milk remains flatter and more integrated with the espresso.

    A cappuccino therefore feels lighter and foamier, while a cortado feels denser and smoother.

    How Do You Make a Cortado at Home?

    I start with a double shot of espresso and roughly the same volume of milk. If my espresso measures close to 2 ounces, I use about 2 ounces of milk.

    I steam the milk gently, adding only enough air for a smooth, glossy texture. I avoid a thick foam cap, then pour the milk slowly into the espresso and serve it immediately.

    Whole milk works well, while barista-style oat milk is a popular dairy-free option in US cafés. Soy and almond milk can work too.

    The most common mistake is simply using too much milk. If the finished drink starts resembling a small latte, reducing the milk usually brings the espresso-to-milk balance back where it belongs.

    How Much Caffeine Is in a Cortado?

    How Much Caffeine Is in a Cortado?

    The caffeine comes from the espresso, not the milk. Many US cafés use a double shot, but the actual amount varies with the beans, dose, roast, and extraction.

    A cortado and a latte made with the same espresso shots can therefore contain similar caffeine even though the cortado tastes stronger.

    Is a Cortado Sweet?

    A traditional cortado does not require sugar or flavored syrup. Properly steamed milk adds natural sweetness and can make espresso taste less bitter.

    You can add sweetener, but the classic balance comes from espresso and milk alone. If you are used to flavored coffee shop drinks, a cortado may initially taste less sweet but considerably more coffee-forward.

    Frequently Asked Questions (FAQs)

    1. Is a cortado stronger than a latte?

    It usually tastes stronger because it has a higher proportion of espresso to milk. Caffeine depends on the espresso shots rather than the total drink size.

    2. What is a cortado coffee made of?

    What is a cortado coffee made from? A typical version combines espresso with roughly the same amount of lightly steamed milk, commonly around 2 ounces of each, with little thick foam.

    3. Is a cortado the same as a Gibraltar?

    They are closely related in US specialty coffee culture. “Gibraltar” often refers to a cortado-style drink served in a Gibraltar glass, although individual cafés may use slightly different recipes.

    4. Can you order a cortado with oat milk?

    Yes. Oat milk, especially a barista-style version, can create a smooth texture while keeping the drink dairy-free.

    Final Thoughts

    When someone asks me what a cortado coffee is, I describe it as espresso softened rather than hidden by milk. Its roughly 1:1 ratio, compact 4-ounce size, lightly steamed milk, and minimal foam give it a distinct place between a macchiato and milkier drinks such as the flat white or latte. 

    For readers exploring milk drink recipes, a cortado is also a simple example of how a small amount of milk can change the character of espresso without overpowering it.

    For US coffee drinkers who want clear espresso flavor without drinking a straight shot, the cortado is easy to appreciate. Keep the serving small, the milk silky, and the espresso at the center.

  • What Is Café au Lait? The Coffee That Keeps Milk Simple

    What Is Café au Lait? The Coffee That Keeps Milk Simple

    Some coffee drinks rely on espresso machines, precise foam, or carefully layered ingredients. Café au lait takes a much simpler route. I can start with the same brewed coffee I would drink at breakfast, add an equal amount of warm milk, and completely change its texture without hiding the flavor of the coffee.

    So, what is café au lait? It is a traditional French drink that combines strong brewed coffee with hot milk, commonly in a 1:1 ratio. Instead of using espresso like a latte, it starts with drip, filter, or French press coffee. That straightforward preparation makes it especially practical for US coffee drinkers who want a smooth, café-style drink without needing an espresso machine.

    What Does Café au Lait Mean?

    “Café au lait” is French for “coffee with milk,” which describes the drink almost perfectly.

    Traditionally, the drink is associated with breakfast in France. It may be served in a large mug or a wide, handleless bowl known as a bol. The wide opening makes it easy to hold with both hands and is also associated with dipping breakfast pastries such as croissants.

    In US coffee shops, the presentation is usually less formal. You are more likely to receive café au lait in a standard ceramic mug or takeaway cup, but the basic combination of brewed coffee and hot milk remains the same.

    What Is the Traditional Café au Lait Ratio?

    What Is the Traditional Café au Lait Ratio?

    The classic café au lait ratio is approximately 1:1.

    That means I might combine 4 ounces of strong brewed coffee with 4 ounces of hot milk for an 8-ounce drink. For a larger serving, the same principle applies.

    The ratio is flexible rather than rigid. If I prefer stronger coffee flavor, I can add a little more coffee. If I want a softer, creamier cup, I can slightly increase the milk.

    The goal is balance. The coffee should still taste clearly present rather than disappearing behind the milk.

    What Kind of Coffee Is Used in Café au Lait?

    Traditional café au lait uses brewed coffee rather than espresso.

    Drip coffee works particularly well for an American-style home preparation because most households already have a standard coffee maker. French press is another excellent choice because it produces a fuller body and keeps more natural coffee oils in the cup.

    Filter and pour-over coffee can also work, although I usually brew them slightly stronger than normal so the flavor remains noticeable after adding an equal quantity of milk.

    Medium-dark and dark roasts tend to pair well with milk. Chocolate, caramel, toasted nut, and brown sugar notes generally remain recognizable even after the coffee is diluted.

    What Milk Works Best for Café au Lait?

    Whole milk produces the richest traditional texture because its fat content gives the drink more body and natural sweetness.

    However, there is no requirement to use whole dairy milk. Reduced-fat milk works well if I want a lighter cup.

    For a dairy-free version, barista-style oat milk is one of my preferred alternatives because it has a creamy consistency and relatively neutral flavor. Soy milk provides good body, while almond milk makes the drink lighter and slightly nutty.

    The milk should be hot but does not need the highly polished microfoam used for a latte. Some cafés steam it lightly, while traditional versions may simply use hot or gently scalded milk with very little foam.

    Café au Lait vs Latte: What Is the Difference?

    The biggest difference between café au lait and a latte is the coffee base.

    A latte uses espresso combined with a relatively large amount of steamed milk and a thin layer of microfoam. Café au lait uses brewed coffee and generally follows a more balanced 1:1 coffee-to-milk ratio.

    That creates noticeably different flavors. A latte has concentrated espresso underneath a creamy milk texture, while café au lait tastes more like traditional brewed coffee softened and enriched with hot milk.

    Because brewed coffee plays such an important role in the final taste, I also pay attention to grind size, water temperature, and freshness to maximise coffee brew quality before adding the milk.

    For Americans who own a drip coffee maker but not an espresso machine, café au lait is also much easier to prepare at

    Café au Lait vs Cappuccino and Flat White

    Café au Lait vs Cappuccino and Flat White

    Cappuccino and flat white are both espresso-based drinks, so they differ fundamentally from café au lait.

    A cappuccino traditionally contains espresso, steamed milk, and a prominent layer of foam. Its airy milk texture is one of its defining characteristics.

    A flat white also uses espresso, often with finely textured microfoam. It usually has less foam than a cappuccino and a stronger coffee-to-milk flavor than a typical latte.

    Café au lait has little or no thick foam and depends on brewed coffee rather than espresso, giving it a softer but still coffee-forward profile.

    Is Caffè Misto the Same as Café au Lait?

    For American coffee drinkers, Caffè Misto is one of the closest equivalents.

    The term became particularly familiar through Starbucks, where a Caffè Misto combines brewed coffee with steamed milk. The preparation is conceptually very similar to café au lait and commonly uses approximately equal amounts of each.

    The terminology differs more than the basic idea.

    If I order a Caffè Misto in the US, I expect something much closer to café au lait than to a latte because the drink starts with brewed coffee rather than espresso.

    What Is New Orleans Café au Lait?

    New Orleans has developed one of America’s most recognizable regional versions of café au lait.

    New Orleans café au lait traditionally combines coffee with roasted chicory and hot or scalded milk. Chicory contributes a roasted, earthy, slightly bitter character that makes the drink distinct from a standard French preparation.

    The drink is strongly associated with the city’s café culture and is famously paired with beignets.

    For me, this variation is especially useful when explaining what café au lait is to a US audience because it shows how the French concept evolved into something uniquely connected to American regional food culture.

    How Does Café au Lait Compare With Café con Leche?

    Café con leche is another coffee-and-milk drink, but its preparation varies across Spain, Latin America, and US communities.

    It is commonly made with stronger coffee or espresso-style coffee combined with hot or scalded milk. Depending on the region, the coffee flavor can be more intense than in a traditional French café au lait.

    Both drinks share the idea of combining strong coffee with heated milk, but their coffee base, cultural traditions, and proportions can differ.

    How to Make Café au Lait at Home

    How to Make Café au Lait at Home

    I start by brewing strong coffee using a drip machine, French press, or pour-over brewer.

    While the coffee brews, I warm an approximately equal quantity of milk. I keep it hot but avoid aggressively boiling it because overheated milk can develop a cooked taste.

    I then combine equal portions of coffee and milk in a large mug.

    If I want a slightly more café-like texture, I lightly froth or steam the milk before pouring it. I do not aim for a thick cappuccino foam because café au lait should remain smooth and relatively flat on top.

    The result is a simple homemade drink that requires no espresso machine and very little specialized equipment.

    Does Café au Lait Have More Caffeine Than a Latte?

    Not necessarily.

    A latte contains espresso, while café au lait contains a larger quantity of brewed coffee. Because brewed coffee and espresso have different caffeine concentrations and serving sizes, either drink can contain more caffeine depending on how it is prepared.

    A large café au lait made with several ounces of strong drip coffee may contain as much or more caffeine than a small single-shot latte.

    The beans, brewing method, serving size, and number of espresso shots all influence the final amount.

    Frequently Asked Questions (FAQs)

    Is café au lait just coffee with milk?

    It is similar, but café au lait usually follows a deliberate preparation using strong brewed coffee and a substantial amount of hot milk, often close to equal proportions. Regular coffee with milk might contain only a small splash.

    Does café au lait contain espresso?

    Traditional café au lait generally does not contain espresso. Brewed coffee is one of its defining characteristics.

    Does café au lait have foam?

    It may have a small amount of foam if the milk is lightly steamed, but it does not normally have the thick foam associated with cappuccino.

    Can I make café au lait with plant-based milk?

    Yes. Oat, soy, and almond milk can all work. I prefer creamy barista-style oat milk when I want a texture closer to whole dairy milk.

    How do you pronounce café au lait?

    A common English approximation is “caf-ay oh lay.”

    Final Thoughts

    When I explain what is cafe au lait, I think of it as one of the easiest ways to turn everyday brewed coffee into a richer café-style drink. Strong coffee and hot milk in roughly equal amounts produce a smooth cup without requiring espresso equipment or complicated techniques.

    It is also useful to compare this drink with other milk-based coffees when learning what a cortado is, because a cortado typically uses espresso with a smaller amount of warm milk, creating a stronger and more concentrated flavor.

    I also like how much regional variation exists. The French version remains simple and breakfast-friendly, while New Orleans adds chicory and scalded milk for a distinctly American identity. Caffè Misto offers another familiar US interpretation, and café con leche shows how other coffee cultures approach the same basic combination differently.

    For anyone who enjoys brewed coffee but wants a creamier cup, café au lait remains one of the simplest classics to make at home.

  • How To Make Ginger Simple Syrup From Scratch: The Fiery Bar Guide

    How To Make Ginger Simple Syrup From Scratch: The Fiery Bar Guide

    Store-bought ginger syrups taste like diluted pancake sugar with an artificial sting. If you want a real, throat-warming kick in your Moscow Mules and sodas, you must learn how to make ginger simple syrup from scratch using fresh, unpeeled rhizomes. 

    I spent years tinkering with syrups behind commercial bars, and most home cooks make the mistake of babying their ginger. You do not need expensive peelers or hours at the stove to extract pure, pungent flavor.

    A balanced ginger syrup requires only three base components: fresh ginger root, filtered water, and sugar. The goal is extracting volatile gingerols without scorching the sugars into bitterness.

    Ingredients and Optimal Ratios

    Ingredients and Optimal Ratios

    The golden ratio for bar-grade ginger syrup is equal parts by volume of fresh chopped ginger, granulated cane sugar, and clean water.

    Component Metric US Standard Role in Extraction
    Fresh Ginger Root 125 g 1 cup, sliced Delivers gingerols, zingerone, and sharp aromatics
    Granulated White Sugar 200 g 1 cup Builds mouthfeel; stabilizes against wild fermentation
    Filtered Water 240 ml 1 cup Solvent for hydrophilic aroma compounds
    Fine Sea Salt 1 g 1 tiny pinch Suppresses astringency and rounds out the heat

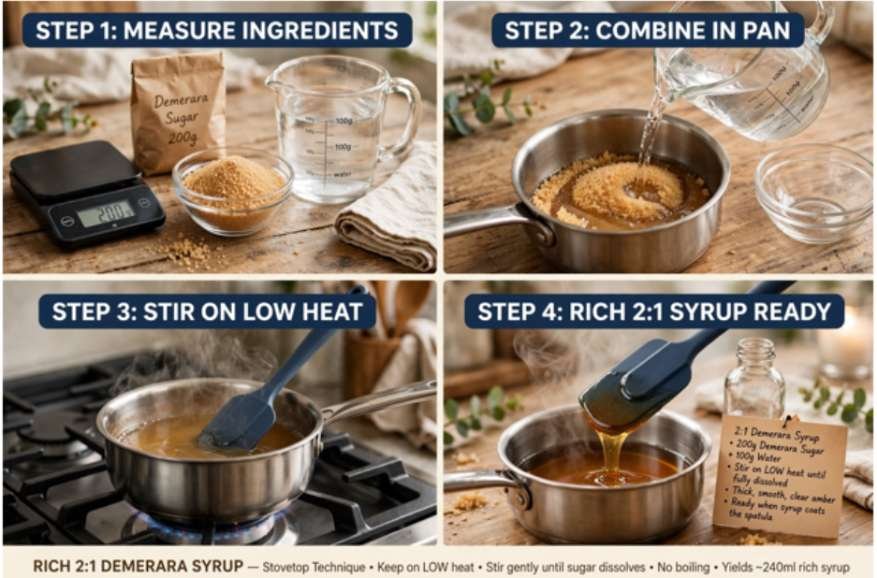
    For deeper cocktails built on bourbon or aged rum, swap granulated white sugar for turbinado or demerara. If you enjoy experimenting with botanicals, master this base first, then explore crafting hibiscus syrup using dried flowers.  

    Why Peeling Ginger Is a Waste of Time

    Scraping ginger with a teaspoon is tedious and strips away aromatic potency. The papery skin contains intense woody notes that balance the fiery interior. Wash and scrub the rhizome under cold water with a stiff brush to remove residual field soil. 

    Slice the unpeeled root into 1/8-inch discs across the grain. Exposing the fibrous cross-sections allows boiling water to wash straight through the cell walls, releasing flavor compounds without tedious prep work.

    Step-by-Step Stovetop Extraction Method

    Step-by-Step Stovetop Extraction Method

    Step Action Temperature Time Critical Checkpoint
    1. Combine Add sliced ginger, water, sugar, and salt to saucepan Medium heat 3–4 min Stir constantly until sugar crystals vanish entirely.
    2. Simmer Cover tightly with a fitted lid Low heat (bare simmer) 15 min Keep covered to prevent aroma loss through steam.
    3. Steep Remove from heat source; leave lid on Ambient cool-down 30–60 min 30 min yields mellow sweetness; 60 min yields intense heat.
    4. Press & Strain Pour through fine mesh into sterilized glass Room temp 2 min Press solids with a muddler to recover trapped juices.

    Stovetop extraction creates a bright, translucent syrup suitable for clear cocktails and delicate teas. Culinary techniques documented by Serious Eats show that maintaining a covered vessel preserves light top-note monoterpenes that otherwise boil off into the kitchen.

    The High-Speed Blender Variation for Maximum Pungency

    The High-Speed Blender Variation for Maximum Pungency

    When you need an aggressive, biting heat for dark spirits, skip the stove simmer entirely. Heat your water and sugar together just until dissolved, then transfer the warm liquid directly into a high-speed blender alongside your raw sliced ginger.

    Blend on high for 45 seconds. The blades pulverize the cellular walls mechanically rather than relying on thermal breakdown. Pass the frothy mixture through a fine-mesh strainer lined with cheesecloth or a nut milk bag. This method creates a cloudy syrup packed with raw, peppery gingerols that rival professional formulations featured in Food & Wine.

    Shelf Life, Stabilization, and Storage Ratios

    Rich sugar syrups act as natural preservatives, but homemade botanical infusions run the risk of yeast spoilage.

    Storage Method Additive / Condition Expected Shelf Life Signs of Spoilage
    Standard Chill Airtight glass jar, 38°F (3°C) 2 to 3 weeks Hazy suspension, sour odor, bubbles
    Fortified Bar Standard Add 15 ml (1 tbsp) 80-proof neutral vodka 60 to 90 days Mold raft on meniscus surface
    Deep Freeze Silicone ice trays, transfer to freezer bag 6 months Freezer burn, loss of aroma

    Glass bottles sanitized with boiling water offer better storage conditions than plastic deli tubs. Plastic absorbs essential oils and speeds oxidation.

    Signature Cocktails and Mocktails

    Signature Cocktails and Mocktails

    A concentrated ginger base allows you to craft balanced drinks without relying on flat canned sodas. Commercial recipe benchmarks from Liquor.com highlight how fresh ginger transforms standard drink profiles.

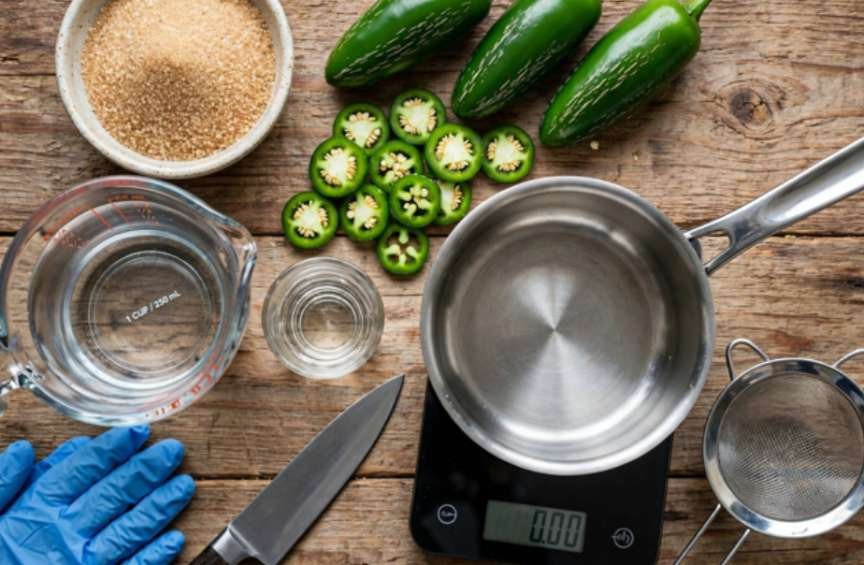
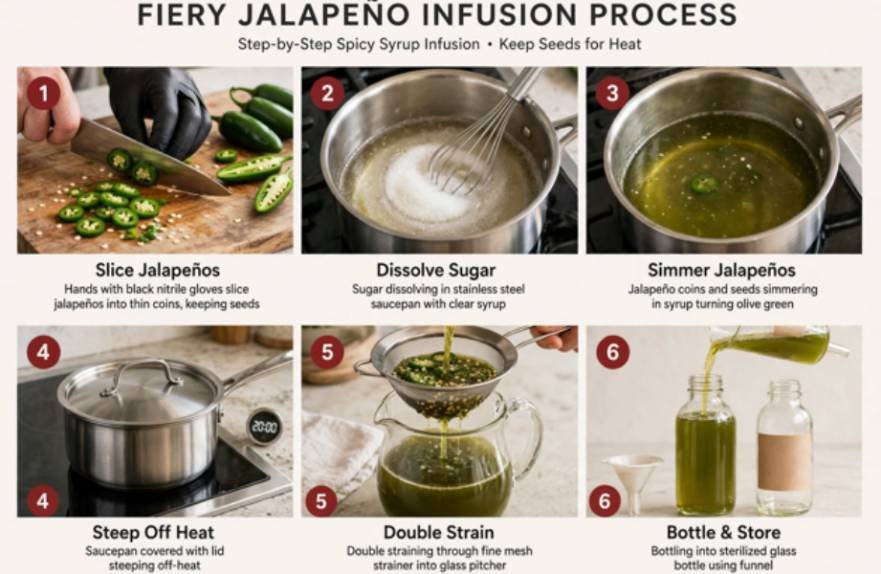
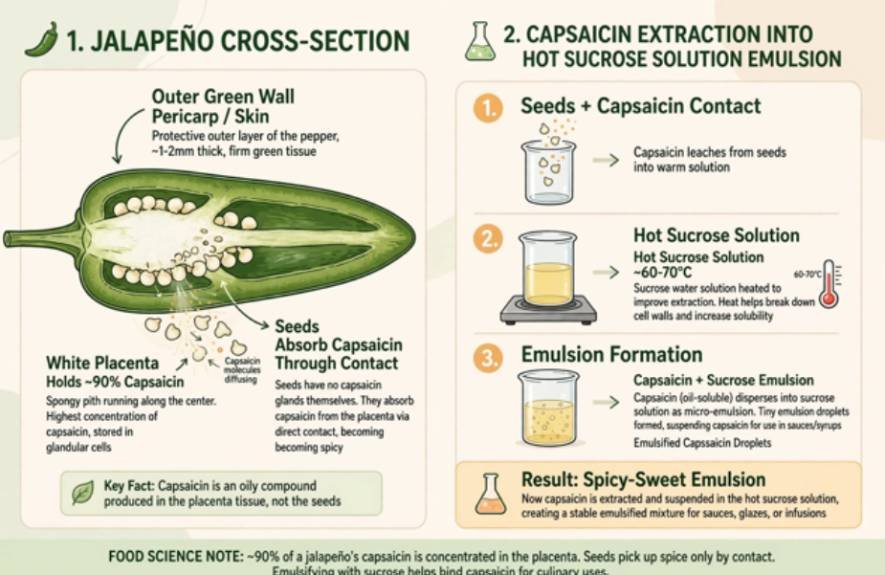
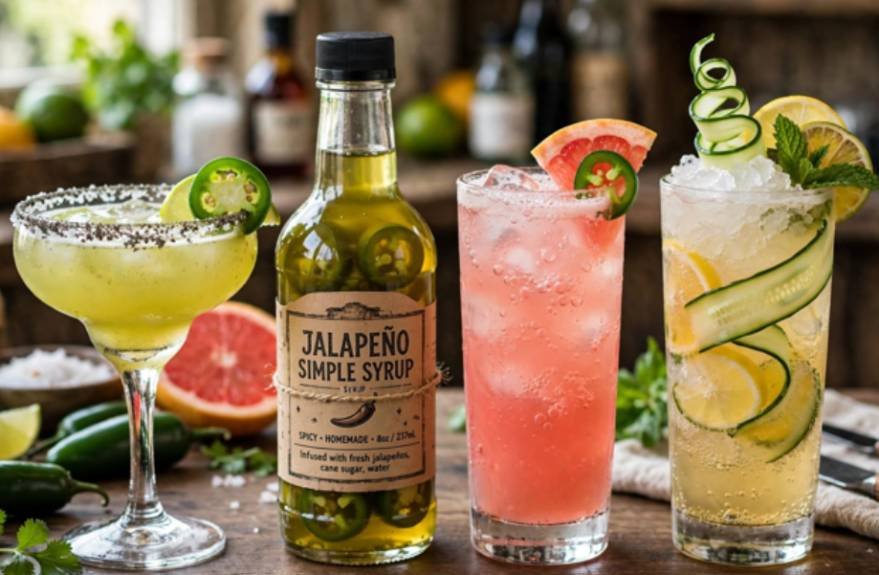
    You can explore the flavor of spicy jalapeno simple syrup for agave-based drinks.

    Drink Name Base Spirit / Liquid Citrus / Acid Ginger Syrup Measure Finish / Soda
    The Penicillin 2 oz Blended Scotch ¾ oz Fresh lemon ⅜ oz Ginger syrup (+ ⅜ oz Honey syrup) ¼ oz Islay Scotch float
    Craft Mule 2 oz Vodka ¾ oz Fresh lime ¾ oz Ginger syrup 3 oz Club soda
    Ginger Palomita (Zero-Proof) 2 oz Pink grapefruit juice ½ oz Fresh lime ¾ oz Ginger syrup 2 oz Topo Chico
    Fiery Cider Fizz 3 oz Crisp apple cider ½ oz Fresh lemon 1 oz Ginger syrup 2 oz Seltzer water

    Frequently Asked Questions

    1. Can I make ginger simple syrup using ground dry ginger?

    No, powdered ginger yields an unappealing, chalky sludge that refuses to strain clear.

    2. How do I make my ginger syrup significantly spicier?

    Blend the raw ginger with warm simple syrup for 60 seconds before straining.

    3. Can I substitute white sugar with raw honey?

    Yes, replace sugar with raw clover honey at a 1:1 liquid ratio without boiling.

    4. What can I do with the leftover ginger pieces after straining?

    Roll the damp pieces in coarse sugar and bake at 200°F for two hours to make candied ginger.

    Stop Settling for Boring Mixers

    Stop buying dull, preservative-laden bottles when a handful of unpeeled roots and twenty minutes at the stove yield liquid fire. Make a batch, fortify it with a splash of neutral spirit, and keep it front-and-center in your refrigerator door. Your next round of cocktails will never taste flat again.

  • Cocktail Foam Without Egg White: Four Reliable Ways to Build a Better Head

    Cocktail Foam Without Egg White: Four Reliable Ways to Build a Better Head

    A thick cocktail foam does not depend on egg white. It depends on ingredients that trap tiny air bubbles and slow them from merging or draining away. That is why chickpea liquid, commercial foamers, lecithin, and hydrocolloid blends can all work.

    For anyone seeking cocktail foam without egg white, the best substitute depends on the drink. A Whiskey Sour needs dense texture; a fruit or tea cocktail may only need a light aromatic cap. The goal is foam that improves aroma, mouthfeel, and appearance without changing the drink’s flavor.

    Why Egg-Free Cocktail Foam Works

    Foam needs a surface-active ingredient around each bubble plus enough viscosity to slow drainage. The Institute of Food Technologists’ food-foam explainer explains that proteins can unfold around air bubbles and form a stabilizing network. Research published by the American Chemical Society similarly describes surface-active proteins as important to foam formation.

    Aquafaba reaches the same destination differently. Research on chickpea cooking water shows that proteins and carbohydrates work together to create foaming and emulsifying properties. A 2025 study found that concentrating aquafaba could improve foam stability because its functional proteins and carbohydrates become more concentrated.

    Hydrocolloids take another route. The FDA’s food-additive guidance identifies xanthan gum as an ingredient used to add texture, while FDA ingredient records describe methylcellulose and gum arabic as stabilizing, thickening, or emulsifying agents. That helps explain why egg-free foaming blends often combine them.

    Which Egg-Free Foamer Should You Choose?

    Option Starting point Result Best for
    Aquafaba 1/2–3/4 oz Dense, creamy Sours
    Commercial foamer Follow label Fine, consistent Fast service
    Soy lecithin Small measured dose Light, airy Spoon-on “airs”
    DIY hydrocolloid foam 1/4–1/2 oz Dense, stable Repeatable cocktails

    Aquafaba is easiest at home. Commercial foamers are fastest. Lecithin suits airy surface foam, while methylcellulose-and-gum blends offer the most control.

    Aquafaba: The Simplest Substitute

    Aquafaba is the liquid from canned or cooked chickpeas. Studies document its ability to form and stabilize foam, although performance changes with chickpea variety, concentration, temperature, and processing.

    For a standard sour, start with 1/2 ounce of unsalted aquafaba.

    If you’re new to mixing at home, these 3 ingredient cocktails for beginners are a good starting point for practicing simple ratios before adding foaming techniques.

    Add the spirit, citrus, sweetener, and aquafaba to a shaker without ice. Shake hard for 10–15 seconds, add ice, shake again until cold, and fine-strain.

    If the head is thin, try 3/4 ounce. If the drink tastes savory, reduce the amount or switch chickpea brands. Campari Academy’s testing also found that aquafaba can provide useful emulsification but may contribute a slight savory character in delicate drinks.

    Why Dry Shaking Helps

    Why Dry Shaking Helps

    The first ice-free shake aerates the foamer before melting ice dilutes the mixture. A reverse dry shake—shake with ice first, strain, then shake again without ice—can also create a smooth, tight head.

    The important variable is agitation. You are physically creating thousands of bubbles and giving the foaming ingredient time to stabilize their surfaces before the drink reaches the glass.

    Commercial Foamers: Best for Speed

    Bottled cocktail foamers are useful when you want predictable results without opening chickpeas or making a batch. Some need only drops or dashes, but there is no universal dose, so follow the manufacturer’s directions.

    Overdosing can make the foam unusually stiff or introduce an aftertaste. If egg avoidance is allergy-related, read the complete ingredient and allergen statement because formulas differ.

    Commercial products are especially practical for occasional home bartenders because they reduce waste. They also make it easier to reproduce the same head across several cocktails during a party.

    Soy Lecithin: Better for Light “Air”

    Soy lecithin is an emulsifier, not a perfect egg-white imitation. Harvard’s Nutrition Source notes that soy lecithin is commonly used to improve texture and mouthfeel in foods.

    In cocktails, a hand blender or frother can turn a low-fat liquid such as juice, tea, or flavored water into a light layer of bubbles.

    That makes lecithin useful for spooned aromatic foam, but less convincing for the creamy body of a classic sour. Because lecithin products vary in concentration and formulation, follow food-use directions and begin with a small measured dose.

    How to Make a Stable DIY Super Foam

    How to Make a Stable DIY Super Foam

    For serious home bartenders, a hydrocolloid blend can create cocktail foam without egg white while keeping sweetness separate from the foaming ingredient.

    A widely published formula uses:

    500 g water
    3 g food-grade methylcellulose
    0.3 g xanthan gum
    20 g gum arabic

    The xanthan amount matters. Some reposted versions show 3 grams, but a published version of this formula uses 0.3 gram—one-tenth as much.

    Heat 160 grams of the water to a gentle simmer. Mix in the methylcellulose, xanthan gum, and gum arabic for about five minutes. Slowly add the remaining 340 grams of cold water and continue mixing until the blend is fully dispersed and hydrated.

    Transfer it to a clean bottle and refrigerate. Start with about 1/4 ounce per cocktail, increasing toward 1/2 ounce if the drink needs more body.

    Campari Academy tested several egg-white substitutes and found methylcellulose solutions especially effective for producing robust texture without a noticeable aroma or flavor.

    Because homemade water-based mixtures do not automatically have validated shelf-life testing, make modest batches, refrigerate them, and discard the mixture if its odor, appearance, or texture changes.

    Use a Three-Glass Test Instead of Guessing

    Make three half-size versions of the same sour. Keep the spirit, citrus, sugar, ice, shake time, and glassware identical. Change only the amount of foamer.

    Compare the drinks after one, five, and ten minutes. Judge foam height, bubble size, liquid separation, aroma, mouthfeel, and flavor.

    This simple test quickly reveals whether you need more foaming power or whether you have already gone too far. The best version is not necessarily the tallest. It is the one whose foam stays attractive while the drink underneath still tastes balanced.

    Mistakes That Make Egg-Free Foam Collapse

    Mistakes That Make Egg-Free Foam Collapse

    Fat can disrupt many foams by interfering with the film around bubbles, so oily shaker residue, creamy ingredients, or oily garnishes may weaken the head. IFT’s food-science material describes the same problem in protein foams.

    Weak shaking, excessive dilution, or too much thickener can also hurt texture. More foamer does not automatically mean better foam.

    If you want to practice balancing cocktails before experimenting with foam, these smoky mezcal cocktails offer useful examples of working with citrus, sweetness, bitters, and dilution.

    Foam also says nothing about alcohol strength. The NIAAA mixed-drink calculator notes that one cocktail can contain one, two, or more U.S. standard drinks depending on the recipe. A fluffy sour can still be a strong drink.

    Frequently Asked Questions 

    1. Can I use chickpea water straight from the can?

    Yes. Unsalted canned aquafaba is easiest. Start with about 1/2 ounce per drink, dry-shake first, and increase slightly if needed.

    2. What is the most neutral-tasting option?

    A commercial foamer or well-made methylcellulose blend is usually more neutral than aquafaba. Test it in a simple sour before using it in delicate drinks.

    3. Can I use a milk frother?

    Yes. It works especially well for lecithin-based surface foams. For a classic sour, a shaker usually integrates the foam more evenly.

    4. Does aquafaba always taste like chickpeas?

    No. Flavor varies by brand and concentration. Unsalted aquafaba is often subtle, though delicate gin or vodka cocktails may reveal it more clearly.

    The Takeaway

    Egg white is one way to create cocktail foam without egg white alternatives being inferior by default—good foam ultimately comes down to bubble stability, texture, and flavor balance. Aquafaba is the easiest starting point, commercial foamers win on convenience, lecithin suits light aromatic airs, and methylcellulose-gum blends offer the most control.

    Measure the foamer, control the shake, and judge the drink again after several minutes rather than immediately after pouring. Once you focus on how the foam behaves instead of simply how tall it looks, egg-free foaming becomes a useful bartending technique rather than a compromise.

  • Honey Simple Syrup 1 to 1 Ratio Recipe: The Bar-Tested Guide

    Honey Simple Syrup 1 to 1 Ratio Recipe: The Bar-Tested Guide

    Raw honey turns into an unyielding, waxy pebble the second it strikes cold liquid. When I developed cocktail menus behind a high-volume bar, guests constantly asked for honey-sweetened drinks, yet shaking raw clover honey with ice leaves half the sweetener stuck to the base of your tin.

    The fix is this tested honey simple syrup 1 to 1 ratio recipe, an equal-parts blend that delivers instant solubility, silky texture, and pure floral nuance without the clumping.

    Why Standard Honey Fails in Cold Drinks

    Why Standard Honey Fails in Cold Drinks

    Honey is a supersaturated sugar solution containing approximately 80% natural sugars and 17% water, alongside trace minerals and aromatic compounds. Cold temperatures cause these sugars—primarily fructose and glucose—to seize up.

    When you dilute honey with water, you drop its viscosity enough for it to disperse across cold iced tea, chilled lattes, and shaken sours. You can read deeper into the moisture profile of raw sweeteners via USDA FoodData Central.

    The Brix Balance: Honey Volume vs. Granulated Sugar

    Most bartenders know that standard simple syrup registers at roughly 50° Brix (50% sugar by weight). When you build a 1:1 honey syrup using equal liquid volumes, you are not hitting 50° Brix. Because honey contains native moisture, a volumetric 1:1 honey-to-water mixture lands closer to 41–43° Brix.

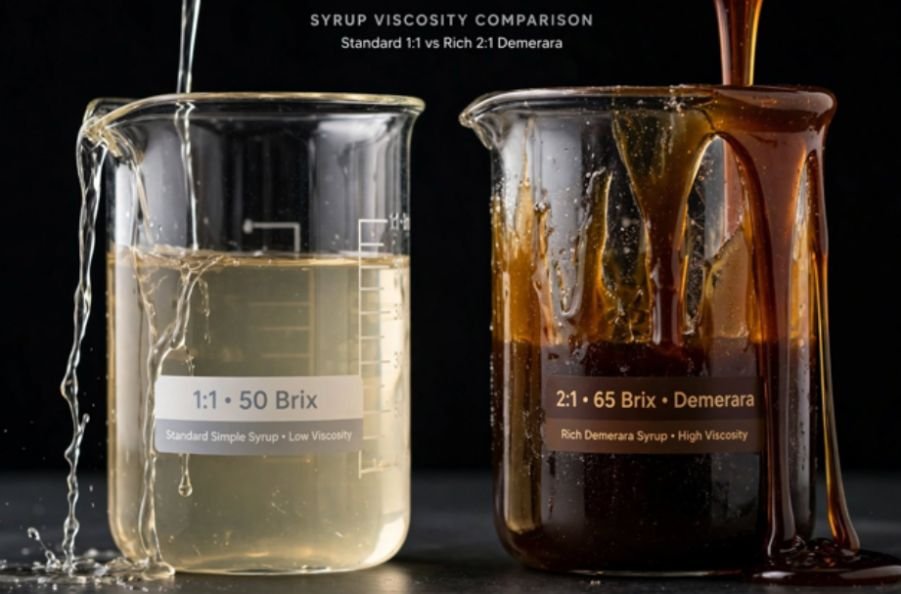
    This means your syrup tastes slightly softer and less intensely sweet ounce-for-ounce than traditional white syrup. If a cocktail calls for rich, heavy body, you might lean toward a rich simple syrup 2 to 1.

    Ingredients and Essential Gear

    Ingredients and Essential Gear

    Great syrup requires only two pantry items and minimal kitchen hardware:

    • ½ cup honey: Clover and orange blossom provide clean, bright floral notes. Wildflower yields a deeper, herbal punch, while buckwheat gives a bold, earthy profile. Consult the varietal guide from the National Honey Board to match varietals with your drink base.
    • ½ cup filtered water: Avoid hard tap water, which contains mineral residues that cloud your syrup.
    • Small saucepan or heat-proof jar
    • Whisk or bar spoon
    • Funnel and glass flip-top bottle

    Step-by-Step: The Low-Heat Method

    Step-by-Step: The Low-Heat Method

    Follow this straightforward stove process for clarity and stability:

    1. Pour equal measures of honey and filtered water into a small saucepan over low heat.
    2. Stir constantly using a small silicone spatula or whisk.
    3. Keep the stove temperature low. Watch the edges closely so the liquid never simmers or bubbles.
    4. Once the honey fully dissolves and the surface looks clear, take the pan off the burner. This step takes roughly 3 minutes.
    5. Let the syrup sit at room temperature for 20 minutes before funneling it into a clean, sanitized glass bottle.

    The 110°F Rule: Preserving Delicate Aromatics

    Heat is the fastest way to ruin exceptional honey. Peer-reviewed research published through ScienceDirect shows that exposing honey to temperatures above 110°F (43°C) rapidly breaks down essential terpenes, pinene, and delicate volatile esters.

    High heat boils away floral top notes, leaving behind a flat, generic sugar water. Warm your pan just enough to lower the viscosity and encourage the water molecules to separate the sugar chains. If the pan feels too hot to touch safely, your heat is set too high.

    The Zero-Heat Shake Alternative

    The Zero-Heat Shake Alternative

    You do not need a stove if your honey is fresh and fluid. Combine equal parts honey and warm tap water (around 105°F) directly inside a clean squeeze bottle or Mason jar.

    Seal the container tightly and shake vigorously for 45 to 60 seconds. The physical agitation disperses the honey without altering its raw biological enzymes or aromatic profile.

    How to Use Your 1:1 Honey Mix in Cocktails and Coffee

    How to Use Your 1:1 Honey Mix in Cocktails and Coffee

    Once chilled, this syrup integrates seamlessly into cold beverages:

    • Bee’s Knees: Shake 2 oz London Dry Gin, ¾ oz fresh lemon juice, and ¾ oz 1:1 honey syrup with ice. Fine strain into a chilled coupe for a balanced, herbal profile.
    • Gold Rush: Shake 2 oz Bourbon, ¾ oz lemon juice, and ¾ oz honey syrup with ice. Strain over a single large cube in an old fashioned glass.
    • Cold Brew Sweetener: Stir 1 tablespoon of honey syrup into 8 ounces of cold brew concentrate and splash with oat milk. Unlike plain honey, it integrates completely without resting on the bottom of your tumbler.

    For a deeper dive into cocktail emulsification and proper dilution dynamics, review the mixology techniques cataloged on Serious Eats.

    Shelf Life, Storage, and Spoilage Signs

    Pure raw honey lasts indefinitely because its ultra-low water activity prevents bacterial multiplication. Once you add equal parts water, you introduce moisture that enables microbial growth.

    Store your cooled syrup in an airtight glass container inside the coldest part of your refrigerator, never in the door. It remains fresh for roughly 3 to 4 weeks.

    Inspect the bottle before pouring. If you notice white fuzz around the neck, cloudiness, active carbonation bubbles, or a fermented sour aroma, discard the batch immediately.

    If a cocktail calls for rich, heavy body you might check out deep molasses notes of a demerara syrup. For bright sours like a Gold Rush or a Bee’s Knees, however, this lighter 1:1 ratio yields clean dilution and balanced acidity.

    Frequently Asked Questions

    1. Can I substitute clover honey with raw local honey?

    Yes, raw local honey works cleanly and retains pleasant indigenous pollen notes.

    2. Why did my honey simple syrup turn cloudy after a week?

    Cloudiness usually points to natural glucose recrystallization from unfiltered honey or early microbial spoilage.

    3. Can I freeze 1:1 honey syrup for longer storage?

    Yes, it freezes solid for up to six months without muting its core flavor profile.

    4. How does honey simple syrup compare to agave nectar?

    Honey syrup offers round floral notes and higher glucose levels, whereas agave delivers concentrated neutral sweetness with higher fructose.

    Shake It Before It Settles

    Keep a sealed 8-ounce squeeze bottle of this syrup sitting on your top refrigerator shelf, and you will never struggle with stubborn sediment in your shakers again. Test a batch with local wildflower honey this weekend, squeeze a fresh lemon, and pull together a clean cocktail that proves why equal-parts simplicity rules behind the bar.

  • How to Froth Oat Milk Without a Frother for Café-Style Foam

    How to Froth Oat Milk Without a Frother for Café-Style Foam

    A carton of oat milk and a cup of coffee can taste completely different once I add a layer of soft, creamy foam. The good news is that I do not need an espresso machine, steam wand, or another countertop appliance to get that texture at home.

    When I figured out how to froth oat milk without a frother, I realized that ordinary kitchen tools could do most of the work. A mason jar creates quick foam, a French press gives me a finer texture, and even a whisk, blender, or immersion blender can turn plain oat milk into a café-style topping.

    The real secret is not expensive equipment. I get better results by choosing the right oat milk, leaving enough room for it to expand, adding air efficiently, and keeping the temperature under control. In this blog, I’ll show the methods I use for both hot coffee and iced drinks, along with the fixes that help when oat milk refuses to foam.

    What Oat Milk Froths Best for Coffee?

    I usually choose refrigerated barista oat milk when I want foam for a latte or cappuccino-style coffee. These products are designed to perform more consistently in coffee, so they tend to create finer bubbles and hold their texture longer.

    Regular oat milk can still froth, although performance varies by brand. If one carton consistently creates thin or unstable foam, I try another variety before assuming my technique is the problem.

    For hot drinks, I usually aim for about 140°F to 150°F. I avoid boiling oat milk because excessive heat can negatively affect its flavor and texture.

    How to Froth Oat Milk in a Mason Jar

    How to Froth Oat Milk in a Mason Jar

    The mason jar method is my simplest option when I do not want to use any special coffee equipment.

    I pour cold or gently warmed oat milk into a clean glass jar, filling it no more than halfway. About one-third full works particularly well because the milk needs plenty of space to expand. Oat milk is also a popular choice when comparing the best non-dairy milk for coffee, especially for people who want a creamy texture without using dairy.

    I secure the lid tightly and shake the jar vigorously for 30 to 60 seconds. The milk should become visibly foamy and increase in volume.

    Next, I remove the lid. If I want hot foam, I microwave the uncovered jar in short intervals for up to about 30 seconds, depending on the microwave’s power and my preferred temperature. Gentle heating after shaking can also help the foam maintain its structure.

    I avoid shaking very hot liquid inside a tightly sealed jar because heat can create pressure. The mason jar generally produces larger bubbles than a French press, but it remains one of the fastest ways to improve homemade coffee.

    How to Froth Oat Milk With a French Press

    When I want finer, creamier foam, I usually choose a French press.

    I first warm the oat milk to approximately 140°F to 150°F. Then I pour it into a clean French press until the carafe is roughly one-third full.

    I pump the plunger rapidly up and down for about 30 seconds, concentrating much of the movement through the upper portion of the milk. As more air enters the liquid, I can usually feel additional resistance.

    Once the milk has expanded and looks creamy, I gently swirl the French press before pouring.

    Of the simple household methods I use, the French press usually creates the closest result to café-style microfoam.

    Can I Froth Oat Milk With a Whisk?

    Yes. A regular kitchen whisk works surprisingly well when I do not have a jar or French press available.

    I gently heat the oat milk to around 140°F to 150°F. I can whisk directly in a small saucepan or transfer the warm milk into a deep bowl if I want more room to work.

    Then I whisk vigorously for about one to two minutes, keeping the whisk relatively close to the surface so it pulls air into the milk.

    The resulting foam is usually lighter than French press foam, but it still adds texture to drip coffee, espresso drinks, and homemade lattes.

    Can I Froth Oat Milk in a Blender?

    Can I Froth Oat Milk in a Blender?

    A blender is particularly useful when I want to prepare more than one serving.

    For hot coffee, I warm the oat milk first, but I only put warm liquid into a blender if the manufacturer specifically says the container can safely handle it.

    I begin on low speed for a few seconds before gradually increasing the speed. Depending on the blender and oat milk, a substantial layer of foam can develop within approximately 20 to 45 seconds.

    If my blender is not designed for warm liquids, I blend refrigerated oat milk instead and heat it separately afterward. This avoids unnecessary pressure buildup inside the blender container.

    How to Froth Oat Milk With an Immersion Blender

    An immersion blender is one of my favorite options for a single serving.

    I pour warm oat milk into a tall container and position the blender head close to the surface. Then I move it gently up and down for around 20 to 30 seconds.

    Keeping the blade near the surface allows it to pull more air into the milk. I prefer a tall container because it helps contain splashes while giving the foam room to develop.

    Why Is My Oat Milk Not Frothing?

    When oat milk refuses to foam properly, I first check the milk itself. Very thin varieties may not hold bubbles as effectively as fuller-bodied or barista blends.

    Temperature also matters. Overheating oat milk can weaken its texture, while filling a mason jar or French press too high leaves too little room for air and expansion.

    I also keep my equipment clean. Oil, food residue, or other buildup on a whisk, blender, jar, or French press can interfere with foam formation.

    Finally, I pour the milk soon after frothing. Even good foam gradually separates and collapses if I allow it to sit too long.

    Hot Oat Milk Foam vs. Cold Oat Milk Foam

    I use warm foam for lattes, mochas, and other hot espresso drinks. Keeping the oat milk around 140°F to 150°F provides plenty of warmth without pushing it toward boiling.

    For iced coffee or cold brew, I usually start with refrigerated oat milk and froth it without heating.

    Cold oat milk foam tends to feel lighter, while warm foam integrates more smoothly with espresso. I choose the temperature based on the drink rather than following one universal frothing rule.

    Which Oat Milk Frothing Method Works Best?

    Which Oat Milk Frothing Method Works Best?

    For me, the French press produces the finest foam, while the mason jar wins for simplicity. A whisk works when I have almost no equipment, a full-size blender is convenient for larger batches, and an immersion blender is ideal when I only need one serving.

    Creating good foam is mainly about controlling air, heat, and milk quality. Paying attention to those three factors has made a noticeable difference in my homemade coffee.

    Frequently Asked Questions (FAQs)

    Can Regular Oat Milk Be Frothed?

    Yes. Regular oat milk can froth, although the texture and foam stability vary between brands. I usually get more consistent results from barista-style oat milk.

    Does Oat Milk Froth Better Hot or Cold?

    Both temperatures can work. I use cold oat milk for iced coffee and cold foam, while I warm oat milk to approximately 140°F to 150°F for hot lattes and espresso drinks.

    Why Does My Oat Milk Foam Disappear Quickly?

    Large bubbles collapse faster than fine foam. Thin oat milk, excessive heat, dirty equipment, or allowing the foam to sit too long can also cause it to break down faster.

    What Is the Easiest Way to Froth Oat Milk at Home?

    I find the mason jar method easiest because it requires virtually no special equipment. When I want finer and more consistent foam, I prefer using a French press.

    Final Thoughts

    Once I learned how to froth oat milk without a frother, I stopped treating an electric milk frother as essential for making better coffee at home. A mason jar gives me convenience, a French press creates finer foam, and a whisk, blender, or immersion blender gives me plenty of alternatives.

    The best results come from leaving enough room for expansion, controlling the temperature, keeping equipment clean, and choosing fuller-bodied oat milk when possible. With those basics in place, I can prepare creamy lattes, iced coffees, cold brews, and cappuccino-style drinks without adding another appliance to my kitchen counter.

  • Homemade Real Grenadine Syrup From Pomegranate Juice

    Homemade Real Grenadine Syrup From Pomegranate Juice

    Commercial bright red bottles ruined an entire generation of classic drinks with high-fructose corn syrup and artificial food dyes. Making your own homemade real grenadine syrup from pomegranate juice restores the crisp acidity, deep ruby hue, and drying tannins that balance spirits properly.

    I stopped buying commercial mixers years ago after tasting an authentic Jack Rose crafted with real reduced pomegranate, and the contrast is night and day.

    Traditional grenadine derives its name from grenade, the French word for pomegranate. When you build this syrup at home with unsweetened juice and pure cane sugar, you produce a rich cocktail modifier that elevates drinks from cloying to complex.

    The Industrial Corn Syrup Lie in Your Bar Cart

    Walk down any grocery store mixer aisle, and you will find bottles filled with water, citric acid, sodium benzoate, Red #40, and high-fructose corn syrup. Most commercial brands contain zero pomegranate juice. They exist purely to dye drinks neon red and drown clean spirits under sticky, artificial sugar.

    Real grenadine provides a tart backbone backed by natural astringency. Pomegranate arils contain punicalagins and tannins, the same compounds that give fine red wine its structured mouthfeel. 

    When mixed into shaken drinks, these tannins bind to citrus oils and mellow harsh alcohol bites. If you enjoy building nuanced cocktail modifiers like an oleo saccharum citrus base for punches, authentic grenadine belongs in that exact same craft rotation.

    Cold Process vs. Gentle Warmth: The Science of Keeping Fruit Bright

    Cold Process vs. Gentle Warmth: The Science of Keeping Fruit Bright

    Home bartenders often make the mistake of boiling their pomegranate mixture down to thicken it. Doing so oxidizes the delicate aromatic compounds and changes fresh fruit juice into heavy, scorched jelly.

    Why Boiling Destroys Pomegranate Polyphenols

    According to nutritional data documented by the USDA FoodData Central, pomegranate juice is packed with heat-sensitive polyphenols and ascorbic acid. Boiling temperatures above 180°F (82°C) rapidly degrade anthocyanins, the pigments that give pomegranate its rich burgundy tone. Boiling also converts clean fructose into caramelized compounds that mute the fruit’s natural snap.

    I use gentle warmth only long enough to dissolve sugar crystals, never letting the pot simmer or boil. Alternatively, you can use a high-powered blender to dissolve the sugar without heating the liquid at all, keeping every crisp, berry-like ester completely raw.

    Dialing in Brix Density for Pour Precision

    Syrup consistency dictates cocktail balance. A standard 1:1 simple syrup measures roughly 50° Brix on a refractometer, while a rich 2:1 syrup hits 66° Brix.

    When you combine equal weights of unsweetened juice and granulated sugar, the natural fruit sugars boost your finished product to around 58° Brix. That specific density yields a clean, silky pour that disperses evenly throughout shaken drinks without dropping directly to the bottom of the glass.

    Ingredients and Ratios for Authentic Pomegranate Grenadine

    Ingredients and Ratios for Authentic Pomegranate Grenadine

    You do not need an entire afternoon or rare equipment to execute this recipe. High-quality inputs yield superior cocktail modifiers, much like brewing a delicate dried lavender simple syrup for floral gin sours.

    • 1 cup 100% pure unsweetened pomegranate juice: Bottled POM Wonderful works reliably year-round due to its consistent pH and acid profile, though freshly squeezed arils produce unbeatable brightness.
    • 1 cup granulated cane sugar: Standard refined white sugar or organic cane sugar lets the pomegranate flavor shine through without introducing the molasses heavy-handedness of dark brown sugar.
    • 1 tablespoon pomegranate molasses: This middle-eastern pantry staple adds concentrated tartness and deepens the final color.
    • 1/2 teaspoon orange blossom water: Popularized by bar professional Jeffrey Morgenthaler, this tiny floral addition introduces authentic Mediterranean nuance.
    • 1 tablespoon high-proof neutral spirit (optional): Adding unflavored vodka or grain alcohol prevents microbial contamination without skewing the flavor profile.

    How I Make Real Grenadine Step by Step

    How I Make Real Grenadine Step by Step

    Start by combining one cup of unsweetened pomegranate juice and one cup of sugar in a small, non-reactive stainless steel saucepan. Keep reactive aluminum pans out of this process; the high acidity of the pomegranate juice will leach metallic notes into your batch.

    Place the saucepan over low heat. Whisk the mixture continuously for three to four minutes until the liquid transitions from cloudy to completely translucent, indicating the sugar crystals have dissolved entirely. Keep the surface quiet and steady; do not let the pan bubble.

    Pull the pot off the stove immediately. Whisk in one tablespoon of pomegranate molasses and a half teaspoon of orange blossom water. Let the syrup rest until it comes down to room temperature. Transfer the dark red syrup into a clean glass bottle using a sanitized funnel.

    Storage, Fortification, and Extending Fridge Life

    Unfortified 1:1 fruit syrups run a high risk of mold formation within a few weeks due to their water content. Standard food preservation recommendations from the National Center for Home Food Preservation highlight that cold temperatures combined with low water activity restrict spoilage organisms.

    Kept raw in a sealed glass bottle in the coldest spot of your refrigerator, real grenadine holds peak flavor for roughly three to four weeks. Stirring in one tablespoon of neutral vodka or unaged brandy extends that freshness past eight weeks. If you build seasonal bar batches, freeze the surplus in silicone ice molds, then pop individual frozen cubes into a sealed bag for year-round access.

    Cocktails Transformed by Real Pomegranate Grenadine

    Cocktails Transformed by Real Pomegranate Grenadine

    Using authentic grenadine completely rehabilitates several historic drinks that commercial mixer syrups ruined.

    • The Jack Rose: Shake two ounces of bonded applejack or Calvados, three-quarters of an ounce of fresh lemon juice, and three-quarters of an ounce of homemade grenadine with ice. The tart pomegranate drys out the robust apple spirit beautifully.
    • Ward Eight: Combine two ounces of rye whiskey, a half-ounce of lemon juice, a half-ounce of orange juice, and two barspoons of grenadine. Real syrup turns this classic Boston cocktail from watery citrus into a vibrant whiskey sour riff.
    • El Presidente: Stir one and a half ounces of aged white rum, one and a half ounces of blanc vermouth, a barspoon of dry curaçao, and a barspoon of real grenadine over ice. The floral pomegranate notes bring elegance without excess sweetness.

    Frequently Asked Questions About Real Grenadine

    1. Can I use brown sugar instead of white cane sugar?

    White cane sugar preserves crisp fruit tartness, whereas brown sugar adds heavy molasses notes that overpower the pomegranate.

    2. Why did my homemade grenadine turn brown instead of bright red?

    Excess heat during cooking oxidizes pomegranate anthocyanins, turning the vibrant red juice a dull brown color.

    3. Can I make grenadine without turning on the stove?

    Yes, combine equal parts juice and sugar in a blender on medium speed for two minutes until dissolved.

    4. How do I know when the syrup has spoiled?

    Discard the batch immediately if you see cloudy sediment strings, floating mold specs, or notice a carbonated fizzy pressure release.

    Shake Off the Neon Bottle Curse

    Reclaiming authentic grenadine turns your bar cart into a temple of genuine flavor rather than a dumping ground for artificial chemicals. Take fifteen minutes this week, warm a cup of unsweetened juice with pure sugar, and mix up a real Jack Rose to experience what this storied syrup was always meant to deliver.

  • How to Make Oleo Saccharum Citrus Syrup (Bartender’s Guide)

    How to Make Oleo Saccharum Citrus Syrup (Bartender’s Guide)

    Learning how to make oleo saccharum citrus syrup unlocks the single most aromatic mixer in classic beverage craft. Citrus juice supplies acidity, but the colored skin holds the plant’s volatile aromatic compounds. When dry sugar pulls those oils out through pure osmotic pressure, you get an electric, concentrated syrup that transforms punches, sodas, and sours.

    Over a decade behind craft cocktail bars taught me that traditional bowl-and-muddler methods waste half the oils. Here is the exact friction-and-vacuum method I use to extract every drop of flavor from discarded citrus rinds.

    The Chemistry of Osmotic Citrus Oil Extraction

    The Chemistry of Osmotic Citrus Oil Extraction

    Oleo saccharum translates directly from Latin as “oily sugar.” The process relies on hygroscopic osmosis. Granulated sucrose draws water and volatile terpenes out of the oil glands located in the citrus flavedo. The primary aromatic compound here is limonene, as detailed by botanical research hosted on the National Center for Biotechnology Information (NCBI).

    Muddling rinds against a ceramic bowl ruptures only the top layer of oil pockets. Surrounding each peel with fine sucrose crystals triggers a slow collapse of the cellular walls. As the sugar dissolves in the escaping moisture, it forms an intensely fragrant liquid solution saturated with cold-pressed citrus oil.

    Why Essential Oils Beat Citrus Juice in Cocktail Architecture

    Citrus juice contains citric and malic acids that alter the pH balance of a drink. Juice spoils within 24 to 48 hours as oxidation sets in, turning bright flavors stale and flat.

    Oleo saccharum captures pure citrus aroma without shifting acidity. You control the tartness of your final drink separately using fresh juice, while the syrup carries the heavy aromatic top notes.

    Unlike cooked syrups, this ambient extraction protects heat-sensitive aromatics, mirroring the technique used by bar directors on Punch Drink.

    Ingredients and Essential Tools for Citrus Oil Extraction

    Ingredients and Essential Tools for Citrus Oil Extraction

    Quality ingredients make a measurable difference in yield. Always reach for unwaxed, organic fruit whenever possible to avoid commercial food-grade shellac or synthetic coatings.

    • Citrus Fruit: 6 medium lemons, naval oranges, grapefruits, or limes
    • Sugar: 1 cup (200 grams) superfine caster sugar
    • Peeling Tool: Sharp carbon steel Y-peeler
    • Container: 1-quart heavy-duty freezer zip-top bag
    • Filtration: Fine-mesh conical strainer and clean glass storage bottle

    Selecting the Right Citrus Variety and Sugar Crystal Size

    Selecting the Right Citrus Variety and Sugar Crystal Size

    Standard granulated sugar crystals are large and sharp, but they take excessive time to dissolve into heavy oils. Confectioners’ sugar contains cornstarch and ruins the syrup. Caster sugar, or superfine baker’s sugar, hits the optimal sweet spot. The smaller surface area accelerates oil dissolution without turning chalky.

    Lemons and grapefruits yield the most punchy, expressive syrups due to their thick flavedo layer. Limes contain delicate aromatics but possess thinner skins that tear easily. Blood oranges and Meyer lemons create rich, floral profiles that pair well alongside herbal infusions like dried lavender simple syrup.

    Step-by-Step Method: The High-Yield Ziplock Technique

    Skip the wooden muddler and mixing bowl. Enclosing the mixture in a flexible plastic bag creates immediate surface-to-surface contact between the crystals and the peels.

    Phase 1: Precision Peeling Without the White Pith

    Precision Peeling Without the White Pith

    Thoroughly scrub your fruit under warm running water using a produce brush to remove dirt. Dry the fruit completely before cutting into it.

    Hold the fruit firmly and glide your Y-peeler across the surface in smooth, shallow ribbons. Remove only the colorful outer skin. The white spongy layer underneath is the albedo, which contains bitter limonin compounds that muddy the bright fruit profile. If you see white pith on the backside of your peeled ribbons, scrape it off gently with a paring knife.

    Phase 2: Maceration, Massage, and Osmotic Rest

    Weigh your prepared peels on a digital kitchen scale. Measure an equal weight of caster sugar for a 1:1 ratio. Transfer both ingredients into the heavy-duty freezer bag.

    Seal the bag, leaving a small opening at one corner. Press out all excess air to pull the plastic tight against the contents, then seal it completely. Massage the bag firmly between your palms for two minutes. You will feel the sugar turn into a wet, abrasive paste as the crystals break open the oil glands.

    Lay the bag flat on your kitchen counter at room temperature. Let it rest for 4 to 8 hours. Shake and knead the bag once every hour to redistribute the pooling syrup over dry patches.

    Phase 3: Straining and Recovering the Trapped Sugar

    Straining and Recovering the Trapped Sugar

    After resting, you will see a pool of rich, translucent liquid surrounding shriveled, translucent peels. Snip a bottom corner off the plastic bag and drain the syrup through a fine-mesh conical strainer into a sanitized glass bottle. Press firmly against the peels using the back of a stainless steel spoon to force out the trapped liquid.

    If undissolved sugar clings to the peels, add one tablespoon of boiling water or fresh citrus juice directly to the bag. Shake vigorously for thirty seconds to dissolve the remaining crystals, then pass that final liquid through the strainer.

    How to Fix, Stabilize, and Store Citrus Oleo Saccharum

    How to Fix, Stabilize, and Store Citrus Oleo Saccharum

    Raw oleo saccharum lasts roughly two weeks in an airtight container kept in the coldest section of your refrigerator. Because the sugar concentration is high, spoilage usually occurs from airborne mold spores rather than yeast fermentation.

    To extend the shelf life to six weeks, stir half an ounce of 80-proof neutral grain spirit or unaged vodka into the finished syrup. The alcohol halts bacterial development without masking the citrus perfume. Never freeze oleo saccharum, as cold separation damages the delicate emulsion between the water content and the suspended essential oils.

    For deep-dive food science on cold-solvent extractions, Serious Eats details extensive tests on sugar-to-peel weight efficiencies.

    Creative Ways to Build Drinks Around Citrus Syrup

    Oleo saccharum acts as an exceptional foundation for large-format punches, where it forms the aromatic base alongside tea, rum, and Cognac, following historical techniques archived on Difford’s Guide.

    In single-serve drinks, swap standard simple syrup for lemon oleo saccharum in a Gin Collins to add depth. For stirred drinks, use orange oleo saccharum in a classic Old Fashioned to replace both the sugar cube and the expressed twist. You can also alternate citrus syrup with herbal bases like fresh mint simple syrup to make crisp sodas and iced teas.

    Frequently Asked Questions About Oleo Saccharum

    1. Can I use brown sugar instead of white sugar?

    Yes, but demerara or brown sugar introduces heavy molasses notes that overpower subtle lemon or lime oils.

    2. How long can oleo saccharum sit at room temperature?

    Let it rest on the counter for a maximum of 12 hours before straining and transferring it into refrigeration.

    3. What should I do with the leftover candied peels?

    Toss the drained peels in extra granulated sugar, let them dry overnight on parchment paper, and use them as garnishes.

    4. Why did my oleo saccharum turn cloudy?

    Cloudiness simply means the citrus oils formed a dense, natural suspension with the dissolved sugar crystals.

    Stop Throwing Out Citrus Peels

    Throwing away citrus peels means discarding the most aromatic portion of the fruit. Turning those skins into oleo saccharum saves kitchen scrap, boosts home bar efficiency, and delivers brighter, more complex cocktails. Grab a bag of lemons, peel them clean, and let the sugar do the heavy lifting tonight.