Blog

  • How to Make Rich Simple Syrup 2 to 1: The Bar Pro’s Guide

    How to Make Rich Simple Syrup 2 to 1: The Bar Pro’s Guide

    Every home bartender eventually hits a wall with watery Old Fashioneds and limp whiskey sours. I spent years wondering why my cocktails tasted thin despite using premium rye and fresh citrus. The culprit was not the liquor; it was the standard 1:1 simple syrup watering down each pour. 

    Learning how to make rich simple syrup 2 to 1 fundamentally changed my drinks. This heavy-density syrup introduces concentrated sweetness alongside luxurious mouthfeel without dumping unwanted water into spirit-forward drinks.

    Why 2:1 Ratio Syrups Outperform Standard Bar Syrups

    Standard simple syrup splits white sugar and water down the middle at a 1:1 ratio. While fine for high-acid long drinks, it introduces unnecessary water into cocktails that require restraint. Rich simple syrup doubles the sugar volume against the water base, producing a concentrated sweetener that behaves differently in a glass.

    The Dilution Problem in Spirit-Forward Cocktails

    Shaking and stirring drinks naturally melt ice, providing essential dilution that opens up ethanol flavors. When your sweetening agent is already 50% water, you lose control over total water volume. According to cocktail science insights detailed on Serious Eats, uncalibrated water in simple syrups causes over-dilution before a drink hits proper serving temperature. Using a 2:1 rich syrup lets your ice chilling do the work it was meant to do without drowning spirit nuances in your favorite classic cocktail recipes.

    Viscosity, Brix, and Mouthfeel

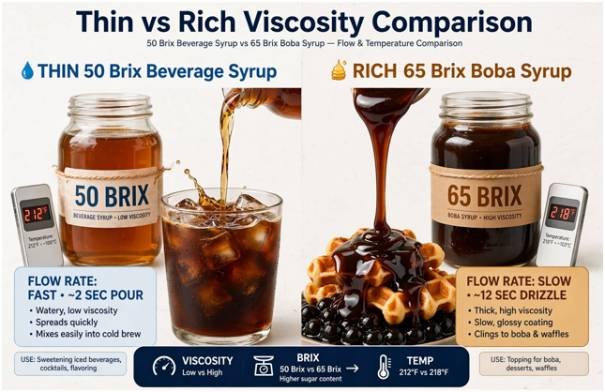
    In professional beverage development, sweetness density is measured on the Brix scale. Standard 1:1 syrup measures approximately 50° Brix. Rich 2:1 syrup sits at roughly 66° to 67° Brix. 

    At this exact concentration, sucrose molecules create noticeable silkiness. The syrup clings to the palate, coats your tongue, and carries aromatic bitters across taste buds with far more weight than standard bar syrup could ever manage.

    Equipment and Ingredient Proportions (Weight vs. Volume)

    Precision dictates consistency. Measuring dry sugar by volume introduces error because granulated crystals pack unevenly depending on humidity and scoop density.

    Metric Imperial (Volume) Metric (Weight)
    White Cane Sugar 2 cups 400 grams
    Filtered Water 1 cup 200 grams

    For the cleanest flavor profile, use pure cane granulated sugar. Demerara or turbinado works wonderfully for dark spirits, but standard white sugar preserves neutral versatility. Always opt for filtered water; municipal chlorine distorts delicate aromatics.

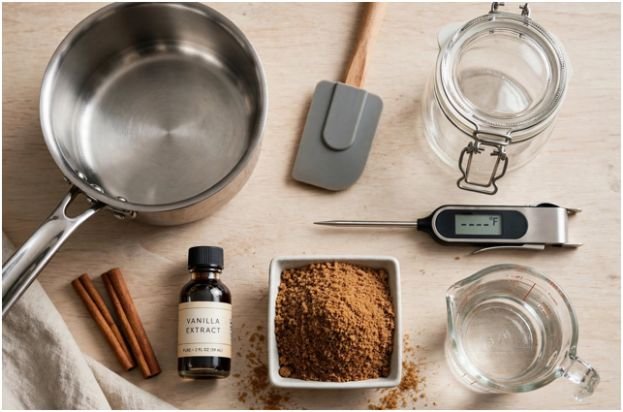
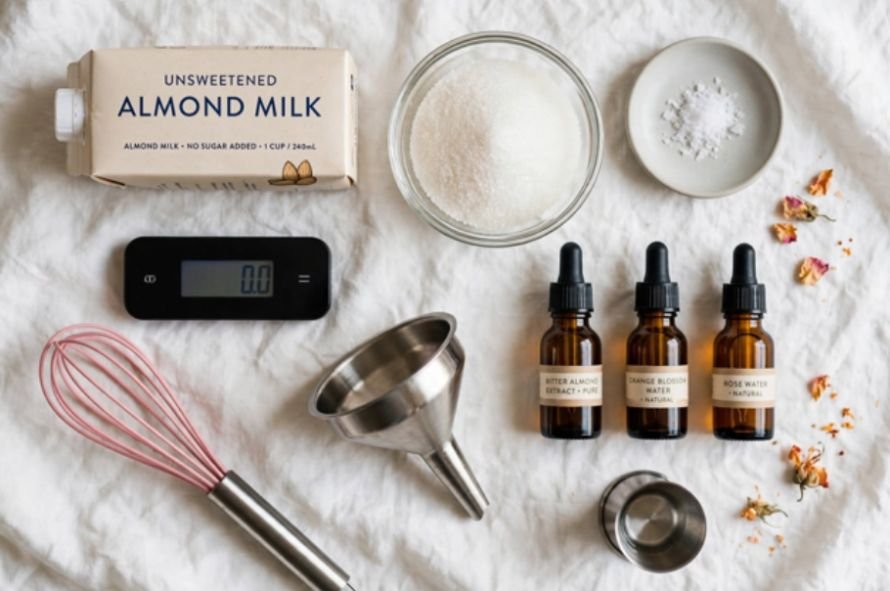
    You need a small saucepan, an accurate digital kitchen scale, a funnel, and a clean glass swing-top bottle.

    Two Reliable Methods to Make Rich Simple Syrup 2 to 1

    Most traditional recipes instruct you to boil your mixture on high. That instruction is wrong. Boiling causes rapid water evaporation, instantly skewing your carefully measured 2:1 ratio into unpredictable candy territory. Here are the two ways I produce crystal-clear syrup behind the bar.

    Method 1: The Gentle Warm Dissolve (Stovetop)

    Method 1: The Gentle Warm Dissolve (Stovetop)

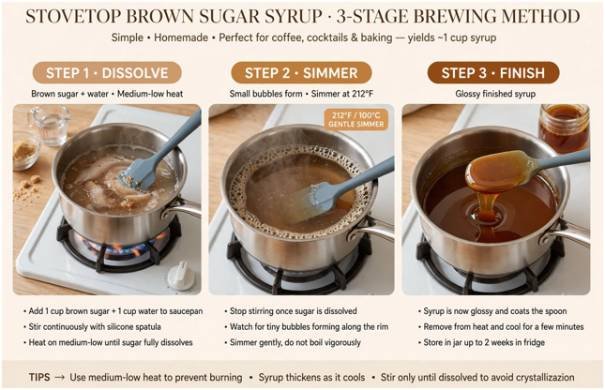
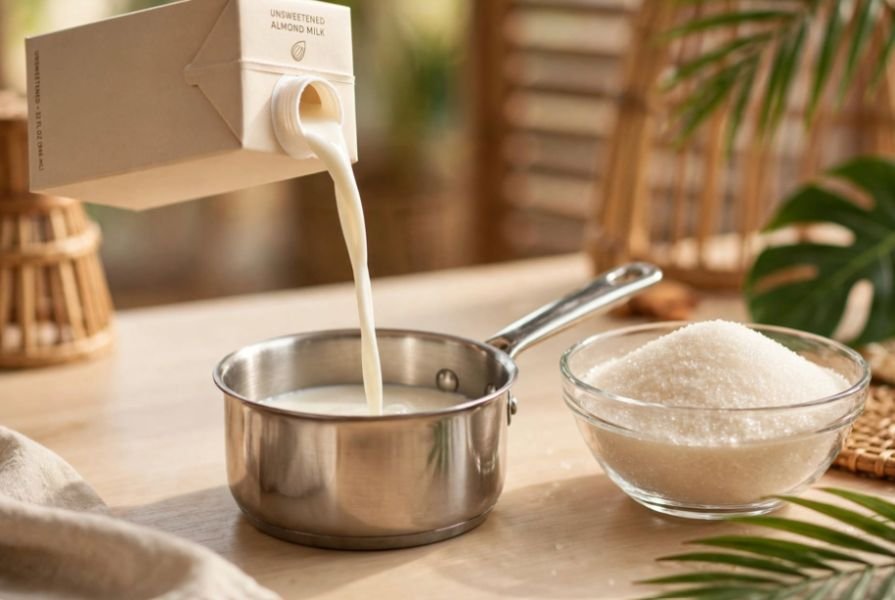
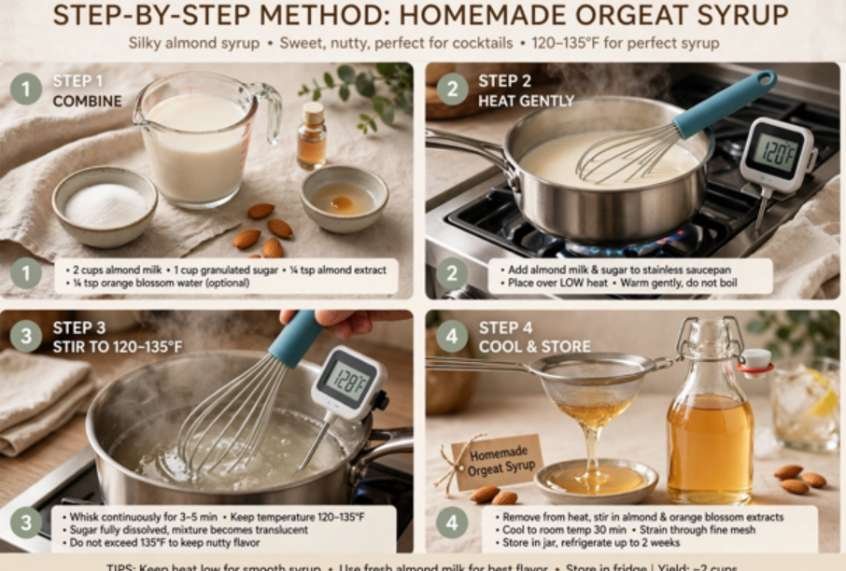
    1. Combine ingredients: Place your saucepan on the digital scale, tare to zero, and pour in 200 grams of water. Tare again, then add 400 grams of white granulated sugar.
    2. Apply low heat: Set your stove burner to medium-low.
    3. Stir continuously: Whisk gently. Keep the liquid moving so the sugar does not settle against the hot bottom and scorch.
    4. Dissolve without boiling: Watch the mixture turn from opaque sludge to clear amber, and finally into transparent liquid. The internal temperature needs to reach only 120°F to 135°F to dissolve sucrose entirely.
    5. Cool and bottle: Remove from heat the instant the liquid turns completely transparent. Let it settle to room temperature, then funnel it into a sanitized bottle.

    Method 2: The Zero-Evaporation Blender Method

    Method 2: The Zero-Evaporation Blender Method

    If you want zero water loss and perfectly uniform syrup, skip the stove entirely.

    Pour 200 grams of warm tap water (about 110°F) and 400 grams of white sugar directly into a high-speed blender jar. Secure the lid tightly and run the blender on high speed for 60 to 90 seconds. 

    The mechanical shear forces and gentle friction dissolve the sugar completely without heating the liquid to evaporation points. Let the micro-bubbles settle for 10 minutes; you will be left with diamond-clear, velvety rich syrup.

    Converting Legacy Recipes from 1:1 to 2:1 Syrup

    You cannot swap rich simple syrup directly into cocktail recipes built for standard 1:1 syrup without over-sweetening your glass. Because 2:1 syrup is roughly 33% sweeter by volume, apply a standard reduction factor:

    $$\text{Volume of 2:1 Syrup} = \text{Volume of 1:1 Syrup} \times 0.75$$

    • If a recipe demands 1 oz of standard simple syrup, use 0.75 oz of rich simple syrup.
    • If a recipe calls for 0.5 oz of standard simple syrup, drop to 0.375 oz (3/8 oz) of rich simple syrup.

    This mathematical tweak cuts the volume of supplemental liquid while hitting the exact intended sweetness, making it a reliable base for experimenting with homemade infused syrups.

    Storage Realities: Shelf Life, Crystallization, and Preservation

    Storage Realities: Shelf Life, Crystallization, and Preservation

    High sugar density makes rich simple syrup naturally shelf-stable. According to water activity data compiled by the USDA FoodData Central, solutions above 65° Brix create an osmotic environment that inhibits most common bacterial and mold growth.

    • Refrigerated: Kept cold in an airtight glass container, 2:1 syrup maintains fresh quality for up to six months.
    • Room Temperature: Safe on a dark bar cart for four to six weeks.
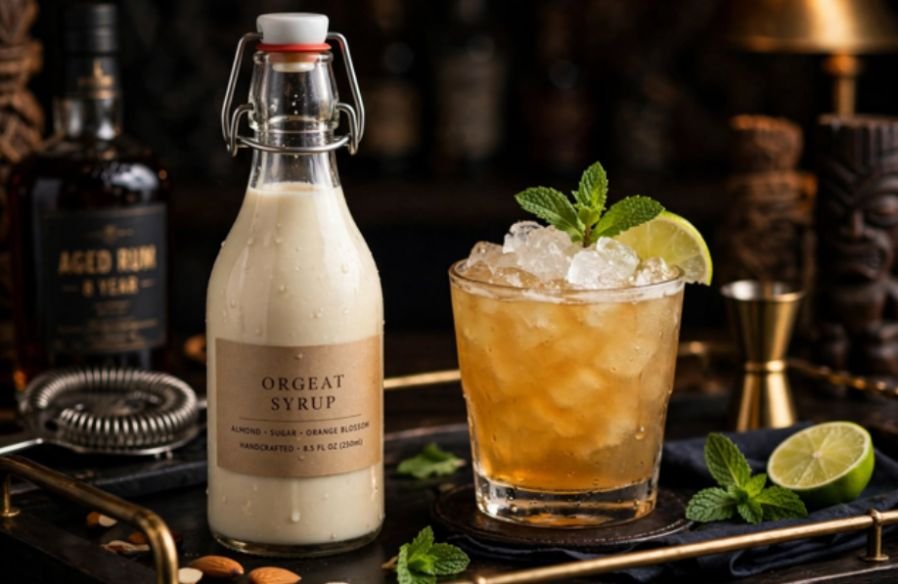
    • The Pro Bartender Hack: Add half a barspoon (roughly 0.25 oz) of high-proof neutral spirit, like unflavored 80-proof vodka, to your finished batch. The spirit prevents surface mold spores from finding traction whenever the bottle opens.

    If white sugar crystals gather around the neck or bottom of the bottle after several months, place the bottle in a warm water bath for ten minutes to dissolve them back into solution.


    Frequently Asked Questions

    1. Can I make 2:1 rich simple syrup using brown sugar or demerara?

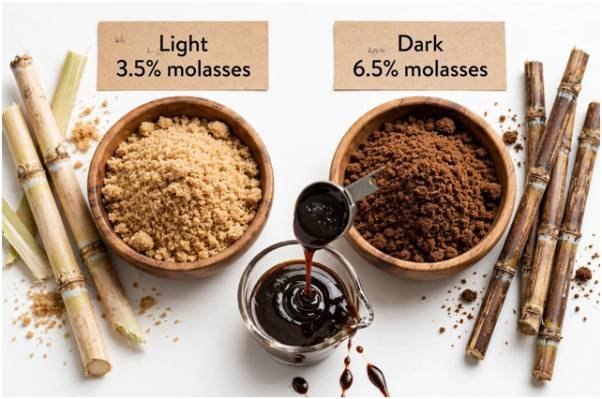
    Yes, using brown or demerara sugar at the exact same 2:1 weight ratio yields a rich, molasses-forward syrup ideal for whiskey and rum cocktails.

    2. Why did my rich simple syrup crystallize in the bottle?

    Crystallization happens when excess water evaporates during cooking or when sugar crusts on the bottle rim seed crystal formation throughout the syrup.

    3. Do I need to boil the water to make 2:1 syrup?

    No, sugar dissolves fully at temperatures well below boiling, and avoiding a boil keeps your measured liquid proportions perfectly accurate.

    4. How long does rich simple syrup last compared to 1:1 simple syrup?

    Rich simple syrup lasts up to six months refrigerated, whereas standard 1:1 simple syrup typically spoils within three to four weeks.

    Stop Diluting Your Drinks

    Ditching watery 1:1 syrup is the single fastest upgrade you can make to your cocktail program. Measure your sugar by weight, dissolve it with gentle heat or mechanical blender shear, and stash it in a clean glass bottle. 

    Once you experience the concentrated punch and velvety glide of true 2:1 rich syrup, standard bar syrups will never touch your shaker again.

  • Why Does My Cold Brew Taste Watery? 7 Fixes That Work

    Why Does My Cold Brew Taste Watery? 7 Fixes That Work

    Few things are more disappointing than waiting overnight for cold brew only to pour a glass that tastes thin and weak. When I hear someone ask Why does my cold brew taste watery, I usually start with three suspects: the coffee-to-water ratio, extraction, and dilution.

    Cold water extracts coffee much more slowly than hot water, so small brewing mistakes can noticeably affect flavor. Too little coffee, an extremely coarse grind, a short refrigerator steep, poor saturation, or too much water and melting ice can all leave cold brew tasting flat. Even choosing the best milk for lattes will not fully fix a weak cold brew base, so I focus on correcting the brew itself first. Fortunately, each problem has a practical fix.

    Is My Coffee-to-Water Ratio Making My Cold Brew Weak?

    The first thing I check is the coffee-to-water ratio. Eyeballing scoops can easily create inconsistent results because different coffees and grind sizes occupy different amounts of space.

    For a cold brew concentrate, I generally start around a 1:4 or 1:5 coffee-to-water ratio by weight. If I want ready-to-drink cold brew, I usually begin closer to 1:8 to 1:10 and adjust from there.

    A digital kitchen weighing scale makes this much easier. Measuring by weight gives me a repeatable recipe, while cups and tablespoons can lead to an unexpectedly weak brew.

    I also make sure I know which style I am making. Concentrate is intentionally strong and designed for dilution. Ready-to-drink cold brew starts with more water and normally needs little or no additional dilution.

    Can Grinding Coffee Too Coarse Make Cold Brew Watery?

    Can Grinding Coffee Too Coarse Make Cold Brew Watery?

    Cold brew usually works best with a coarse grind, but there is a difference between coarse and excessively coarse.

    If the grounds look like rough gravel, the water has less surface area available for extraction. That can leave the brew thin even after many hours.

    I prefer grounds closer to coarse sea salt. If my cold brew is consistently weak, I move the grinder slightly finer rather than immediately adding more brewing time.

    I do not go too fine, however. Fine grounds can create excessive sediment, clog filters, and produce muddy or overly harsh flavors. The goal is a consistent coarse grind that allows steady extraction.

    Does Cold Brew Taste Weak Because It Is Under-Extracted?

    Under-extraction is another common reason cold brew lacks body.

    Cold water pulls soluble compounds from coffee slowly, and brewing temperature matters. If I brew on the counter, 12 to 18 hours can be a useful starting range for many recipes. If I brew entirely in a cold refrigerator, extraction can take longer, so I may extend the steep closer to 18 to 24 hours depending on the grind and ratio.

    I judge the result by taste rather than the clock alone. Once the coffee has the strength and body I want, I can also experiment with the best milk for lattes if I plan to turn the finished cold brew into a creamier milk-based drink.

    How Can I Tell If Cold Brew Is Under-Extracted?

    Weakness by itself does not always mean under-extraction.

    If the coffee tastes watery but otherwise balanced, simple dilution may be the problem. If it tastes thin, sour, grassy, sharp, or hollow, I am more likely dealing with incomplete extraction.

    In that situation, I may steep longer, grind slightly finer, improve saturation, or use a stronger coffee-to-water ratio.

    Can Poor Saturation Cause Weak Cold Brew?

    Yes. Dry pockets inside the coffee bed can prevent water from extracting evenly.

    When I add water, I make sure all the grounds become wet. I gently stir the mixture at the beginning or press floating grounds beneath the surface.

    For a refrigerated batch, a light stir during brewing can sometimes help if the coffee is clearly clumping or floating, but I avoid aggressive or repeated agitation because it can increase sediment.

    A wide brewing container also gives the grounds more room to contact water evenly.

    Am I Diluting My Cold Brew Concentrate Too Much?

    Am I Diluting My Cold Brew Concentrate Too Much?

    Sometimes the brew itself is perfectly fine, but I weaken it while serving.

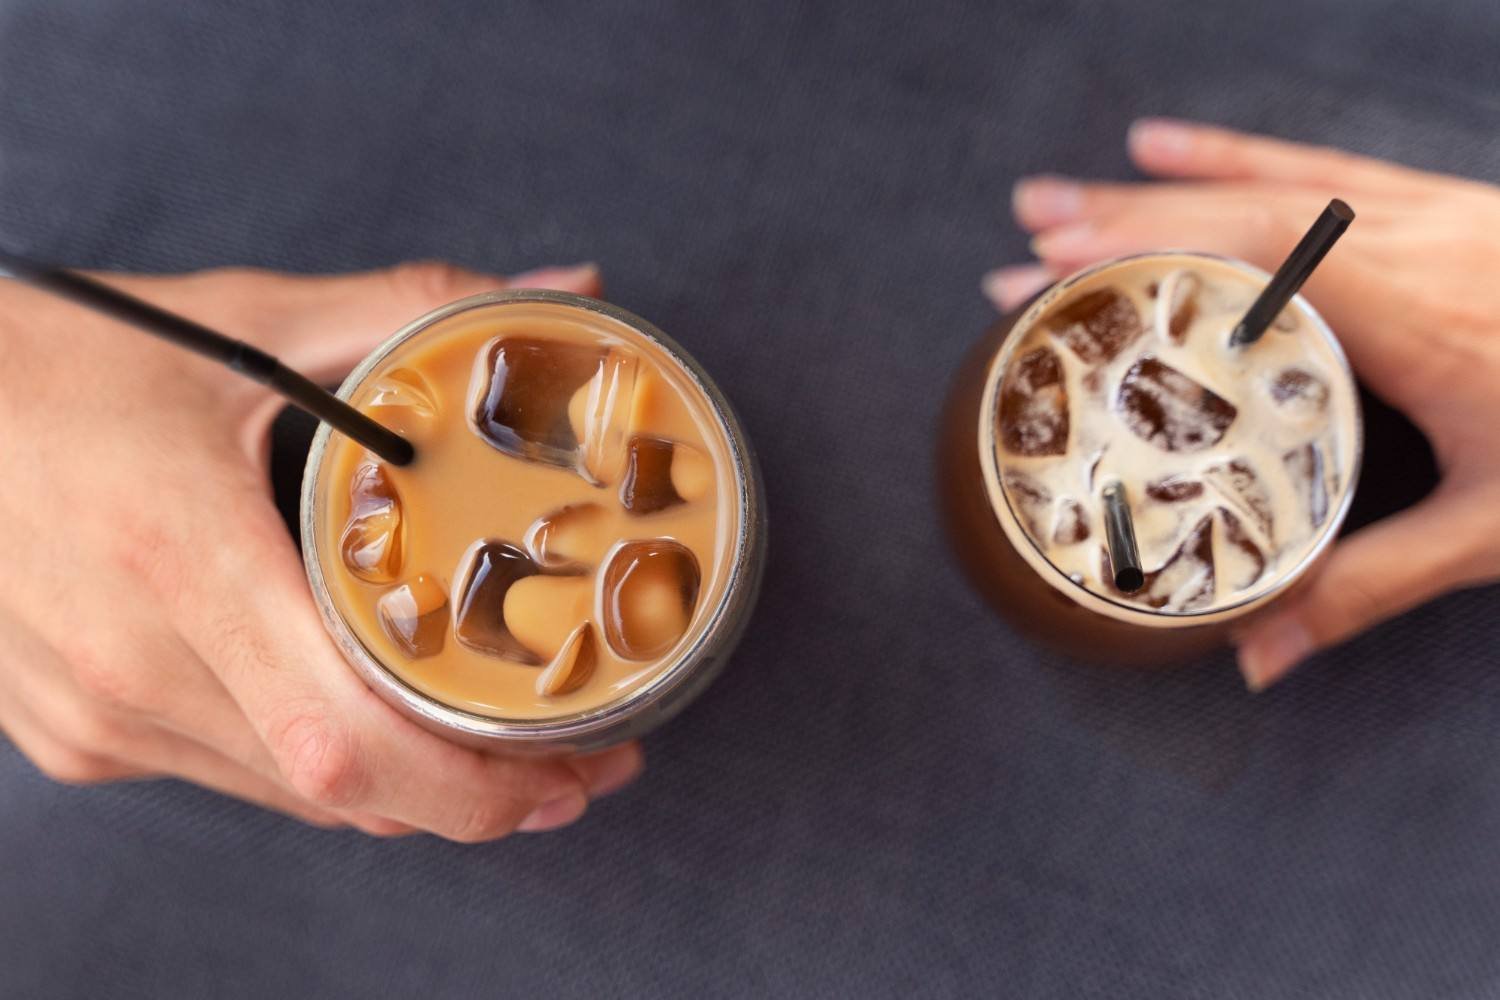
    A 1:1 concentrate-to-water ratio is common, but it is not a rule. Some concentrates taste much better with less dilution.

    I prefer to add water or milk gradually. I pour the concentrate, add a small amount of liquid, taste it, and continue only if needed.

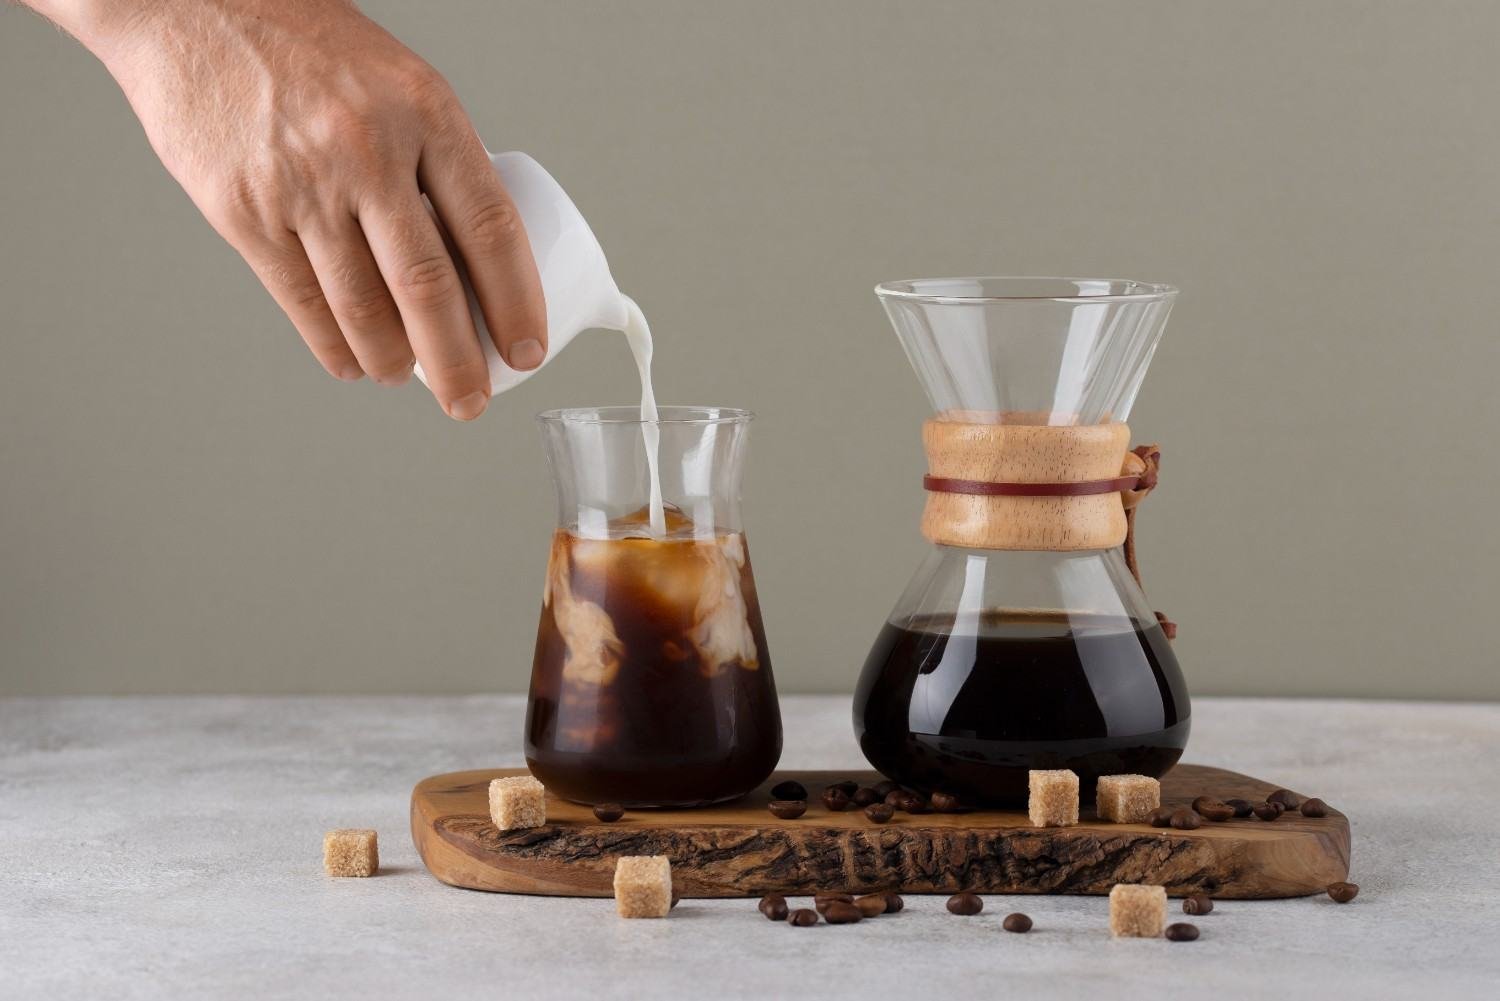
    This is especially important with milk-based drinks because milk contributes its own water while also softening the perceived intensity of the coffee.

    Why Does My Cold Brew Become Watery After I Add Ice?

    If my first sip tastes strong but the drink becomes weak halfway through, ice is usually responsible.

    Small cubes and crushed ice melt quickly, especially during warm US summers. Instead of filling the glass with ice to chill warm coffee, I refrigerate the cold brew first and use fewer, larger cubes.

    Coffee ice cubes work even better. I freeze leftover cold brew in an ice tray and use those cubes in the next glass. As they melt, they maintain the coffee flavor rather than watering it down.

    Can Water Quality Change the Flavor of Cold Brew?

    Because cold brew is mostly water, water quality can make a noticeable difference.

    Strong chlorine flavors or unusual mineral levels in tap water can leave coffee tasting flat or unpleasant. If my tap water does not taste good by itself, I normally use filtered water.

    I also avoid relying on distilled water for everyday brewing. Coffee extraction benefits from some mineral content, and extremely low-mineral water can produce a cup that tastes dull.

    Good brewing water will not fix an incorrect ratio, but it can make an otherwise solid recipe taste cleaner and fuller.

    How Can I Fix Watery Cold Brew I Already Made?

    I rarely throw out a weak batch.

    If the problem is dilution, I simply serve it with less water, milk, and ice. I can also mix the weak brew with a stronger fresh batch.

    Another option is turning the coffee into ice cubes for future iced coffee. Weak cold brew also works surprisingly well in smoothies, protein shakes, iced lattes, baking recipes, and coffee-based desserts.

    If the batch clearly tastes under-extracted, I can steep a small amount of fresh coarse-ground coffee in part of the finished brew for several additional hours. It will not perfectly reproduce a properly brewed batch, but it can add more body and flavor.

    What Is the Best Cold Brew Ratio for Strong Coffee?

    What Is the Best Cold Brew Ratio for Strong Coffee?

    There is no single perfect ratio for every coffee.

    For concentrate, I typically begin around 1:4 or 1:5 by weight. For a ready-to-drink batch, I start around 1:8 to 1:10.

    Roast level, bean origin, grind size, brewing temperature, steep time, and personal preference all influence the final cup. I treat ratios as starting points and adjust one variable at a time.

    That approach helps me identify what actually improved the recipe instead of changing everything at once.

    FAQs About Weak and Watery Cold Brew

    1. Why is my cold brew weak after 24 hours?

    If cold brew remains weak after 24 hours, I check the ratio and grind before extending the brewing time. Too much water or extremely coarse grounds can produce weak coffee even during a long steep.

    2. Should I steep cold brew at room temperature or in the refrigerator?

    Both methods can work. Room-temperature brewing generally extracts faster, while refrigerator brewing may require more time. I adjust the steep based on taste, grind size, and coffee-to-water ratio rather than relying on one universal number.

    3. Can I steep cold brew for too long?

    Yes. A very long steep can eventually produce dull, woody, bitter, or overly heavy flavors. I normally start tasting the brew within the expected extraction window and stop once the flavor is balanced.

    4. Why does my cold brew taste sour and thin?

    Sour, thin cold brew often suggests under-extraction. I would try a slightly finer grind, a longer steep, better initial saturation, or a stronger coffee-to-water ratio.

    How Do I Keep Cold Brew From Tasting Thin Next Time?

    For consistent cold brew, I weigh the coffee and water, use an evenly coarse grind, fully saturate the grounds, allow enough extraction time, and chill the finished drink before serving.

    I also taste the concentrate before adding anything to it. If it already tastes weak, extra water or milk will only make the problem worse.

    Once I control ratio, grind, steeping temperature, saturation, water quality, and serving dilution, I rarely have to wonder why does my cold brew taste watery. A few measured adjustments usually turn a disappointing batch into a richer, smoother cup.

  • Why Does My Cold Brew Taste Bitter? Fix the Flavor Fast

    Why Does My Cold Brew Taste Bitter? Fix the Flavor Fast

    A batch of cold brew can look perfect in the pitcher and still deliver an unexpectedly harsh first sip. I have found that bitterness usually starts with small brewing decisions rather than one major mistake. When I wonder why my cold brew tastes bitter, I check how finely I ground the beans, how long they steeped, the brewing temperature, the coffee-to-water ratio, and even how well I filtered the finished drink.

    Cold brew is often associated with a smooth, mellow flavor, but cold water does not eliminate extraction problems. Fine coffee particles, an overly long steep, very dark beans, stale coffee, warm brewing conditions, or leftover sediment can all push the flavor in the wrong direction. 

    A strong concentrate can also taste bitter when the real solution is simply adding water or milk. Once I identify which issue is responsible, getting back to a balanced cup is usually straightforward.

    Why Does Cold Brew Become Bitter During Brewing?

    Cold water extracts coffee more slowly than hot water, which is one reason cold brew often tastes smoother than traditional hot coffee. However, slower extraction does not mean unlimited extraction.

    The longer coffee grounds remain in contact with water, the more soluble compounds move into the brew. When the process passes the flavor balance I want, bitterness and astringency can become more noticeable.

    Temperature also matters. Cold brew left at room temperature extracts faster than coffee steeped in the refrigerator. That means I pay closer attention to timing when brewing on the counter.

    Am I Steeping My Cold Brew Too Long?

    Am I Steeping My Cold Brew Too Long?

    Over-steeping is one of the first things I check.

    For most batches, I start around 12 to 16 hours. Some recipes work well closer to 18 hours, particularly when brewing in the refrigerator, but I avoid assuming that 24 hours will automatically produce better coffee.

    If my cold brew tastes woody, dry, or aggressively bitter, I shorten the next batch by two or three hours. Room-temperature brewing usually needs more careful timing because warmer water speeds extraction compared with refrigerated brewing.

    Is My Cold Brew Grind Size Too Fine?

    Fine grounds expose more coffee surface area to water. This speeds extraction and creates more tiny particles, or fines, that can pass through a filter.

    For cold brew, I prefer a coarse grind with a texture similar to raw sugar, coarse sea salt, or rough breadcrumbs. A burr grinder usually gives me more consistent particles than a blade grinder, which can produce a mix of large pieces and powdery coffee dust. Grind size matters just as much as choosing the best milk for lattes when I want more control over the final taste and texture of a coffee drink.

    If I see thick sediment at the bottom of my cold brew, grind consistency is one of the first things I change.

    Is My Cold Brew Bitter or Simply Too Concentrated?

    This is an important distinction because cold brew concentrate is supposed to taste intense.

    A ratio around 1:4 or 1:5 coffee to water can produce a strong concentrate designed to be diluted later. For a ready-to-drink batch, ratios closer to 1:8 to 1:10 may produce a more approachable cup, although the ideal ratio depends on the beans, grind, and personal taste.

    When a batch seems bitter, I pour a small amount into a glass and dilute it with cold water. If the harsh flavor disappears, concentration may have been the issue rather than severe over-extraction.

    I can also dilute concentrate with dairy milk, oat milk, or another milk alternative depending on how I plan to serve it.

    Can Dark or Stale Coffee Beans Make Cold Brew Bitter?

    Bean choice matters just as much as brewing technique.

    Very dark roast coffee naturally contains stronger roasted, smoky, and sometimes bitter flavors. Cold brewing may soften some sharp notes, but it cannot remove flavors already created during roasting.

    When I want a naturally sweeter cold brew, I usually choose fresh medium or medium-dark beans with chocolate, caramel, nutty, or brown-sugar tasting notes. Lighter roasts can also work, although they may produce brighter, more fruit-forward flavors.
    Stale or old pre-ground coffee can taste flat, woody, and harsh. I get better results when I store whole beans in an airtight container and grind them close to brewing.

    Can Warm Water or Poor Water Quality Cause Bitter Cold Brew?

    Can Warm Water or Poor Water Quality Cause Bitter Cold Brew?

    Although cold brew does not require ice-cold water throughout the entire process, excessively warm conditions can speed extraction. That matters most when the coffee already has a fine grind or a long steep time.

    Water quality also changes flavor. Since water makes up most of the finished drink, heavily chlorinated or unpleasant-tasting tap water can make the coffee taste worse.

    I prefer clean, good-tasting filtered water. I also avoid assuming distilled water is automatically ideal because some mineral content helps coffee extraction.

    Can Coffee Sediment Keep Making Cold Brew Taste Harsh?

    Tiny coffee particles can remain in the brew even after I remove the main grounds. These fines can make cold brew muddy, gritty, or unpleasantly astringent.

    I often use a second filtration step if the first filter lets too much sediment through. A paper coffee filter can remove fine silt and some coffee oils, producing a cleaner cup than a coarse mesh strainer alone.

    I also avoid leaving finished coffee sitting on spent grounds once the intended brewing time ends.

    Can Dirty Brewing Equipment Make Cold Brew Taste Bitter?

    Old coffee oils can oxidize and create stale flavors. If a cold brew recipe that usually tastes good suddenly becomes unpleasant, I inspect the equipment.

    I thoroughly clean jars, reusable filters, grinder components, lids, seals, and brewing containers. Mesh filters deserve special attention because fine coffee residue can collect inside them.

    Fresh beans cannot fully compensate for equipment coated with old coffee oils.

    How Can I Fix Bitter Cold Brew I Already Made?

    I usually try to rescue the batch before throwing it away.

    My first step is dilution. I gradually add cold water and taste until the flavor becomes balanced. Milk can soften bitterness and increase body, while ice naturally reduces concentration as it melts.

    A small amount of simple syrup can also balance bitterness when I want a sweetened drink. However, if the coffee tastes strongly burnt, stale, woody, or extremely astringent, adding sugar may only cover the problem rather than fix it.

    How Do I Prevent Bitter Cold Brew Next Time?

    How Do I Prevent Bitter Cold Brew Next Time?

    When troubleshooting a bitter batch, I change only one or two variables at a time. Otherwise, I cannot tell which adjustment actually helped.

    I start with fresh beans, a coarse grind, filtered water, and clean brewing equipment. I aim for roughly 12 to 16 hours as a starting steep time, strain the coffee thoroughly, and decide beforehand whether I am making concentrate or ready-to-drink cold brew. Since coffee can also contribute compounds people associate with the nutrition source of coffee, I prefer keeping the brewing process clean and controlled rather than masking poor extraction with extra sugar or heavy add-ins.

    I also refrigerate finished cold brew in a clean, airtight container. Oxidation and long storage can gradually make coffee taste dull or stale even when the initial extraction was good.

    FAQs About Bitter Cold Brew

    1. Why is my cold brew bitter even after only 12 hours?

    A shorter steep does not guarantee smooth coffee. The grind may be too fine, the brewing environment may be warm, the beans may be heavily roasted, or the coffee-to-water ratio may be too concentrated.

    2. Why is my cold brew bitter and weak at the same time?

    This can happen when fine particles over-extract while the overall coffee-to-water ratio remains too diluted. I would try a coarser grind and check the recipe before extending the steep time.

    3. Why does my cold brew taste burnt?

    A burnt taste often comes from very dark roasted beans rather than cold brewing itself. Switching to a medium roast can help determine whether the roast profile is responsible.

    4. Does cold brew become more bitter in the refrigerator?

    Its flavor can change during storage because of oxidation and gradual quality loss. I keep strained cold brew refrigerated in a clean, sealed container and make quantities I can drink while they still taste fresh.

    Final Thoughts

    The answer to why my cold brew tastes bitter is not always simply that I brewed it for too long. Steep time matters, but grind size, water temperature, concentration, roast level, bean freshness, filtration, water quality, equipment cleanliness, and the effect of time and roasting temperature can all influence the final flavor.

    I get the most consistent results by using coarse freshly ground coffee, filtered water, a controlled 12-to-16-hour starting window, proper filtration, and a ratio suited to whether I want concentrate or ready-to-drink coffee. Changing one variable at a time also makes it much easier to find the real cause and produce a smoother, sweeter cup the next time.

  • Best Non-Dairy Milk for Coffee: Taste, Froth & Nutrition

    Best Non-Dairy Milk for Coffee: Taste, Froth & Nutrition

    Walk into almost any US coffee shop or grocery store today, and you will see far more plant-based choices than just soy and almond. Oat, coconut, cashew, pea, hemp, rice, and barista blends all promise better texture, foam, or flavor. When I compare the best non-dairy milk for coffee, I look at taste, creaminess, frothing ability, heat stability, and how well the milk lets the coffee itself come through.

    For most people, oat milk is still the strongest all-around choice. It is creamy, gently sweet, easy to find in US supermarkets, and reliable in lattes and cappuccinos. But the right choice changes if protein, calories, iced drinks, or flavor matter more to you.

    Which Non-Dairy Milk Is Best Overall?

    Oat milk earns my top spot because it comes close to dairy in body without bringing an aggressive flavor. Its subtle sweetness can soften espresso bitterness, while its creamy texture works in drip coffee, iced coffee, cold brew, flat whites, and espresso drinks. If you are learning to make a latte at home, oat milk is also one of the easiest plant-based options to start with because it creates a smooth, creamy result.

    Barista oat milk performs even better because it is formulated to handle steaming and coffee acidity more consistently. Soy can be better when protein and strong foam matter. Unsweetened almond milk suits a lighter cup. Coconut works when I want a noticeable flavor, while cashew can provide neutral creaminess.

    How Do Popular Plant Milks Compare in Coffee?

    How Do Popular Plant Milks Compare in Coffee?

    Milk Flavor Texture Frothing Best Use
    Oat Mild, slightly sweet Thick and creamy Excellent in barista versions Lattes, cappuccinos, everyday coffee
    Soy Mild to earthy Smooth, moderately thick Very good Lattes, drip coffee, higher-protein drinks
    Almond Nutty, sometimes bitter Light and thin Fair Iced coffee, drip coffee
    Coconut Distinct coconut flavor Rich and velvety Fair to good Iced drinks, mochas, dark roasts
    Cashew Mild, subtly sweet Smooth and creamy Good, but brand-dependent Hot or iced coffee

    Pea milk is also worth trying when I want more protein without soy or nuts. Hemp milk has an earthier flavor and can foam reasonably well. Rice milk is mild, but its thin body makes it less useful for lattes.
    Is Oat Milk Better for Lattes and Cappuccinos?

    For most home espresso drinks, yes. Oat milk combines creaminess with a flavor that rarely overwhelms espresso. A good barista version can stretch into smooth microfoam, which helps create the glossy texture used for latte art.

    Soy is the closest challenger because its protein helps stabilize foam. Some soy milks, however, taste earthier and can split in very hot, acidic coffee. Almond milk can foam too, but I prefer a barista blend for lattes because standard versions often feel thinner.

    What Is the Best Plant-Based Milk for Iced Coffee?

    What Is the Best Plant-Based Milk for Iced Coffee?

    Iced coffee changes the priorities because steaming no longer matters. I focus on flavor, body, sweetness, and how easily the milk mixes into cold coffee.

    Oat milk remains my favorite for a creamy iced latte or cold brew. Almond gives a lighter finish, coconut brings a stronger tropical note, and cashew adds body without dominating the coffee.

    Why Does Plant Milk Curdle in Hot Coffee?

    Heat and acidity are the usual causes. When cold plant milk meets very hot, acidic coffee, its proteins can destabilize and separate. Soy and almond milk are especially prone to this.

    I reduce the risk by warming the milk first and letting freshly brewed coffee cool slightly. Another useful technique is to pour the milk into the mug first, then add the coffee slowly. This tempers the milk instead of shocking it with intense heat.

    For home steaming, I avoid overheating plant milk. I generally aim for about 140°F as a conservative target for delicate alternatives, though some barista formulations tolerate somewhat higher temperatures. I follow the carton’s guidance when available because formulas differ.

    Is Barista Edition Plant Milk Really Better?

    If I only add a splash to drip coffee, I usually do not need it. For lattes, cappuccinos, or flat whites, the difference can be meaningful.

    Barista-grade plant milks are designed for coffee. Manufacturers may adjust fat, protein, stabilizers, or acidity regulators so the milk steams smoothly and resists separating. That is why regular and barista versions made from the same plant can behave differently.

    In US stores, I look for terms such as “barista,” “barista blend,” or “extra creamy.” I still check the Nutrition Facts panel because added sugar, calories, sodium, and fortification vary by product.

    Which Dairy-Free Milk Is Healthiest for Coffee?

    Which Dairy-Free Milk Is Healthiest for Coffee?

    There is no single healthiest option for everyone. Soy and pea milk appeal to me when I want more protein. Unsweetened almond milk can suit a lower-calorie cup. Oat milk usually contains more carbohydrates than almond milk but gives a fuller texture.

    In the US, I compare serving size, added sugars, protein, saturated fat, calcium, vitamin D, and vitamin B12 on the Nutrition Facts label. Sweetened and unsweetened versions of the same milk can differ significantly.

    Frequently Asked Questions (FAQs)

    1. What is the best non-dairy milk for coffee if I want a dairy-like texture?

    Barista oat milk is usually my first choice because it combines a creamy mouthfeel, mild flavor, and dependable steaming performance. Soy and pea milk can also provide good body and foam.

    2. What non-dairy milk froths best for latte art?

    Barista oat milk and soy milk are usually the easiest options to work with. Standard almond and rice milk tend to be less forgiving because they are often thinner or lower in protein.

    3. Which non-dairy milk has the most neutral flavor?

    Oat and cashew milk are usually among the least intrusive choices. Pea milk can also taste quite neutral, while coconut, hemp, and some almond milks contribute more noticeable flavor.

    Final Thoughts

    After comparing flavor, texture, foam, nutrition, and heat stability, oat milk remains my strongest all-around choice. It works in hot and iced drinks, feels creamy without becoming too heavy, and performs especially well in barista formulations. For many coffee drinkers, it is the most versatile plant-based milk for coffee because it balances taste, body, and frothing performance so well.

    I would not use one milk for every situation. Soy is excellent when I want protein and strong foam, almond works when I prefer a lighter cup, coconut can enhance bold iced drinks, and cashew offers smooth creaminess. Matching the milk to the coffee style usually makes a bigger difference than simply buying the most popular dairy-free carton.

  • How to Make a Latte Without an Espresso Machine: Café Results at Home

    How to Make a Latte Without an Espresso Machine: Café Results at Home

    A latte can go wrong long before the milk hits the cup. If the coffee is too weak, it disappears under the milk. If the milk gets too hot or foamy, the drink loses that smooth café-style texture. I found that getting those two details right matters far more than owning expensive equipment.

    When I learned how to make a latte without an espresso machine, I stopped trying to copy professional equipment and started focusing on what a good latte actually needs: concentrated coffee and creamy, lightly aerated milk. 

    A Moka pot, AeroPress, French press, double-strength drip coffee, or even instant coffee can provide the base, while a handheld frother, whisk, French press, or jar can handle the milk.

    With the right ratio and a few simple techniques, I can make a rich homemade latte using tools already found in most American kitchens.

    What Is the Quickest Way to Make a Latte Without a Machine?

    For one serving, I start with about 2 ounces of concentrated coffee and 6 to 8 ounces of milk. This creates roughly a 1:3 to 1:4 coffee-to-milk ratio, which gives me enough milk for a creamy texture without completely hiding the coffee. This simple ratio also works well when making a latte at home without an espresso machine.

    I heat the milk to roughly 130°F to 150°F. It should be hot and steamy but never boiling. Then I froth it until it looks smooth and slightly increased in volume.

    Finally, I pour the warm liquid milk into the strong coffee and add the thicker foam on top.

    How Do I Make Strong Coffee for a Homemade Latte?

    How Do I Make Strong Coffee for a Homemade Latte?

    A common mistake is starting with normal-strength coffee. Once several ounces of milk are added, weak coffee can become almost flavorless.

    Can I Use a Moka Pot Instead of Espresso?

    A Moka pot is one of my preferred options because it produces concentrated stovetop coffee with enough intensity to stand up to milk.

    I fill the lower chamber with water according to the manufacturer’s directions, add fine to medium-fine coffee to the basket without tightly tamping it, and brew over moderate heat. About 2 ounces of the finished coffee works well for a single latte.

    The result is not technically espresso because it is brewed at much lower pressure, but the concentrated flavor makes it an excellent espresso substitute at home.

    Can I Make a Latte With an AeroPress?

    An AeroPress is another practical choice.

    I use finely ground coffee with approximately 2 to 2.5 ounces of hot water rather than brewing a full cup. The goal is concentration. After a short brew, I press the coffee directly into my mug.

    Because the finished coffee is stronger than regular drip coffee, it holds up well when I add steamed or frothed milk.

    Can Regular Drip Coffee Work in a Latte?

    Yes, but I make it stronger than usual.

    I typically use more coffee grounds with less water, essentially creating double-strength drip coffee. A medium-dark or dark roast often works particularly well because its stronger flavor remains noticeable after the milk is added.

    Can I Use Instant Coffee Instead of Espresso?

    Instant coffee is the quickest solution when I do not have brewing equipment.

    I dissolve strong instant coffee or instant espresso powder in only a small amount of hot water. For example, I can combine about 1 to 2 teaspoons of instant coffee with approximately 2 tablespoons of hot water.

    I avoid turning it into a regular full cup because the extra water can make the finished latte taste thin.

    How Do I Froth Milk Without a Steam Wand?

    How Do I Froth Milk Without a Steam Wand?

    The milk is what gives a latte its soft, creamy body. Fortunately, several everyday kitchen tools can create foam.

    How Do I Froth Milk With a Handheld Frother?

    I heat 6 to 8 ounces of milk first. Then I position the frother near the surface briefly to introduce air before moving it slightly deeper.

    I stop once the milk looks glossy and lightly foamy. I want smooth milk with small bubbles rather than stiff foam similar to what I might use for a cappuccino.

    Can I Froth Milk With a French Press?

    A French press works surprisingly well.

    I pour warm milk into the press without filling it more than halfway. Then I pump the plunger rapidly for about 30 seconds. The milk expands as air becomes incorporated.

    Afterward, I swirl the milk gently to help larger bubbles disappear.

    Can I Froth Milk Without a Frother?

    Yes. I can use a whisk or jar.

    With a whisk, I vigorously whisk warm milk until a layer of foam develops. For the jar method, I leave plenty of space, secure the lid tightly, and shake for about 30 to 60 seconds.

    The jar method tends to create larger bubbles than a proper frother, but it is useful when I want a latte without buying additional equipment.

    How to Make a Homemade Latte Step by Step

    When someone asks me how to make a latte without an espresso machine, I keep the actual recipe simple.

    First, I prepare approximately 2 ounces of concentrated coffee using a Moka pot, AeroPress, strong French press, double-strength drip method, or instant coffee.

    Next, I heat 6 to 8 ounces of milk to approximately 130°F to 150°F. I avoid boiling it because excessive heat can create an unpleasant cooked flavor.

    I froth the warm milk with a handheld frother, French press, whisk, or jar. Then I pour the strong coffee into a wide mug. I hold back the thickest foam with a spoon while pouring in most of the warm milk, then spoon the remaining foam over the surface.

    For extra flavor, I sometimes add vanilla syrup, caramel, maple syrup, cinnamon, cocoa powder, or brown sugar.

    What Milk Makes the Creamiest Homemade Latte?

    Whole milk is one of the easiest options because it creates a rich texture while still producing foam. Two percent milk makes a slightly lighter drink but also works well.

    For dairy-free lattes, I generally prefer barista-style oat milk. It tends to have more body than many standard plant-based milks and works especially well with coffee.

    Soy milk can also foam effectively because of its protein content. Almond milk creates a lighter latte and can vary considerably between brands.

    When choosing plant-based milk, I look for versions labeled “barista” because they are usually formulated specifically for coffee drinks.

    Why Does My Homemade Latte Taste Weak?

    Why Does My Homemade Latte Taste Weak?

    Weak coffee is usually the problem rather than the milk.

    If my finished latte tastes watery or overly milky, I strengthen the coffee base before reducing the milk. A Moka pot, concentrated AeroPress brew, or instant espresso can solve this quickly.

    I also watch dilution. If I use regular coffee, too much brewing water plus 8 ounces of milk can create a drink that tastes more like warm milk than a latte.

    Why Is My Latte Foam Full of Large Bubbles?

    Large bubbles usually mean I added too much air too quickly.

    With a handheld frother, I keep the tool near the surface only briefly before moving it deeper. After frothing, I gently tap the container on the counter and swirl the milk.

    That simple step helps break up large bubbles and produces a smoother texture.

    Can I Make an Iced Latte Without an Espresso Machine?

    An iced latte is even easier because I do not have to heat or froth the milk.

    I prepare about 2 ounces of concentrated coffee and let it cool slightly. Then I fill a glass with ice, add approximately 6 ounces of cold milk, and pour the coffee over it.

    Vanilla, caramel, brown sugar, or maple syrup can be mixed in before serving. I keep the coffee strong because melting ice will gradually dilute the drink.

    Frequently Asked Questions (FAQs)

    Can I Use Normal Brewed Coffee for a Latte?

    Yes. I recommend brewing it at about double the normal strength so the coffee flavor remains noticeable after adding milk.

    What Is a Good Coffee-to-Milk Ratio for a Homemade Latte?

    I usually start around 1 part concentrated coffee to 3 parts milk. Two ounces of strong coffee with 6 ounces of milk is an easy starting point.

    Can I Make a Latte Without a Milk Frother?

    Yes. A French press, whisk, or sealed jar can create foam without a dedicated milk frother or steam wand.

    Is a Moka Pot or AeroPress Better for Homemade Lattes?

    Both work well. A Moka pot creates a naturally concentrated stovetop brew, while an AeroPress gives me more control over coffee strength and brewing variables.

    Final Thoughts

    Learning how to make a latte without an espresso machine changed the way I make coffee at home. I no longer see professional equipment as essential for getting a rich, creamy drink.

    The biggest difference comes from concentrating the coffee before adding milk. After that, I heat the milk gently, create smooth foam, and keep the ratio around 1:3 or 1:4. Whether I use a Moka pot, AeroPress, French press, double-strength drip coffee, or instant coffee, those basic principles help me create a balanced latte with ordinary kitchen equipment.

  • Best Low-Calorie Coffee Drinks for Flavor Without the Extra Calories

    I do not judge a coffee only by how few calories it has. If the drink tastes thin, overly bitter, or bland, I am unlikely to order it again. What I want is a coffee that still feels satisfying while keeping milk, sugar, syrups, and toppings under control.

    That is why I approach the best low-calorie coffee drinks by looking at the whole cup rather than just the coffee base. A plain cold brew or Americano can stay extremely light, while a carefully customized latte, cappuccino, or shaken espresso can still deliver creaminess and sweetness without becoming a high-calorie dessert. 

    For US coffee drinkers, the key is knowing which drinks start light and which simple café swaps make the biggest difference.

    What Coffee Drinks Have the Fewest Calories?

    Black Coffee and Black Iced Coffee

    Plain hot or iced coffee contains only a few calories when served without milk or sweetener. If black coffee tastes too sharp, I add a small splash of milk instead of loading it with syrup.

    Cold Brew and Nitro Cold Brew

    Cold Brew and Nitro Cold Brew

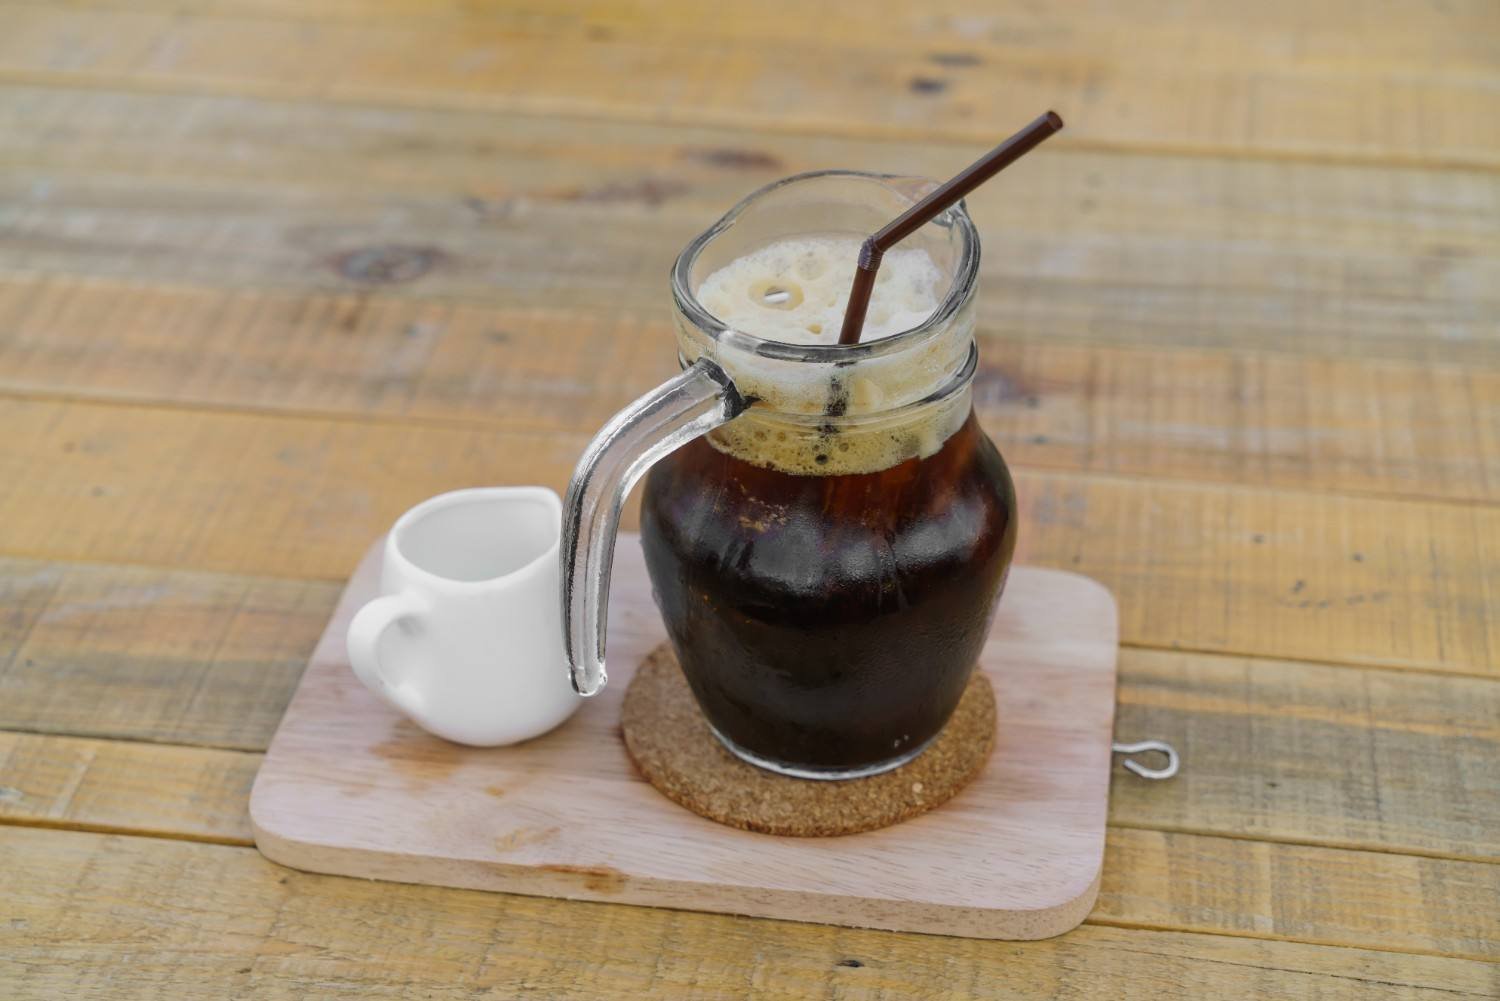
    Cold brew is one of my favorite low-calorie iced coffee options because its smooth profile can taste less harsh without extra sugar. Starbucks currently lists both a grande Cold Brew and a grande Nitro Cold Brew at 5 calories. Nitro gets its velvety texture from nitrogen rather than dairy.

    Caffè Americano and Espresso

    An Americano combines espresso and water, keeping the flavor bold without milk. Starbucks currently lists a grande Caffè Americano at 15 calories and a doppio iced espresso at 10 calories.

    Which Creamy Coffee Drinks Can Stay Around 100 Calories?

    Low-calorie does not have to mean black coffee. The main variables are milk, sweetness, and portion size.

    A cappuccino usually contains less liquid milk than a similar-size latte because foam occupies more of the cup. Starbucks currently lists its standard grande cappuccino at 140 calories, so I would choose a smaller size or lighter milk to get closer to 100 calories.

    A standard grande Iced Shaken Espresso is currently listed at 100 calories. Because it uses espresso, ice, syrup, and only a touch of milk, cutting back on syrup can reduce the total.

    A Caffè Misto combines brewed coffee and steamed milk. Starbucks lists the standard grande at 110 calories, so a smaller serving or lighter milk can move it below that mark.

    For a Skinny Vanilla Latte, I choose nonfat milk and a reduced-sugar or sugar-free flavor option where available. Recipes differ by café, so I never assume “skinny” guarantees a specific calorie count.

    How Do I Order Lower-Calorie Coffee at Starbucks or Dunkin?

    How Do I Order Lower-Calorie Coffee at Starbucks or Dunkin?

    I start with cold brew, iced coffee, espresso, or an Americano and customize from there. Serving size matters because larger drinks usually mean more milk, syrup, and toppings. The FDA also emphasizes that calorie information depends on serving size.

    For sweetness, I ask for fewer syrup pumps instead of removing flavor altogether. At Dunkin, current dietitian-backed ordering advice specifically suggests options such as fewer syrup pumps, sugar-free vanilla syrup, flavor shots instead of flavor swirls, and skipping whipped toppings or cold foams when reducing added sugar.

    I use a similar strategy at Starbucks. Whipped cream, sweet cream, flavored cold foam, sauces, and drizzles can quickly turn a light coffee into a much richer drink.

    Which Milk Is Lowest in Calories for Coffee?

    Unsweetened almond milk is often one of the lighter plant-based choices. Nonfat dairy milk provides protein with less fat than whole milk, while soy milk can offer more protein than many plant alternatives. Oat milk is creamy, but some versions contain more calories.

    Quantity matters too. A splash of whole milk can add fewer calories than a full cup of a lower-calorie milk. When comparing coffee calories by milk, I check both the nutrition label and serving amount rather than assuming one option always wins.

    Are Sugar-Free Coffee Drinks Always Low Calorie?

    No. A drink can use sugar-free syrup and still contain calories from cream, whole milk, sweet cream, whipped cream, or cold foam.

    The FDA distinguishes added sugars from naturally occurring sugars and notes that syrups and other sweeteners can contribute added sugars. I use the same whole-drink approach with coffee instead of relying only on labels such as “skinny,” “sugar-free,” or “nondairy.”

    How Can I Make Coffee Lower in Calories Without Losing Flavor?

    How Can I Make Coffee Lower in Calories Without Losing Flavor?

    I use cinnamon, cocoa powder, vanilla extract, or a small amount of sweetener for extra flavor. Strong espresso and cold brew also stand up well to a modest splash of milk. When I want a creamier drink, choosing the best milk for lattes can also help me balance texture, flavor, and calories without overloading the cup.

    For coffee drinks under 50 calories, black coffee, plain cold brew, unsweetened iced coffee, espresso, and many Americanos are easy starting points.

    For coffee drinks under 100 calories, I focus on smaller sizes, fewer syrup pumps, controlled milk, and minimal toppings. An iced shaken espresso can be a useful starting point, while a smaller cappuccino or modified Caffè Misto can satisfy me when I want something creamier.

    I also pay attention to flavored cold brew. Plain cold brew can contain almost no calories, but sweet cream changes the equation quickly. Starbucks, for example, currently lists its grande Nonfat Vanilla Sweet Cream Cold Brew at 100 calories compared with 5 calories for plain Cold Brew.

    Frequently Asked Questions (FAQs)

    1. What low-calorie coffee drinks work best for everyday use?

    The best low-calorie coffee drinks for everyday use include black coffee, iced coffee, cold brew, Nitro Cold Brew, espresso, and Americano. For something creamier, I modify a cappuccino, shaken espresso, latte, or Caffè Misto.

    2. What coffee can I order for under 50 calories?

    Plain brewed coffee, unsweetened iced coffee, espresso, cold brew, Nitro Cold Brew, and many Americanos can stay below 50 calories without substantial milk, syrup, or cream.

    3. Is cappuccino lower in calories than latte?

    It often can be because cappuccino typically contains more foam and less liquid milk than a similar-size latte. The exact calorie difference still depends on cup size, milk choice, and the coffee shop’s recipe.

    4. Is cold brew good for a low-calorie diet?

    Plain cold brew can be extremely low in calories. Sweet cream, flavored syrup, cold foam, milk, and sugar raise the total, so I check those additions rather than judging the drink by the coffee base alone.

    Final Thoughts

    I do not think a lighter coffee order has to taste plain. I start with a low-calorie base and spend the calories on additions I actually enjoy. Sometimes that means a 5-calorie cold brew with a splash of milk; other times it means a smaller creamy drink made with milk alternatives and fewer syrup pumps.

    By watching serving size, milk, added sugar, sauces, toppings, and the type of milk I choose, I can make the best low-calorie coffee drinks fit my taste without letting a simple morning coffee quietly become a dessert.