Author: Harper Ellison

  • Cocktail Shaker vs Mason Jar Substitute: What Actually Works?

    Cocktail Shaker vs Mason Jar Substitute: What Actually Works?

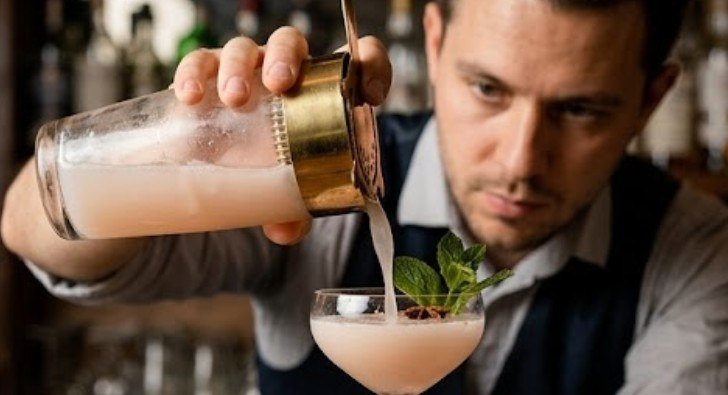
    A cocktail shaker is not magic. Its job is to move ice rapidly through liquid so a drink becomes cold, diluted, and—when needed—aerated. That makes the cocktail shaker vs mason jar substitute question surprisingly simple: a sturdy, tightly sealed mason jar can make a very good shaken cocktail.

    The trade-off is convenience. A real shaker handles repeated rounds better; a mason jar is the useful workaround when you want one or two drinks without buying barware.

    What Shaking Actually Does

    Shaking performs three jobs at once: chilling, dilution, and mixing. Ice absorbs heat and melts slightly, adding water. Vigorous movement also combines ingredients that do not blend as easily with gentle stirring, including citrus juice, syrup, cream, or egg white.

    That is why a jar works. The liquid and ice mainly need enough empty space to move.

    A metal shaker still has an advantage. Stainless steel makes exterior temperature changes easier to feel. Glass gives less obvious feedback.

    For many citrus-forward cocktails, roughly 10 to 15 seconds of vigorous shaking with plenty of ice is a practical starting point.

    Cocktail Shaker vs Mason Jar Substitute: Side-by-Side

    Feature Cocktail shaker Mason jar
    Seal Built for repeated shaking Reliable if lid and threads are sound
    Chilling feedback Easy to feel through metal Less obvious through glass
    Straining Built-in or works with a strainer Lid can be offset carefully
    Grip Designed for handling Can become slippery
    Durability Metal resists breakage Glass may chip or crack
    Best use Frequent cocktail making Occasional home mixing

    If you mix drinks weekly or entertain often, a proper shaker earns its space. If you make a margarita occasionally, a mason jar may be enough.

    How to Shake a Cocktail in a Mason Jar

    How to Shake a Cocktail in a Mason Jar

    1. Inspect the Jar

    Use a genuine canning-style jar in good condition, not a thin decorative jar or reused commercial food container. Look for chips, cracks, scratches, or damaged threads.

    The National Center for Home Food Preservation’s guidance on recommended jars and lids explains that Mason-type home-canning jars are designed for repeated use, while some commercial jars have a greater risk of breakage.

    Penn State Extension also advises inspecting jars carefully because repeated use, age, heat exposure, and tiny hairline cracks can gradually weaken the glass. Its guidance on Mason canning jars is particularly useful if the jar has been in your kitchen for years.

    2. Measure Before Adding Ice

    Pour spirits, citrus, syrup, and other noncarbonated ingredients into the jar first. Accuracy matters more than the container.

    In the United States, the National Institute on Alcohol Abuse and Alcoholism defines one standard drink as containing 0.6 fluid ounces, or 14 grams, of pure alcohol. About 1.5 ounces of 80-proof distilled spirits is one common equivalent. Its U.S. standard drink guidance is helpful because homemade cocktails may contain more than one standard drink even when served in a single glass.

    That makes measuring with a jigger, tablespoon, or marked measuring cup more reliable than free-pouring into a large jar.

    3. Leave Room for Movement

    Add plenty of ice, but do not fill the jar completely to the brim. You need some empty space so the cubes can travel through the liquid rather than sitting in an immovable block.

    Large, solid cubes generally melt more slowly than crushed ice, while smaller pieces offer more surface area. Whatever ice you use, the key is creating enough movement to cool and dilute the drink efficiently.

    4. Seal and Shake

    Seal and Shake

    Tighten both parts of the lid. Turn the jar sideways over the sink briefly to check for leaks before shaking aggressively.

    Then hold it with two hands and shake vigorously for roughly 10 to 15 seconds.

    Condensation can make glass slippery, so grip matters more with a jar than with a purpose-built metal shaker. A dry dish towel around the outside can provide extra control if the surface becomes difficult to hold.

    5. Strain Without Special Bar Tools

    Remove the screw ring and shift the flat lid just enough to create a narrow pouring gap while keeping the lid securely against the jar.

    That improvised opening can hold back larger ice cubes.

    If your cocktail contains citrus pulp, muddled herbs, berry seeds, or small ice fragments, pour it through a small kitchen sieve. The result will be cleaner than relying on the Mason jar lid alone.

    The Safety Rules That Matter With Glass

    A mason jar is still a glass container, not an indestructible piece of bar equipment.

    NSF’s discussion of glass and glass-like beverage ware safety identifies breakage and sharp glass fragments as physical hazards associated with glass tableware. That makes inspecting your jar before vigorous shaking more than a cosmetic precaution.

    Avoid sudden temperature changes. Do not take a hot jar and immediately pack it with ice, and never pour boiling or very hot liquid into a jar and seal it for shaking.

    Carbonation is another important exception. Never shake club soda, tonic water, sparkling wine, beer, or another carbonated ingredient inside a sealed jar. Agitation encourages dissolved carbon dioxide to escape into the available space, increasing internal pressure.

    Shake the noncarbonated ingredients first, pour them into the serving glass, and add the fizzy component afterward. The same practice is sensible with a traditional cocktail shaker.

    When a Real Cocktail Shaker Is Worth It

    When a Real Cocktail Shaker Is Worth It

    A proper shaker becomes noticeably better when you prepare several drinks in a row. Metal opens faster, tolerates bumps better, and works naturally with cocktail strainers.

    It is also easier for foamy drinks. Egg-white sours may require particularly vigorous shaking, sometimes in more than one stage. A mason jar can create foam, but its threaded lid is slower and messier to handle.

    Food safety matters more than the choice of container here. The FDA recommends using pasteurized eggs or pasteurized egg products in recipes where eggs will remain raw or undercooked. Its egg safety recommendations are worth following for homemade sours and similar drinks.

    A Simple Decision Test

    Use the mason jar if you already own a sound canning jar, are making one or two noncarbonated cocktails, and do not mind using a kitchen sieve when necessary.

    Use a cocktail shaker if you mix drinks regularly, want faster service, make foamy cocktails, need cleaner straining, or would rather not shake glass over a hard kitchen floor.

    The misconception to avoid is that a jar automatically makes an inferior drink. Correct proportions, plenty of ice, a secure seal, energetic shaking, and prompt straining generally matter more than the shape of the container.

    Frequently Asked Questions

    Can a mason jar replace a cocktail shaker?

    Yes. A sturdy canning jar with a tight lid can chill, dilute, mix, and aerate most shaken cocktails. Inspect the glass and lid before every use.

    How long should I shake a cocktail in a mason jar?

    About 10 to 15 seconds is a useful starting point. Ingredient temperature, ice size, and the cocktail recipe can change the ideal shaking time.

    Can I shake soda or tonic water in a mason jar?

    No. Shaking carbonated liquid inside a sealed jar can increase pressure. Shake the still ingredients first and add the carbonated mixer afterward.

    Is a mason jar safe for an egg-white cocktail?

    It can be if the jar is sound and clean. For food safety, choose pasteurized egg products when the cocktail contains egg that will remain raw.

    The Takeaway

    The best answer to cocktail shaker vs mason jar substitute is not that one works and the other fails. Both can produce a cold, properly diluted cocktail when the technique is sound. The shaker wins on speed, grip, durability, and effortless straining; the jar wins because it may already be sitting in your cabinet.

    If you use the jar, inspect the glass, avoid temperature shock and carbonation, leave space for the ice, and strain deliberately. Those habits turn an improvised kitchen tool into a dependable one—and keep the attention where it belongs: on the drink rather than the equipment.

  • Smoky Mezcal Cocktail Recipes at Home: 5 Easy Drinks

    Smoky Mezcal Cocktail Recipes at Home: 5 Easy Drinks

    fThe fastest way to ruin mezcal is to make smoke the only thing you can taste. A good mezcal cocktail keeps the spirit’s roasted character visible while giving it something bright, bitter, spicy, or lightly sweet to push against. That is why the most reliable smoky mezcal cocktail recipes at home start with fresh citrus, modest sweetener, and one supporting flavor rather than a long ingredient list.

    Mezcal is not simply “smoky tequila.” Under U.S. regulations, mezcal is recognized as a distinctive Mexican agave spirit. Cornell Legal Information Institute: U.S. agave spirits regulation Its flavor can vary by agave, region, roasting method, fermentation, and still. Rice University notes that traditional earthen-pit cooking is one reason many mezcals develop smoke, while Johns Hopkins highlights how plant variety and place can produce very different results. 

    Why Mezcal Works So Well in Cocktails

    Smoke is powerful, but easy to balance. Acid sharpens it. Agave or honey rounds it. Grapefruit adds bitterness and freshness. Ginger adds heat. Orange peel and bitters pull out earthy, roasted notes.
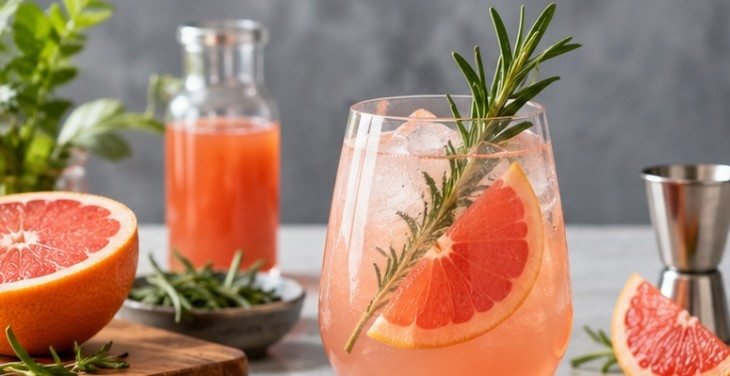
    The Smithsonian’s coverage of maguey culture is a useful reminder that mezcal reflects agricultural and regional traditions, not just a flavor trend. Smithsonian Folklife Festival: El Maguey Taste the spirit before mixing it. A delicate mezcal may disappear in a ginger-heavy drink, while a forceful bottle can overwhelm a simple sour.

    For most home cocktails, start with a joven mezcal made from espadín or another widely available agave. Save rare, expensive bottles for sipping unless you already know how they behave in mixed drinks.

    Use This 30-Second Balance Test

    Pour about ¼ ounce of mezcal and take a small sip. Ask: Is the smoke light, medium, or dominant? Does the spirit taste fruity, herbal, mineral, earthy, or peppery? Does the alcohol feel soft or hot?

    If the smoke is dominant, use more citrus, grapefruit, soda, or a split base with tequila. If it is delicate, avoid burying it under heavy ginger beer, strong bitters, or too much orange liqueur.

    Cocktail Main balance Technique Best for
    Mezcal Margarita Lime + agave Shake First-time mezcal drinkers
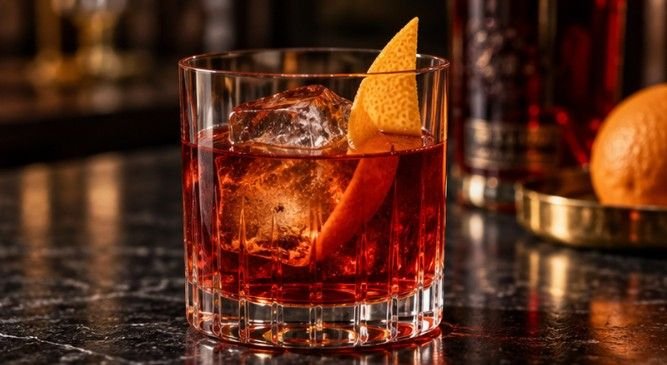
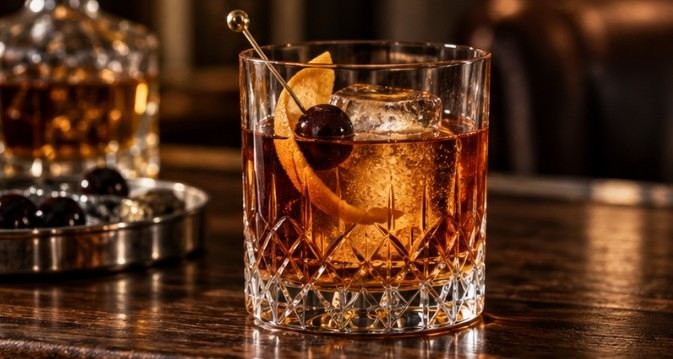
    Oaxaca Old Fashioned Tequila + bitters Stir Spirit-forward drinkers
    Grapefruit Mezcal Highball Grapefruit + soda Build Refreshing drinks
    Ginger Mezcal Mule Ginger + lime Build Spicy flavors
    Smoky Honey Sour Lemon + honey Shake Softening strong smoke

    1. Mezcal Margarita With a Clean Smoky Finish

    Mezcal Margarita With a Clean Smoky Finish

    Use 2 ounces mezcal, 1 ounce fresh lime juice, ½ ounce orange liqueur, and ¼ to ½ ounce agave syrup or simple rich syrup. Shake with ice for about 10 seconds. Strain over fresh ice into a rocks glass with a salt or Tajín rim.

    Start with ¼ ounce agave. Add more only if your lime is especially sharp. Too much syrup flattens the smoke and makes the drink taste generic.

    2. Oaxaca Old Fashioned for Controlled Smoke

    A split base is one of the smartest ways to make smoky mezcal cocktail recipes at home because tequila stretches the agave character while lowering the intensity of the smoke.

    Combine 1½ ounces reposado tequila, ½ ounce mezcal, 1 teaspoon agave nectar, and 2 dashes Angostura bitters in a mixing glass with ice. Stir until chilled, then strain over one large cube. Express an orange peel over the top.

    If the mezcal disappears, increase it to ¾ ounce and reduce the tequila by the same amount.

    3. Grapefruit Mezcal Highball

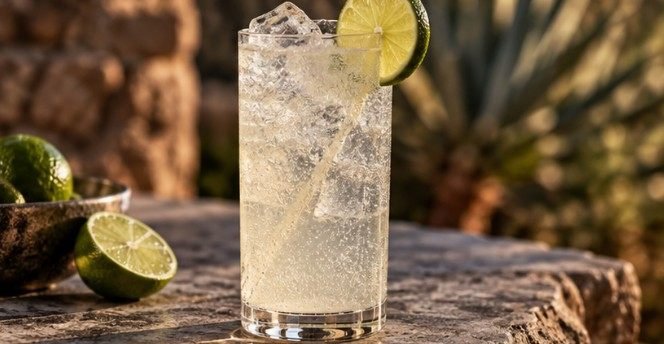
    Mix 1½ ounces mezcal, 1 ounce fresh grapefruit juice, ½ ounce lime juice, and ¼ ounce agave syrup in an ice-filled highball glass. Stir briefly, then top with 2 to 3 ounces chilled club soda.

    A small pinch of salt can make grapefruit taste brighter while softening bitterness. For a sweeter Paloma-style version, replace some or all of the soda with grapefruit soda.

    4. Ginger Mezcal Mule

    Add 1½ ounces mezcal and ¾ ounce fresh lime juice to an ice-filled mug or highball glass, then top with 3 to 4 ounces ginger beer.

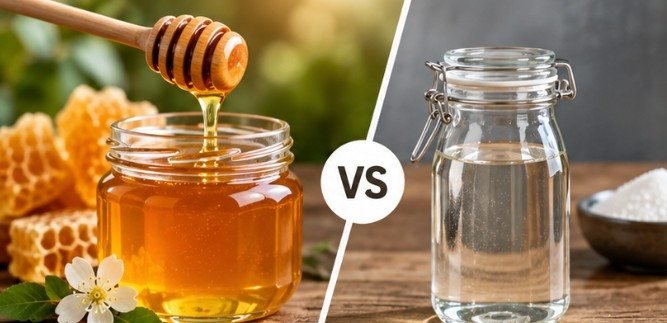
    For a rounder version, add ¼ ounce honey syrup made from equal parts honey and warm water. Straight honey tends to sink in a cold drink. Choose a moderately spicy ginger beer so it does not overpower the mezcal.

    5. Smoky Honey Sour

    Smoky Honey Sour

    Combine 2 ounces mezcal, ¾ ounce fresh lemon juice, and ½ ounce honey syrup in a shaker with ice. Shake hard and strain into a coupe or over fresh ice.

    If it seems too sharp, add another teaspoon of honey syrup. If it feels heavy, add a teaspoon of lemon instead. A wide lemon peel adds aroma without extra sweetness.

    Fix Common Mezcal Cocktail Problems

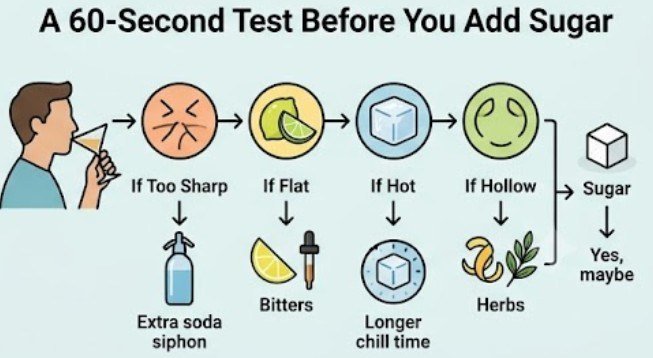
    If a drink tastes too smoky, do not automatically add sugar. First try ¼ ounce more citrus or a splash of soda. If it tastes too sour, add sweetener in teaspoon-size increments.

    Or f it tastes flat, add a tiny pinch of salt, one dash of bitters, or fresh citrus peel. If it tastes hot and alcoholic, dilution may be missing; stir or shake a little longer. Change one variable at a time.

    Measure the Alcohol, Not Just the Ingredients

    Measure the Alcohol, Not Just the Ingredients

    Home cocktails are easy to overpour. The National Institute on Alcohol Abuse and Alcoholism defines one U.S. standard drink as 0.6 fluid ounces, or 14 grams, of pure alcohol. At 40% ABV, 1.5 ounces of distilled spirits is approximately one standard drink NIAAA: What Is a Standard Drink?

    Use this calculation:

    pure alcohol in ounces = pour size × ABV as a decimal

    Then divide by 0.6. Two ounces of 45% ABV mezcal contains 0.9 ounce of pure alcohol, or about 1.5 U.S. standard drinks before any alcoholic liqueur is added. Check the bottle’s ABV because mezcal strength varies.

    Frequently Asked Questions

    1. What mixes best with smoky mezcal?

    Fresh lime, grapefruit, orange, agave, honey, ginger, bitters, and soda work well because they brighten, soften, or contrast roasted agave flavors.

    2. Can I use tequila instead of mezcal?

    Yes, but the drink will lose much of its smoky character. A tequila-mezcal split is a good compromise if full-mezcal cocktails feel too intense.

    3. How do I make a mezcal cocktail less smoky?

    Use less mezcal, split the base with tequila, add citrus, or lengthen the drink with soda. Avoid using large amounts of sugar merely to hide smoke.

    4. What is the best mezcal for cocktails?

    A reasonably priced joven mezcal with clear agave flavor and moderate smoke is flexible. Rare or highly distinctive bottles are often better enjoyed neat.

    The Final Pour

    The best mezcal drink is not the one with the most smoke; it is the one where smoke has something interesting to play against. Start with a measured pour, taste the spirit first, and choose one balancing direction—citrus, grapefruit, ginger, honey, or bitters. Once you understand that relationship, these recipes become templates rather than rules. You can make a Margarita brighter, an Old Fashioned smokier, or a highball lighter without losing control. That is the advantage of mixing mezcal at home: a few small adjustments can turn one bottle into several distinctly different cocktails.

  • How to Build a Cocktail Menu for a Party Without Overworking the Bar

    How to Build a Cocktail Menu for a Party Without Overworking the Bar

    A party with 15 cocktail choices sounds generous. In practice, it can turn one corner of your kitchen into a slow-moving production line of bottles, garnishes, half-cut citrus, and guests waiting for drinks.

    The smarter approach to how to build a cocktail menu for a party is surprisingly restrained: offer three to five distinct drinks, make their ingredients overlap, and design every choice around fast service. A good menu gives guests enough variety to find something they enjoy without forcing the host to operate a full cocktail bar.

    The goal is not to impress people with quantity. It is to make every drink on the menu earn its place.

    Start With the Number of Drinks, Not the Recipes

    For most home parties, three or four cocktails plus one alcohol-free option is a useful target.

    More choices increase the number of spirits, syrups, juices, garnishes, glasses, and preparation methods you need. They can also slow guests down as they study an unnecessarily complicated menu.

    Instead, think in flavor categories.

    A four-drink menu might include a bright citrus cocktail, a refreshing tall drink, a stronger spirit-forward option, and a bubbly or lower-intensity drink. Then add a mocktail that feels deliberately designed rather than like soda offered as an afterthought.

    That range covers far more preferences than four nearly identical vodka drinks.

    Menu role Example style Useful characteristic
    Crowd-pleaser Margarita-style sour Bright, familiar, refreshing
    Easy sipper Highball or spritz Light and easy to serve
    Bold choice Old Fashioned-style drink Spirit-forward, slower sipping
    Alcohol-free option Citrus-herb spritz Inclusive and refreshing

    Build Around Ingredient Overlap

    Build Around Ingredient Overlap

    Professional-looking cocktail menus do not require a shelf full of unrelated bottles.

    Choose two or three base spirits and repeat useful ingredients across the menu. Lime juice might appear in a tequila cocktail and a rum highball. Simple syrup can sweeten several drinks. Club soda, herbs, citrus wheels, and bitters can also serve multiple purposes.

    Ingredient overlap reduces shopping costs, refrigerator space, waste, and last-minute preparation.

    Imagine a summer party menu built around tequila and gin. Fresh lime, grapefruit, simple syrup, club soda, and mint could support several noticeably different drinks without requiring 20 ingredients.

    This is one of the easiest ways to make a small home bar operate more like an organized event bar.

    Give Every Cocktail a Different Job

    Selecting four famous recipes is not enough. They should also taste different.

    If every drink is sweet, citrus-heavy, and shaken, guests who prefer something dry or spirit-forward .

    For a smoky, spirit-forward option, smoky mezcal cocktails can bring a completely different character to the menu without adding another sweet or citrus-heavy drink.

    Think in Flavor, Strength, and Texture

    A useful menu balances several variables at once.

    One drink might be tart and refreshing. Another can be bitter or herbal. A third might be richer and spirit-forward. The final alcoholic option could feature sparkling wine or soda for a lighter texture. Strength matters too.

    The CDC notes that a U.S. standard drink contains approximately 0.6 fluid ounces, or 14 grams, of pure alcohol. A standard serving is roughly equivalent to 1.5 ounces of 80-proof distilled spirits, but cocktails may contain more than one standard drink depending on their recipe and ABV.  That makes measured pours preferable to casually free-pouring spirits into party drinks.

    Make the Mocktail Part of the Menu

    Make the Mocktail Part of the Menu

    An alcohol-free cocktail should receive the same attention as everything else.

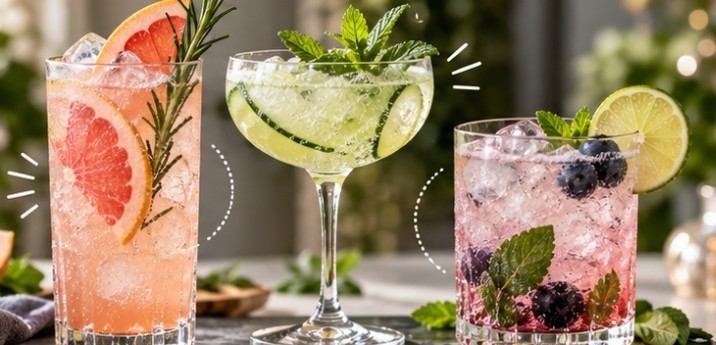
    A sparkling rosemary-grapefruit drink, cucumber-lime cooler, or ginger-citrus fizz gives designated drivers, pregnant guests, people taking certain medications, guests who do not drink, and anyone simply pacing themselves an appealing alternative.

    Responsibility.org specifically recommends providing water, zero-proof beverages, food, and safe transportation planning when alcohol is served. 

    The University of Michigan’s guidance on social gatherings similarly recommends clearly available nonalcoholic drinks and standard-sized alcoholic servings. That is both responsible hosting and good hospitality.

    Design Drinks That Can Survive a Busy Party

    A cocktail can taste fantastic and still be wrong for an event.

    Frozen drinks require a blender. Egg-white cocktails demand repeated shaking. Drinks involving five individually measured ingredients become tedious when ten people order them simultaneously.

    If you want a simple alternative when you don’t have a traditional cocktail shaker,a mason jar can work well for basic shaken drinks.

    Before adding a cocktail, ask one question: can I make several of these quickly while still talking to my guests?

    If the answer is no, simplify it.

    Batch What You Can Before Guests Arrive

    Cocktails built from spirits, syrups, liqueurs, and some juices can often be measured ahead in a refrigerated pitcher or sealed container.

    Do not add carbonated ingredients too early. Club soda, tonic, sparkling wine, and other fizzy components should generally be added near serving time so the drink retains its carbonation.

    Scaling is straightforward. If one cocktail uses 1.5 ounces of tequila, 0.75 ounce lime juice, and 0.5 ounce syrup, multiplying each ingredient by 12 produces a 12-serving batch: 18 ounces tequila, 9 ounces lime juice, and 6 ounces syrup.

    Keep the batch chilled and clearly labeled.

    Calculate Before You Shop

    Calculate Before You Shop

    Learning how to build a cocktail menu for a party also means knowing how much each recipe consumes.

    Write down the per-serving quantity for every ingredient, decide how many servings of that drink you realistically want available, and multiply. Then compare ingredients across recipes before shopping.

    If three cocktails require lime, calculate the combined amount instead of shopping recipe by recipe. Do the same for spirits, syrups, sparkling water, garnishes, and ice. Also plan water and food as part of the beverage setup rather than treating them as extras.

    NIAAA explains that alcohol content varies substantially among drinks and that serving size alone does not indicate how much alcohol a beverage contains. 

    Write a Menu Guests Can Understand in Seconds

    Cocktail menus at private parties do not need elaborate tasting notes.

    Give each drink a recognizable name, followed by its main ingredients and a short flavor description such as “bright and citrusy,” “herbal and sparkling,” or “rich and spirit-forward.”

    That description is often more useful than listing every technical detail.

    Place the menu beside the drink station on a small sign, framed sheet, or card. Guests can decide before reaching the bar, which keeps service moving.

    Skip prices, obviously, and avoid making alcohol the only visual focus. Water and the zero-proof option should be just as easy to find.

    Build Responsible Hosting Into the Setup

    Cocktail planning does not stop at taste.

    In the United States, alcohol should never be served to anyone under 21. Hosts should also make transportation planning easy and avoid encouraging rapid consumption.

    Cornell Health alcohol safety guidance advises eating before or while drinking, pacing alcoholic beverages, alternating with nonalcoholic drinks, and planning safe transportation. Mothers Against Drunk Driving recommends that party hosts confirm guests have a safe ride, provide appealing nonalcoholic options, serve food, and use non-drinking designated drivers. 

    A great host should be able to enjoy the party too, which is another argument for batching drinks and keeping the menu small.

    Frequently Asked Questions

    1. How many cocktails should I offer at a party?

    Three to five choices are usually enough to provide variety without making shopping, preparation, and service unnecessarily complicated.

    2. Should I make cocktails before the party?

    Yes, many noncarbonated components can be measured or batched ahead. Add sparkling wine, soda, tonic, and other carbonated ingredients close to serving.

    3. Do I need a mocktail on my cocktail menu?

    It is strongly recommended. A well-designed zero-proof drink accommodates non-drinkers, designated drivers, and guests who want to alternate between alcoholic and nonalcoholic beverages.

    4. What is the easiest cocktail menu for beginners?

    Choose simple sours, highballs, spritz-style drinks, or other recipes with roughly three or four ingredients and significant ingredient overlap.

    A Better Party Starts With Fewer Bottles

    The secret to how to build a cocktail menu for a party is not collecting as many recipes as possible. It is editing.

    Choose a few drinks with genuinely different personalities, reuse ingredients intelligently, batch the labor-intensive parts, keep sparkling components fresh, and give the alcohol-free choice equal billing. Measure pours rather than guessing, and make food, water, and safe transportation part of the plan from the beginning.

    If guests can find a drink they like in seconds—and you can serve it without disappearing behind the bar all evening—the menu has done its job.

  • 3 Ingredient Cocktails for Beginners: Five Classics That Teach Real Bar Skills

    3 Ingredient Cocktails for Beginners: Five Classics That Teach Real Bar Skills

    A good cocktail does not need a crowded back bar. Some of the world’s best-known drinks use only three components, making them ideal for learning proportion, temperature, dilution, and balance. For anyone searching for 3 ingredient cocktails for beginners, fewer bottles also mean fewer mistakes, less waste, and a clearer sense of why a drink tastes right—or wrong.

    Several cocktails on the International Bartenders Association’s official list are built from very short ingredient lists. That makes them useful practice drinks, not merely shortcuts.

    Why Three Ingredients Are Enough

    Most simple cocktails follow one of three patterns: spirit plus sour plus sweet; spirit plus two modifiers; or spirit plus a carbonated mixer and citrus. Once you recognize those patterns, recipes stop feeling random.

    A Daiquiri teaches sour-sweet balance. A Margarita adds orange liqueur to that framework. A Negroni teaches equal-parts mixing and bitterness. A Moscow Mule shows what carbonation contributes. A White Russian demonstrates how richness changes the perception of alcohol.

    If you want to explore a more smoky, spirit-forward style, smoky mezcal cocktails offer another useful lesson in balancing a strong base with citrus, sweetness, and bitters.

    Measurement matters for another reason. The National Institute on Alcohol Abuse and Alcoholism’s standard-drink guidance defines one U.S. standard drink as 0.6 fluid ounces, or 14 grams, of pure alcohol. Cocktails can contain more than one standard drink depending on the recipe and proof.

    The CDC’s standard drink guidance likewise identifies 1.5 ounces of 80-proof distilled spirits as approximately one standard drink.

    Five Easy 3-Ingredient Cocktails

    Cocktail Beginner ratio Technique Main lesson
    Daiquiri 2 oz rum, 1 oz lime, ¾ oz simple syrup Shake Sour-sweet balance
    Margarita 2 oz tequila, 1 oz lime, 1 oz orange liqueur Shake Citrus and liqueur
    Moscow Mule 2 oz vodka, ½ oz lime, 4 oz ginger beer Build Carbonation
    Negroni 1 oz gin, 1 oz Campari, 1 oz sweet vermouth Stir Equal-parts balance
    White Russian 1½ oz vodka, ¾ oz coffee liqueur, ¾ oz cream Build Richness and texture

    These are beginner-friendly working ratios, not universal laws. Classic specifications vary. The IBA, for example, lists its Margarita at 50 ml tequila, 20 ml triple sec, and 15 ml fresh lime juice, while its Negroni is an equal-parts recipe.

    1. Daiquiri: Learn Sweet-and-Sour Balance

    Add 2 ounces white rum, 1 ounce fresh lime juice, and ¾ ounce simple syrup to a shaker with ice. Shake vigorously for 10 to 15 seconds, then strain into a chilled small glass.

    If it tastes sharply acidic, add slightly more syrup next time. If it feels candy-like, reduce the syrup. This recipe teaches the spirit-sour-sweet structure behind dozens of other cocktails.

    2. Margarita: See How Liqueur Changes the Equation

    Shake 2 ounces blanco tequila, 1 ounce fresh lime juice, and 1 ounce triple sec or another orange liqueur with ice. Strain over fresh ice or serve up. A half-salt rim is optional.

    Orange liqueur contributes sweetness as well as alcohol. A particularly sweet bottle may need a smaller pour, while unusually tart lime may require a small adjustment in the other direction.

    3. Moscow Mule: Practice a Built Drink

    3 Moscow Mule Practice a Built Drink

    Fill a mug or tall glass with ice, add 2 ounces vodka and ½ ounce fresh lime juice, then top with about 4 ounces ginger beer. Stir gently once or twice.

    The IBA uses the same basic vodka, ginger beer, and lime structure. Avoid aggressive stirring because it releases carbonation and makes the drink taste flatter.

    4. Negroni: Master an Equal-Parts Recipe

    Combine 1 ounce gin, 1 ounce Campari, and 1 ounce sweet vermouth in a mixing glass with ice. Stir until cold, then strain over fresh ice. Add orange peel if available.

    The recipe is easy to remember but bold to taste. If you are new to bitter flavors, a Negroni may be less immediately approachable than a Daiquiri or Moscow Mule.

    5. White Russian: Understand Texture

    Pour 1½ ounces vodka and ¾ ounce coffee liqueur over ice, then add ¾ ounce heavy cream, half-and-half, or milk. Float the dairy for a layered appearance or stir it in for a smoother texture.

    Here, cream replaces citrus as the balancing force. Milk creates a lighter result; heavy cream makes the same basic drink noticeably fuller and richer.

    The Three-Question Fix for an Unbalanced Cocktail

    The Three-Question Fix for an Unbalanced Cocktail

    Before abandoning a recipe, ask three questions.

    1. First, is one flavor dominating? Adjust the sweet, sour, or liqueur component by only ¼ ounce at a time. Small changes are easier to understand than large corrections.
    2. Second, is the drink cold enough? Shaking and stirring are not simply ways to combine ingredients. They control temperature and introduce water through melting ice.
    3. Third, is the ice helping? Small, half-melted pieces dilute rapidly. Larger, solid cubes give you more control.

    This simple test turns a disappointing first attempt into useful feedback rather than wasted ingredients.

    What a Beginner Bar Actually Needs

    A jigger or small measuring cup matters more than decorative glassware because repeatable pours help you learn ratios. A shaker is useful for citrus drinks, although a tightly sealing jar can substitute. Built and stirred drinks require little more than a spoon.

    Fresh citrus matters, too. To improve quickly, make the same cocktail twice and alter only one variable—for example, reduce the lime by ¼ ounce. Side-by-side comparison trains your palate faster than changing several ingredients simultaneously.

    Three Ingredients Does Not Mean One Standard Drink

    Three Ingredients Does Not Mean One Standard Drink

    Stanford’s guidance on counting drinks notes that real-world pours do not always match standard serving sizes, making both ABV and portion size important. At home, free-pouring can make a strong drink surprisingly easy to create.

    For gatherings, measure spirits instead of guessing, keep water and substantial food available, and make appealing alcohol-free options easy to find. Cornell University’s alcohol-at-events guidance specifically requires water and heavy food in certain university-hosted events where alcohol is served.

    The University of New Hampshire’s alcohol guidance also recommends measuring spirits in mixed drinks because unmeasured cocktails can contain more alcohol than expected.

    Common Beginner Mistakes

    The biggest error is eyeballing pours. A recipe designed around two ounces of spirit changes considerably if that pour quietly becomes three. Old citrus can also make an otherwise sound recipe taste flat or unbalanced.

    Another misconception is that more ingredients automatically create a better cocktail. Three-part drinks are unforgiving in a useful way: stale juice, melting ice, poor measurements, and weak ratios have nowhere to hide.

    Frequently Asked Questions

    1. What is the easiest three-ingredient cocktail to make?

    A Moscow Mule is usually easiest because it is built directly in the glass with vodka, lime, ice, ginger beer, and a gentle stir.

    2. Do I need a cocktail shaker?

    No. A tightly sealed jar can work for shaken cocktails. Negronis and Moscow Mules can both be prepared without a shaker.

    3. What are the best 3 ingredient cocktails for beginners who dislike bitter drinks?

    Start with a Daiquiri, Margarita, Moscow Mule, or White Russian. A Negroni is distinctly bitter and may require a more developed taste for Campari.

    4. Can one cocktail contain more than one standard drink?

    Yes. Spirit quantity and alcohol proof determine its alcohol content, so a single mixed drink can contain more than one U.S. standard drink.

    Start With One Recipe, Not a Whole Bar

    The real value of a three-ingredient drink is feedback. With fewer components, you can taste exactly what fresh lime, a quarter-ounce adjustment, colder ice, or a longer shake changes.

    Start with one recipe, measure it accurately, taste it, then alter one variable. That habit turns 3 ingredient cocktails for beginners from a shortcut into a genuine bartending lesson. You do not need to memorize dozens of recipes or fill a cabinet with specialty bottles.

    If you’re planning drinks for several people, learn how to build a cocktail menu for a party so you can offer variety without overcomplicating the bar. Learn balance first.

    Learn balance first. Once three components make sense on your palate, more complicated cocktails become much easier to understand, troubleshoot, and eventually create on your own.

  • Fresh Blackberry Simple Syrup Recipe (Small-Batch Guide)

    Fresh Blackberry Simple Syrup Recipe (Small-Batch Guide)

    Store-bought berry mixers taste like flat, artificial candy. A proper fresh blackberry simple syrup recipe should capture the brambly, slightly acidic bite of ripe fruit while pouring cleanly through a speed pourer.

    I spent weeks tweaking this recipe at my home bar because my early batches kept turning into spreadable jam. The culprit was prolonged heat. By treating berries gently and extracting juice through residual warmth rather than a rolling boil, you get a jewel-toned, translucent syrup that elevates sodas and spirits alike.

    The Chemistry of Berry Syrups: Avoiding Pectin Jellification

    Blackberries carry significant natural pectin and large seeds packed with astringent tannins. If you boil crushed berries vigorously with white sugar, the pectin activates and binds the liquid. The result is a viscous jelly that refuses to mix into iced drinks.

    According to agricultural data from the USDA FoodData Central, wild and cultivated blackberries contain roughly 5 grams of dietary fiber per 100 grams, much of which is soluble pectin. When heated in acidic environments, this soluble fiber forms a dense gel network.

    To bypass this problem, I dissolve the sugar in hot water first, introduce the whole fruit, gently simmer just until the skins pop, and then remove the pot from the burner. 

    The off-heat steep extracts the anthocyanin pigments—the compounds responsible for deep purples, as detailed by the National Center for Biotechnology Information without stripping bitter tannins from the cracked seeds. 

    If you prefer heavier, caramel-forward profiles for whiskey, you might choose to make rich simple syrup 2 to 1 or whip up a homemade demerara syrup. But for fruit-forward drinks, a standard 1:1 ratio keeps the fresh berry acidity front and center.

    Fresh vs. Frozen Blackberries

    Peak summer blackberries from the farmers market yield unmatched aromatic top notes. However, flash-frozen berries work remarkably well during the winter months. Freezing ruptures the plant cells, meaning frozen berries actually surrender their juice faster during the warm steep. If you use frozen berries, skip any extra water; they shed plenty of moisture during the thaw.

    Equipment and Essential Ingredients

    Equipment and Essential Ingredients

    Keep your kit straightforward:

    • 1 cup fresh blackberries (about 5 to 6 ounces), rinsed and patted dry
    • 1 cup granulated white cane sugar (organic sugar adds unwanted amber tint)
    • 1 cup filtered water
    • 1 teaspoon freshly squeezed lemon juice (balances pH and sharpens color)
    • Pinch of fine sea salt

    For gear, you need a small stainless steel saucepan, a wooden spoon or potato masher, a fine-mesh conical sieve, and an airtight glass bottle like a swing-top swing bottle or Mason jar. Avoid reactive aluminum pans, which impart a metallic aftertaste to acidic fruit mixtures.

    Step-by-Step Instructions for Clear Berry Syrup

    Step-by-Step Instructions for Clear Berry Syrup

    First, add the water, sugar, lemon juice, and a tiny pinch of fine sea salt to your saucepan. Set the burner to medium heat. Whisk the mixture until the sugar dissolves completely and the liquid turns clear. The salt may seem counterintuitive, but sodium suppresses perceived bitterness and pushes fruit sweetness forward.

    Next, tip the whole blackberries into the hot syrup. Bring the mixture to a gentle simmer. Once tiny bubbles break across the surface, drop the heat to low and set a timer for 8 minutes. You want the berries to soften until their skins split, but do not crush them yet.

    Take the saucepan entirely off the heat source. Using the back of a large spoon or a potato masher, gently press down on the berries. Do not pulverize them; simply crack the fruit open to release the trapped juice. Let the saucepan sit on the counter undisturbed for 15 minutes. This resting phase pulls the vivid magenta juice into the base liquid.

    Set your fine-mesh sieve over a clean heatproof bowl or large glass measuring cup. Pour the warm syrup through the mesh. Let gravity do the heavy lifting for 5 minutes. You can lightly press the remaining skins with your spoon, but stop before you push fruit solids or broken seeds through the wire. Squeezing too aggressively forces pulp into the liquid, producing a cloudy syrup that separates in storage.

    Allow the syrup to hit room temperature before funneling it into a sanitized glass container. Stash it in the coldest part of your refrigerator. It stays fresh for two to three weeks.

    If you want to extend its life to six weeks, add a half-ounce of high-proof neutral grain spirit, a preservation technique recommended by cocktail authorities at Tales of the Cocktail Foundation.

    Three Bartender-Tested Ways to Use It

    Three Bartender-Tested Ways to Use It

    This syrup brings bright contrast to spirits, sparkling water, and cold brews.

    If you enjoy making fresh herb-infused mixers too, try this rosemary simple syrup with fresh herbs for another homemade option.

    My favorite build is an updated Bramble. Fill an Old Fashioned glass with crushed ice, shake two ounces of dry gin with three-quarters of an ounce of fresh lemon juice, and strain the liquid over the ice. Slowly pour three-quarters of an ounce of this blackberry syrup directly down the center. It sinks to the bottom before bleeding outward, creating an eye-catching gradient.

    For a summer smash, place five mint leaves in a shaker tin with three-quarters of an ounce of the syrup. Press the mint gently once to release its oils without bruising the herbs. Add two ounces of bourbon, three-quarters of an ounce of lemon juice, and cubed ice. Shake hard for ten seconds, strain into a lowball glass packed with ice, and crown with a splash of seltzer.

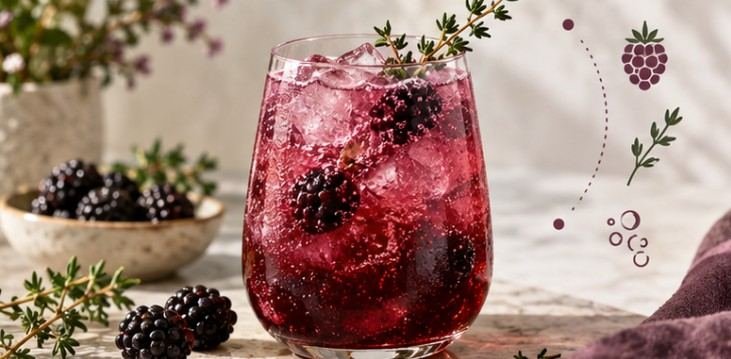
    If you are skipping the booze, stir an ounce of syrup into eight ounces of chilled seltzer and finish with a squeeze of fresh lime. The natural acidity balances the sugar, giving you a dry, refreshing homemade soda that avoids the syrupy cloying finish of grocery-store cans.

    Frequently Asked Questions

    1. Why did my blackberry simple syrup turn thick and gummy?

    Boiling the berries too long activates their natural pectin; always switch to an off-heat steep to keep the texture fluid.

    2. Can I make this recipe without white sugar?

    Yes, honey or agave nectar works, though they will alter the bright flavor and deep purple appearance.

    3. How do I tell if my homemade syrup has gone bad?

    Discard the batch immediately if you see cloudy sediment at the surface, notice floating mold spores, or smell fermentation.

    4. What can I do with the leftover mashed blackberry pulp?

    Stir the sweetened fruit mash directly into morning oatmeal, Greek yogurt, or spoon it over vanilla ice cream.

    Stop Buying Artificially Colored Mixers

    Ditch the day-glo store syrups packed with high-fructose corn syrup and red dye 40. Grab a pint of fresh blackberries this weekend, keep your burner heat low, and build a clean, scratch-made mixer that elevates your entire home bar setup.

  • Homemade Demerara Syrup Recipe for Drinks

    Homemade Demerara Syrup Recipe for Drinks

    A great cocktail demands intentional sugar. When you swap generic refined sweetener for a proper homemade demerara syrup recipe for drinks, your Old Fashioneds and rum punches transform immediately. Demerara brings unrefined toffee notes, mineral depth, and a rich amber hue that white sugar simply cannot deliver.

    I spent years behind high-volume craft bars, watching well-meaning home bartenders ruin delicate spirits with watery simple syrup. Standard grocery-store syrup waters down drinks before the ice even begins to melt. Making your own batch takes less than ten minutes and permanently upgrades your bar cart.

    The Chemistry of Raw Cane: Demerara vs. White Simple Syrup

    The Chemistry of Raw Cane: Demerara vs. White Simple Syrup

    Demerara is a minimally processed raw cane sugar originally produced in the Demerara colony of Guyana. Unlike white table sugar, which undergoes heavy refining, demerara retains a natural outer coating of sugarcane molasses. 

    According to the USDA FoodData Central, raw cane sugars retain natural trace minerals like calcium, potassium, and magnesium, which contribute subtle saline and earthy characteristics.

    Refined white sugar delivers pure sucrose sweetness without aroma. Brown sugar, conversely, is merely white sugar painted with commercial molasses, which often tastes cloying or medicinal in spirits. Demerara sits in the sweet spot: dry, crackly crystals that produce warm aromas of toasted marshmallow, honeycomb, and biscuit.

    Sugar Type Refining Level Molasses Content Flavor Profile Best Bar Applications
    White Granulated Fully refined 0% Neutral, clean sweetness Sours, Collinses, Gin drinks
    Demerara Cane Centrifuged raw 1% to 2% Toffee, light spice, mineral Whiskey, Rum, Agave, Coffee
    Turbinado Steam-washed raw ~1% Subtle honey, neutral caramel General sweetening
    Dark Brown Refined + added molasses 6% to 10% Heavy treacle, dark licorice Hot Toddies, heavy punches

    Standard 1:1 vs. Rich 2:1: Choosing the Right Density

    Cocktail bars categorize syrups using degrees Brix (°Bx), measuring dissolved sugar solids in liquid. Standard 1:1 simple syrup clocks in around 50° Brix, while rich 2:1 syrup reaches roughly 65° Brix. Professional mixology resources like Difford’s Guide note that this difference alters both sweetness and texture.

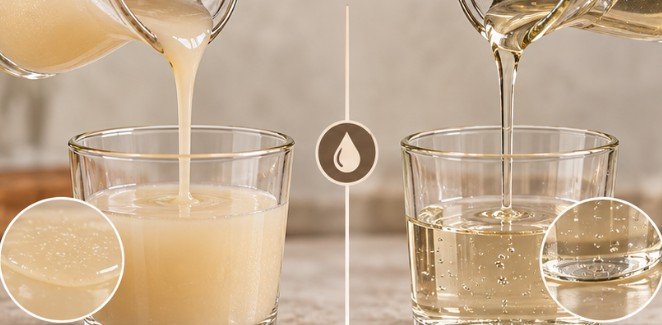
    For spirit-forward cocktails, always choose a rich 2:1 density. The higher ratio provides a silky, viscous mouthfeel that coats the palate. More importantly, it delivers necessary sweetness with minimal added water. If you want to master standard white cane ratios first, learn how to make rich simple syrup 2 to 1 before experimenting with specialty sugars.

    Metric Standard 1:1 Syrup Rich 2:1 Demerara Syrup
    Sugar to Water Ratio (Weight) 100g sugar : 100g water 200g sugar : 100g water
    Sugar Solids Density ~50° Brix ~65° Brix
    Texture & Viscosity Light, fluid like water Velvety, clings to glass walls
    Primary Cocktail Function Cold-brew sweetening, highballs Spirit-forward stirs, Tiki balance
    Refrigerated Stability 3 to 4 weeks 3 to 6 months

    The Precision 2:1 Demerara Recipe

    Many recipes tell you to boil your syrup. That is a mistake. Boiling evaporates water unevenly, skewing your Brix calculations and creating unpredictable sweetness from batch to batch. Gentle thermal dissolution yields a consistent product every time.

    Equipment and Ingredients

    Prepare 200 grams of demerara sugar and 100 grams of filtered water. Using a digital gram scale ensures precision that volumetric measuring cups cannot match. Keep a small stainless steel saucepan, a silicone spatula, a sterilized glass bottle, and a fine-mesh funnel ready.

    Step-by-Step Stovetop Technique

    Step-by-Step Stovetop Technique

    1. Set your saucepan over low heat and add the water and demerara sugar together.
    2. Stir constantly using your silicone spatula to keep heavy crystals moving across the bottom of the pan.
    3. Keep the stove temperature strictly below a simmer; steam rising from the surface is fine, but do not allow bubbles to break.
    4. Remove the saucepan from heat the moment the amber liquid turns translucent and every crystal dissolves.
    5. Cool the saucepan to room temperature on your counter for 20 minutes before funneling into your bottle.

    If you love Tiki cocktails but find pure demerara too assertive for tart citrus, try the classic hybrid formula championed by Smuggler’s Cove. 

    Combine 1.75 parts white granulated sugar with 0.25 parts demerara sugar and 1 part water. This builds rich texture while letting tropical fruit shine.

    Drink Pairings: How to Balance Cocktails with Rich Syrup

    Drink Pairings How to Balance Cocktails with Rich Syrup

    Because a 2:1 syrup contains 30% more sugar by volume than a 1:1 syrup, cut standard syrup measurements by roughly one-quarter. If a classic spec calls for 0.75 ounce of basic syrup, start with 0.5 ounce of rich demerara.

    For more ideas using smoky agave flavors, explore these smoky mezcal cocktail recipes at home.

    Cocktail Base Spirits Syrup Measure Why Demerara Works Here
    Oaxaca Old Fashioned Reposado Tequila, Mezcal 1 barspoon (0.125 oz) Earthy cane grounds vegetal agave and smoky espadín.
    Queens Park Swizzle Aged Demerara Rum 0.50 oz Toffee notes cut through heavy Angostura bitters and fresh lime.
    Ti’ Punch Rhum Agricole Blanc 1 barspoon (0.125 oz) Adds weight to raw, grassy sugarcane distillates.
    Classic Sazerac Rye Whiskey, Cognac 0.25 oz Replaces standard sugar cubes with smoother integration.

    Storage, Preservation, and Brix Stability

    Microorganisms need free water to reproduce. Because a 65° Brix syrup binds available water molecules to sucrose, rich 2:1 demerara naturally resists mold far better than equal-parts syrup.

    Always pour finished syrup into clean, heat-sterilized swing-top glass bottles. Store the sealed bottle in your refrigerator. To extend shelf life past six months, add 0.25 ounce of high-proof neutral spirit, such as 100-proof vodka or overproof white rum, directly into the cooled syrup batch. Discard immediately if the liquid becomes cloudy or develops visible yeast colonies.

    Frequently Asked Questions

    1. Can I make demerara syrup without heating it on a stove?

    Yes, combine sugar and room-temperature water in a blender on high speed for two minutes until clear.

    2. What is the best substitute if I cannot find demerara sugar?

    Turbinado sugar provides the closest grain size and mild molasses profile.

    3. Why did my rich demerara syrup crystallize in the fridge?

    Overcooking evaporated excess water, pushing sucrose past its solubility point; warm the bottle in hot water to redissolve.

    4. Does demerara syrup work well in non-alcoholic drinks?

    It blends smoothly into iced lattes, cold brew, and spiced sparkling lemonade.

    Level Up Your Home Bar Cart

    Ditch store-bought additives and chemical-laden bar mixes. Once you keep a fresh bottle of rich demerara in your refrigerator door, your cocktail game will rival the best speakeasies in town. 

    Mix up a test batch this evening, grab your favorite bottle of rye or rum, and taste the structural difference for yourself.

  • Cocktail Foam Without Egg White: Four Reliable Ways to Build a Better Head

    Cocktail Foam Without Egg White: Four Reliable Ways to Build a Better Head

    A thick cocktail foam does not depend on egg white. It depends on ingredients that trap tiny air bubbles and slow them from merging or draining away. That is why chickpea liquid, commercial foamers, lecithin, and hydrocolloid blends can all work.

    For anyone seeking cocktail foam without egg white, the best substitute depends on the drink. A Whiskey Sour needs dense texture; a fruit or tea cocktail may only need a light aromatic cap. The goal is foam that improves aroma, mouthfeel, and appearance without changing the drink’s flavor.

    Why Egg-Free Cocktail Foam Works

    Foam needs a surface-active ingredient around each bubble plus enough viscosity to slow drainage. The Institute of Food Technologists’ food-foam explainer explains that proteins can unfold around air bubbles and form a stabilizing network. Research published by the American Chemical Society similarly describes surface-active proteins as important to foam formation.

    Aquafaba reaches the same destination differently. Research on chickpea cooking water shows that proteins and carbohydrates work together to create foaming and emulsifying properties. A 2025 study found that concentrating aquafaba could improve foam stability because its functional proteins and carbohydrates become more concentrated.

    Hydrocolloids take another route. The FDA’s food-additive guidance identifies xanthan gum as an ingredient used to add texture, while FDA ingredient records describe methylcellulose and gum arabic as stabilizing, thickening, or emulsifying agents. That helps explain why egg-free foaming blends often combine them.

    Which Egg-Free Foamer Should You Choose?

    Option Starting point Result Best for
    Aquafaba 1/2–3/4 oz Dense, creamy Sours
    Commercial foamer Follow label Fine, consistent Fast service
    Soy lecithin Small measured dose Light, airy Spoon-on “airs”
    DIY hydrocolloid foam 1/4–1/2 oz Dense, stable Repeatable cocktails

    Aquafaba is easiest at home. Commercial foamers are fastest. Lecithin suits airy surface foam, while methylcellulose-and-gum blends offer the most control.

    Aquafaba: The Simplest Substitute

    Aquafaba is the liquid from canned or cooked chickpeas. Studies document its ability to form and stabilize foam, although performance changes with chickpea variety, concentration, temperature, and processing.

    For a standard sour, start with 1/2 ounce of unsalted aquafaba.

    If you’re new to mixing at home, these 3 ingredient cocktails for beginners are a good starting point for practicing simple ratios before adding foaming techniques.

    Add the spirit, citrus, sweetener, and aquafaba to a shaker without ice. Shake hard for 10–15 seconds, add ice, shake again until cold, and fine-strain.

    If the head is thin, try 3/4 ounce. If the drink tastes savory, reduce the amount or switch chickpea brands. Campari Academy’s testing also found that aquafaba can provide useful emulsification but may contribute a slight savory character in delicate drinks.

    Why Dry Shaking Helps

    Why Dry Shaking Helps

    The first ice-free shake aerates the foamer before melting ice dilutes the mixture. A reverse dry shake—shake with ice first, strain, then shake again without ice—can also create a smooth, tight head.

    The important variable is agitation. You are physically creating thousands of bubbles and giving the foaming ingredient time to stabilize their surfaces before the drink reaches the glass.

    Commercial Foamers: Best for Speed

    Bottled cocktail foamers are useful when you want predictable results without opening chickpeas or making a batch. Some need only drops or dashes, but there is no universal dose, so follow the manufacturer’s directions.

    Overdosing can make the foam unusually stiff or introduce an aftertaste. If egg avoidance is allergy-related, read the complete ingredient and allergen statement because formulas differ.

    Commercial products are especially practical for occasional home bartenders because they reduce waste. They also make it easier to reproduce the same head across several cocktails during a party.

    Soy Lecithin: Better for Light “Air”

    Soy lecithin is an emulsifier, not a perfect egg-white imitation. Harvard’s Nutrition Source notes that soy lecithin is commonly used to improve texture and mouthfeel in foods.

    In cocktails, a hand blender or frother can turn a low-fat liquid such as juice, tea, or flavored water into a light layer of bubbles.

    That makes lecithin useful for spooned aromatic foam, but less convincing for the creamy body of a classic sour. Because lecithin products vary in concentration and formulation, follow food-use directions and begin with a small measured dose.

    How to Make a Stable DIY Super Foam

    How to Make a Stable DIY Super Foam

    For serious home bartenders, a hydrocolloid blend can create cocktail foam without egg white while keeping sweetness separate from the foaming ingredient.

    A widely published formula uses:

    500 g water
    3 g food-grade methylcellulose
    0.3 g xanthan gum
    20 g gum arabic

    The xanthan amount matters. Some reposted versions show 3 grams, but a published version of this formula uses 0.3 gram—one-tenth as much.

    Heat 160 grams of the water to a gentle simmer. Mix in the methylcellulose, xanthan gum, and gum arabic for about five minutes. Slowly add the remaining 340 grams of cold water and continue mixing until the blend is fully dispersed and hydrated.

    Transfer it to a clean bottle and refrigerate. Start with about 1/4 ounce per cocktail, increasing toward 1/2 ounce if the drink needs more body.

    Campari Academy tested several egg-white substitutes and found methylcellulose solutions especially effective for producing robust texture without a noticeable aroma or flavor.

    Because homemade water-based mixtures do not automatically have validated shelf-life testing, make modest batches, refrigerate them, and discard the mixture if its odor, appearance, or texture changes.

    Use a Three-Glass Test Instead of Guessing

    Make three half-size versions of the same sour. Keep the spirit, citrus, sugar, ice, shake time, and glassware identical. Change only the amount of foamer.

    Compare the drinks after one, five, and ten minutes. Judge foam height, bubble size, liquid separation, aroma, mouthfeel, and flavor.

    This simple test quickly reveals whether you need more foaming power or whether you have already gone too far. The best version is not necessarily the tallest. It is the one whose foam stays attractive while the drink underneath still tastes balanced.

    Mistakes That Make Egg-Free Foam Collapse

    Mistakes That Make Egg-Free Foam Collapse

    Fat can disrupt many foams by interfering with the film around bubbles, so oily shaker residue, creamy ingredients, or oily garnishes may weaken the head. IFT’s food-science material describes the same problem in protein foams.

    Weak shaking, excessive dilution, or too much thickener can also hurt texture. More foamer does not automatically mean better foam.

    If you want to practice balancing cocktails before experimenting with foam, these smoky mezcal cocktails offer useful examples of working with citrus, sweetness, bitters, and dilution.

    Foam also says nothing about alcohol strength. The NIAAA mixed-drink calculator notes that one cocktail can contain one, two, or more U.S. standard drinks depending on the recipe. A fluffy sour can still be a strong drink.

    Frequently Asked Questions 

    1. Can I use chickpea water straight from the can?

    Yes. Unsalted canned aquafaba is easiest. Start with about 1/2 ounce per drink, dry-shake first, and increase slightly if needed.

    2. What is the most neutral-tasting option?

    A commercial foamer or well-made methylcellulose blend is usually more neutral than aquafaba. Test it in a simple sour before using it in delicate drinks.

    3. Can I use a milk frother?

    Yes. It works especially well for lecithin-based surface foams. For a classic sour, a shaker usually integrates the foam more evenly.

    4. Does aquafaba always taste like chickpeas?

    No. Flavor varies by brand and concentration. Unsalted aquafaba is often subtle, though delicate gin or vodka cocktails may reveal it more clearly.

    The Takeaway

    Egg white is one way to create cocktail foam without egg white alternatives being inferior by default—good foam ultimately comes down to bubble stability, texture, and flavor balance. Aquafaba is the easiest starting point, commercial foamers win on convenience, lecithin suits light aromatic airs, and methylcellulose-gum blends offer the most control.

    Measure the foamer, control the shake, and judge the drink again after several minutes rather than immediately after pouring. Once you focus on how the foam behaves instead of simply how tall it looks, egg-free foaming becomes a useful bartending technique rather than a compromise.

  • How to Make Rosemary Simple Syrup With Fresh Herbs

    How to Make Rosemary Simple Syrup With Fresh Herbs

    Nothing ruins a craft cocktail faster than artificial flavoring. When you learn how to make rosemary simple syrup with fresh herbs, you master the easiest way to bring woodsy botanical aromatics into your home bar. 

    Most kitchen attempts turn out either aggressively bitter or disappointingly faint. After months of testing herbal extractions behind my bar, I discovered that treating rosemary like delicate tea leaves—rather than hard candy—makes all the difference.

    The Science of Extracting Piney Terpenes Without Bitterness

    Rosemary (Rosmarinus officinalis) owes its pine-forward, resinous fragrance to volatile terpenes: mainly alpha-pinene, camphor, and 1,8-cineole. Peer-reviewed research indexed on NCBI demonstrates that these aromatic compounds are heat-sensitive. 

    Prolonged boiling degrades their delicate botanical character and leaves behind astringent, wood-derived tannins.

    Why Boiling Fresh Herbs Ruins the Profile

    Most online recipes instruct you to boil herbs directly in bubbling sugar syrup for several minutes. That approach extracts harsh chlorophyll and bitter compounds from the plant cell walls. You end up with a murky, brownish syrup that tastes like boiled lawn clippings rather than fresh pine.

    Selecting Tender Tops Over Woody Stems

    Strip only the tender, green needle clusters from the top third of each stem. The thick, bark-like lower stems contain high concentrations of astringent resins. Keeping these woody segments out of your pan ensures a clean, crystalline sweetness that lets the herbal finish shine.

    Ingredients and Ratios for Herbal Simple Syrup

    Ingredients and Ratios for Herbal Simple Syrup

    Standard mixology relies on a 1:1 volume ratio of sweetener to liquid. This ratio keeps cocktails balanced without altering the water volume needed for proper dilution during shaking.

    • 1 cup granulated white cane sugar: Avoid raw sugars here; their heavy molasses notes compete with fresh herbs. If you want deep caramel richness for bourbon drinks, consider whipping up a batch of homemade demerara syrup instead.
    • 1 cup filtered water: Tap water with high mineral or chlorine content dulls botanical aromatics.
    • 5 to 6 fresh rosemary sprigs: Look for vibrant green, aromatic stalks that snap cleanly when bent.

    Step-by-Step Brewing Method

    Grab a small stainless steel saucepan, a fine-mesh conical strainer, and a clean glass bottle.

    Step 1: Create the Neutral Base

    Create the Neutral Base

    Place the water and cane sugar into your saucepan over medium heat. Stir continuously with a silicone spatula until the liquid turns completely clear and the crystals dissolve. Bring the mixture to a faint simmer, then cut the heat immediately.

    Step 2: The Off-Heat Herbal Steep

    The Off-Heat Herbal Steep

    Drop your prepared rosemary sprigs directly into the hot, non-boiling liquid. Submerge the needles completely with the back of a spoon. Cover the pan tightly with a lid to trap evaporating aromatic oils inside the vessel. 

    Let the herbs steep undisturbed for 20 minutes. If you enjoy bright fruit pairings, this is the exact moment you can toss in crushed berries, similar to how I make fresh blackberry simple syrup for summer sodas.

    Step 3: Clarifying and Bottling

    Clarifying and Bottling

    Pour the infused liquid through a fine-mesh strainer into a heat-safe glass vessel. Never press, squeeze, or mash the rosemary needles against the mesh. Forcing plant solids through the sieve introduces cloudiness and accelerates spoilage. Discard the spent herbs into your compost bin and allow the syrup to cool to room temperature.

    How to Store and Extend Shelf Life Safely

    Sugar acts as a natural humectant, binding free water molecules to inhibit microbial growth. However, standard 1:1 syrups maintain a water activity level ($a_w$) high enough for mold spores to take hold over time. Guidelines from the National Center for Home Food Preservation emphasize the importance of sanitized storage vessels and temperature control for low-acid liquid preserves.

    Pour the cooled syrup into a freshly scalded, airtight glass bottle. Stored in the coldest section of your refrigerator, it remains fresh for 14 days. If you want to double that lifespan to a full month, add a half-ounce of 80-proof neutral vodka right before sealing. The alcohol prevents yeast fermentation without altering the flavor profile.

    Mixology Pairings and Culinary Uses

    Mixology Pairings and Culinary Uses

    This herbaceous sweetener transforms classic beverage recipes across spirits:

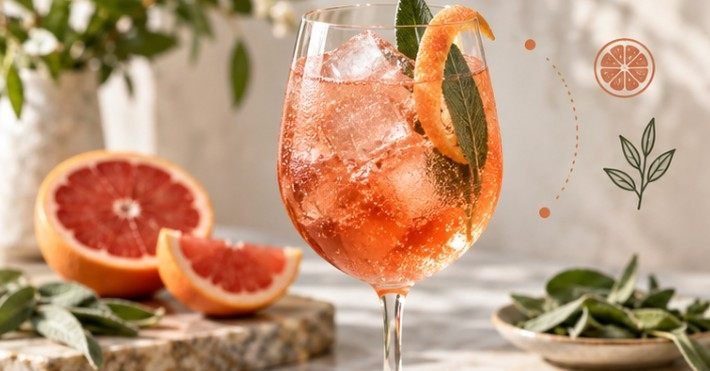
    • The Herbal Greyhound: Shake two ounces of gin or vodka with three ounces of fresh ruby red grapefruit juice and three-quarter ounces of rosemary syrup. The piney notes slice straight through the tart, bitter grapefruit oil.
    • The Smoked Bourbon Old Fashioned: Stir two ounces of rye whiskey, one-third ounce of rosemary syrup, and two dashes of aromatic bitters over ice. Express an orange peel over the rim and garnish with a lightly torched rosemary sprig.
    • Sparkling Mocktails: Combine an ounce of syrup with fresh Meyer lemon juice, topped with club soda and crushed ice for an elevated zero-proof cooler.
    • Morning Kitchen Uses: Drizzle a spoonful over hot buttermilk biscuits, poach sliced pears in the liquid, or whisk it into olive oil with Dijon mustard for an herbaceous salad dressing.

    Frequently Asked Questions

    1. Why does my rosemary simple syrup taste bitter?

    You boiled the herb directly over heat instead of using a flame-off steeping process.

    2. Can I substitute honey or maple syrup for white sugar?

    Yes, but earthy sweeteners overpower delicate pine notes; stick to mild clover honey if substituting.

    3. How do I tell if the syrup has spoiled?

    Discard the batch if you notice cloudiness, floating strands of mold, or a sour, yeasty odor.

    4. Can I freeze rosemary simple syrup for later use?

    Freeze the cooled syrup in silicone ice cube trays for up to six months with zero flavor loss.

    Stop Settling for Boring Drinks

    Mastering your own cocktail components saves money and instantly upgrades your hospitality game. Once you taste how clean a true off-heat infusion is, commercial cocktail mixers will never earn shelf space in your pantry again. 

    Pick fresh stems from your garden or grocery produce section, bottle a batch tonight, and start pouring drinks worth talking about.

  • How to Make Rich Simple Syrup 2 to 1: The Bar Pro’s Guide

    How to Make Rich Simple Syrup 2 to 1: The Bar Pro’s Guide

    Every home bartender eventually hits a wall with watery Old Fashioneds and limp whiskey sours. I spent years wondering why my cocktails tasted thin despite using premium rye and fresh citrus. The culprit was not the liquor; it was the standard 1:1 simple syrup watering down each pour. 

    Learning how to make rich simple syrup 2 to 1 fundamentally changed my drinks. This heavy-density syrup introduces concentrated sweetness alongside luxurious mouthfeel without dumping unwanted water into spirit-forward drinks.

    Why 2:1 Ratio Syrups Outperform Standard Bar Syrups

    Standard simple syrup splits white sugar and water down the middle at a 1:1 ratio. While fine for high-acid long drinks, it introduces unnecessary water into cocktails that require restraint. Rich simple syrup doubles the sugar volume against the water base, producing a concentrated sweetener that behaves differently in a glass.

    The Dilution Problem in Spirit-Forward Cocktails

    Shaking and stirring drinks naturally melt ice, providing essential dilution that opens up ethanol flavors. When your sweetening agent is already 50% water, you lose control over total water volume. According to cocktail science insights detailed on Serious Eats, uncalibrated water in simple syrups causes over-dilution before a drink hits proper serving temperature. Using a 2:1 rich syrup lets your ice chilling do the work it was meant to do without drowning spirit nuances in your favorite classic cocktail recipes.

    Viscosity, Brix, and Mouthfeel

    In professional beverage development, sweetness density is measured on the Brix scale. Standard 1:1 syrup measures approximately 50° Brix. Rich 2:1 syrup sits at roughly 66° to 67° Brix. 

    At this exact concentration, sucrose molecules create noticeable silkiness. The syrup clings to the palate, coats your tongue, and carries aromatic bitters across taste buds with far more weight than standard bar syrup could ever manage.

    Equipment and Ingredient Proportions (Weight vs. Volume)

    Precision dictates consistency. Measuring dry sugar by volume introduces error because granulated crystals pack unevenly depending on humidity and scoop density.

    Metric Imperial (Volume) Metric (Weight)
    White Cane Sugar 2 cups 400 grams
    Filtered Water 1 cup 200 grams

    For the cleanest flavor profile, use pure cane granulated sugar. Demerara or turbinado works wonderfully for dark spirits, but standard white sugar preserves neutral versatility. Always opt for filtered water; municipal chlorine distorts delicate aromatics.

    You need a small saucepan, an accurate digital kitchen scale, a funnel, and a clean glass swing-top bottle.

    Two Reliable Methods to Make Rich Simple Syrup 2 to 1

    Most traditional recipes instruct you to boil your mixture on high. That instruction is wrong. Boiling causes rapid water evaporation, instantly skewing your carefully measured 2:1 ratio into unpredictable candy territory. Here are the two ways I produce crystal-clear syrup behind the bar.

    Method 1: The Gentle Warm Dissolve (Stovetop)

    Method 1: The Gentle Warm Dissolve (Stovetop)

    1. Combine ingredients: Place your saucepan on the digital scale, tare to zero, and pour in 200 grams of water. Tare again, then add 400 grams of white granulated sugar.
    2. Apply low heat: Set your stove burner to medium-low.
    3. Stir continuously: Whisk gently. Keep the liquid moving so the sugar does not settle against the hot bottom and scorch.
    4. Dissolve without boiling: Watch the mixture turn from opaque sludge to clear amber, and finally into transparent liquid. The internal temperature needs to reach only 120°F to 135°F to dissolve sucrose entirely.
    5. Cool and bottle: Remove from heat the instant the liquid turns completely transparent. Let it settle to room temperature, then funnel it into a sanitized bottle.

    Method 2: The Zero-Evaporation Blender Method

    Method 2: The Zero-Evaporation Blender Method

    If you want zero water loss and perfectly uniform syrup, skip the stove entirely.

    Pour 200 grams of warm tap water (about 110°F) and 400 grams of white sugar directly into a high-speed blender jar. Secure the lid tightly and run the blender on high speed for 60 to 90 seconds. 

    The mechanical shear forces and gentle friction dissolve the sugar completely without heating the liquid to evaporation points. Let the micro-bubbles settle for 10 minutes; you will be left with diamond-clear, velvety rich syrup.

    Converting Legacy Recipes from 1:1 to 2:1 Syrup

    You cannot swap rich simple syrup directly into cocktail recipes built for standard 1:1 syrup without over-sweetening your glass. Because 2:1 syrup is roughly 33% sweeter by volume, apply a standard reduction factor:

    $$\text{Volume of 2:1 Syrup} = \text{Volume of 1:1 Syrup} \times 0.75$$

    • If a recipe demands 1 oz of standard simple syrup, use 0.75 oz of rich simple syrup.
    • If a recipe calls for 0.5 oz of standard simple syrup, drop to 0.375 oz (3/8 oz) of rich simple syrup.

    This mathematical tweak cuts the volume of supplemental liquid while hitting the exact intended sweetness, making it a reliable base for experimenting with homemade infused syrups.

    Storage Realities: Shelf Life, Crystallization, and Preservation

    Storage Realities: Shelf Life, Crystallization, and Preservation

    High sugar density makes rich simple syrup naturally shelf-stable. According to water activity data compiled by the USDA FoodData Central, solutions above 65° Brix create an osmotic environment that inhibits most common bacterial and mold growth.

    • Refrigerated: Kept cold in an airtight glass container, 2:1 syrup maintains fresh quality for up to six months.
    • Room Temperature: Safe on a dark bar cart for four to six weeks.
    • The Pro Bartender Hack: Add half a barspoon (roughly 0.25 oz) of high-proof neutral spirit, like unflavored 80-proof vodka, to your finished batch. The spirit prevents surface mold spores from finding traction whenever the bottle opens.

    If white sugar crystals gather around the neck or bottom of the bottle after several months, place the bottle in a warm water bath for ten minutes to dissolve them back into solution.


    Frequently Asked Questions

    1. Can I make 2:1 rich simple syrup using brown sugar or demerara?

    Yes, using brown or demerara sugar at the exact same 2:1 weight ratio yields a rich, molasses-forward syrup ideal for whiskey and rum cocktails.

    2. Why did my rich simple syrup crystallize in the bottle?

    Crystallization happens when excess water evaporates during cooking or when sugar crusts on the bottle rim seed crystal formation throughout the syrup.

    3. Do I need to boil the water to make 2:1 syrup?

    No, sugar dissolves fully at temperatures well below boiling, and avoiding a boil keeps your measured liquid proportions perfectly accurate.

    4. How long does rich simple syrup last compared to 1:1 simple syrup?

    Rich simple syrup lasts up to six months refrigerated, whereas standard 1:1 simple syrup typically spoils within three to four weeks.

    Stop Diluting Your Drinks

    Ditching watery 1:1 syrup is the single fastest upgrade you can make to your cocktail program. Measure your sugar by weight, dissolve it with gentle heat or mechanical blender shear, and stash it in a clean glass bottle. 

    Once you experience the concentrated punch and velvety glide of true 2:1 rich syrup, standard bar syrups will never touch your shaker again.