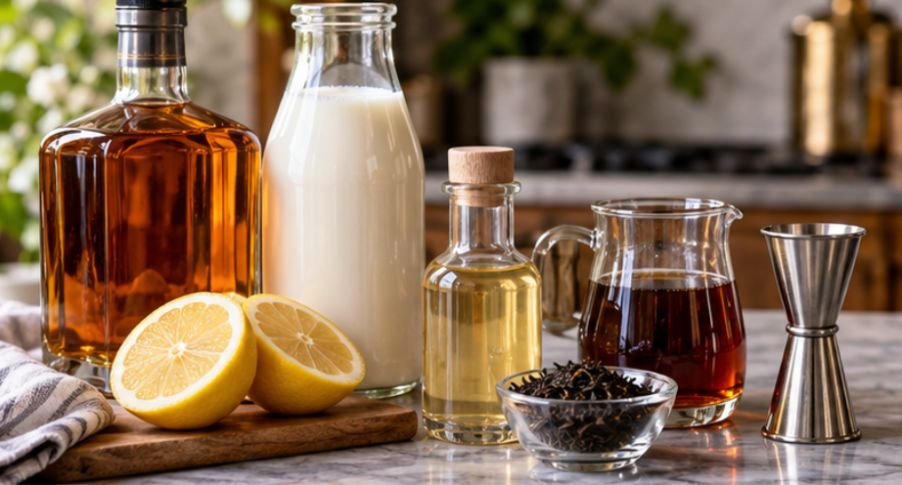
Milk curdling is normally a kitchen warning sign. In a clarified cocktail, it is exactly what you want.
The curds created when an acidic cocktail meets milk become a surprisingly effective filtration system. They capture suspended particles and interact with tannins and other compounds, leaving behind a drink that can look nearly transparent while tasting rounder and softer than the mixture you started with.
That transformation is what makes clarified milk punch for beginners seem more intimidating than it really is. The process requires patience, but not specialized bar equipment. For a first attempt, a pitcher, whole milk, citrus, spirits, a fine strainer, and coffee filters can be enough.
What Actually Happens When Milk Punch Clarifies?
Milk contains proteins called caseins. Under normal conditions, these proteins remain suspended in structures called casein micelles. Add enough acid, however, and their behavior changes.
Cornell University explains that acid coagulation occurs as milk approaches roughly pH 4.6, causing casein proteins to curdle. Mississippi State University demonstrates the same principle in its food-science laboratory material by adding acid to milk and separating the resulting curds from whey.
In a cocktail, those curds do more than separate. They form a porous filter bed that helps trap microscopic material as the punch passes through it. Professional bartending guidance also notes that casein interacts with phenolic compounds, which helps explain why clarified drinks often taste less harsh or astringent after filtration.
The important lesson is simple: the ugly-looking curds are not a failed cocktail. They are the tool doing the work.
A Reliable Beginner Formula
There is no single universal ratio for milk punch. Recipes differ because lemon juice, tea, fruit, fortified wine, and spirits contribute different amounts of acid and tannin.
For a first batch, using whole milk at roughly 20% to 25% of the volume of your prepared cocktail is an easier benchmark than trying to force every recipe into the same rigid formula. Campari Academy, for example, recommends calculating milk at approximately 25% of the cocktail batch volume.
Here is a forgiving starting point.
| Ingredient | Beginner Batch |
| 80-proof bourbon or aged rum | 8 fl oz |
| Strong cooled black tea | 4 fl oz |
| Fresh lemon juice | 3 fl oz |
| 1:1 simple syrup | 3 fl oz |
| Pasteurized whole milk | 4.5 fl oz |
The pre-milk mixture totals 18 ounces, so 4.5 ounces of milk equals 25% of that volume.
The black tea is particularly useful because its tannins give the milk proteins additional compounds to interact with, while lemon provides the acidity required for a strong break.
How to Make Clarified Milk Punch Step by Step
1. Prepare the Cocktail Before Touching the Milk
Combine the spirit, cooled tea, lemon juice, and simple syrup. Stir until the syrup is completely incorporated.
If you do not have a shaker, that is not a problem for this step many cocktails you can make without a shaker rely on building or controlled stirring rather than shaking.
Taste a teaspoon. It should seem slightly stronger, brighter, and more assertive than the finished drink you want because clarification can soften some bitterness and astringency.
2. Put the Milk in a Separate Container
Use pasteurized whole cow’s milk for your first batch.
Whole milk is forgiving because it contains enough protein and fat to create substantial curds. Pasteurized milk is also the sensible U.S. food-safety choice. The FDA advises consumers to choose pasteurized dairy because raw milk can carry disease-causing microorganisms.
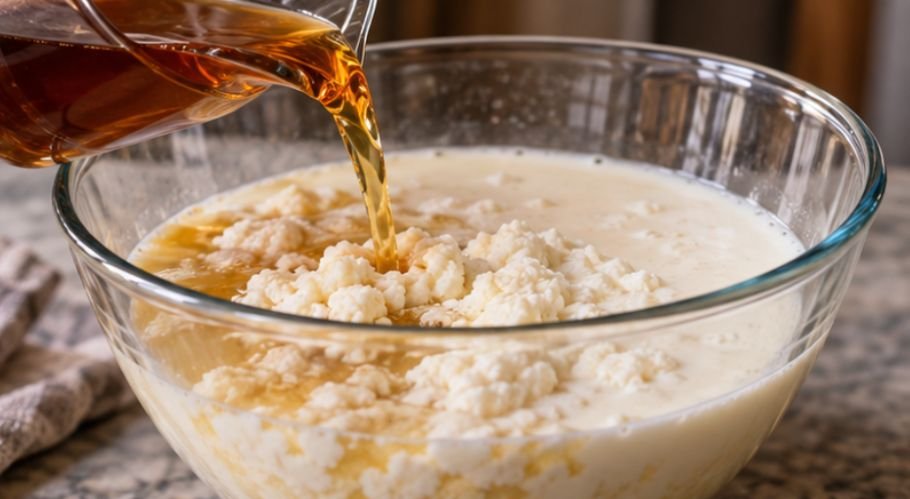
3. Pour the Cocktail Into the Milk
This order matters.
Slowly pour roughly one-third of your acidic cocktail mixture into the milk while stirring very gently. Once visible curds appear, stop aggressive mixing and add the remainder carefully.
Professional milk-punch guidance uses the same general method: cocktail goes into milk, allowing the milk to break before the remaining batch is added.
You should see irregular white clumps suspended in translucent liquid. Large, obvious curds are encouraging.
4. Give the Curds Time to Work
Leave the mixture undisturbed for at least 30 minutes.
You can extend the resting period if the break appears weak, but repeatedly stirring the mixture is usually counterproductive. The goal is to let curds aggregate rather than smash them into smaller particles.
5. Start With a Coarse Strain
Place a fine-mesh sieve over a clean container and pour the mixture through gently.
You do not need specialized barware for this process; a few basic kitchen tools are enough, much like the simple methods used for cocktails you can make without a shaker.
This catches the largest curds and makes the slower filtration stage easier. Avoid squeezing or pressing the curds; forcing liquid through them can push particles back into your punch.
6. Let the Curd Bed Become the Filter
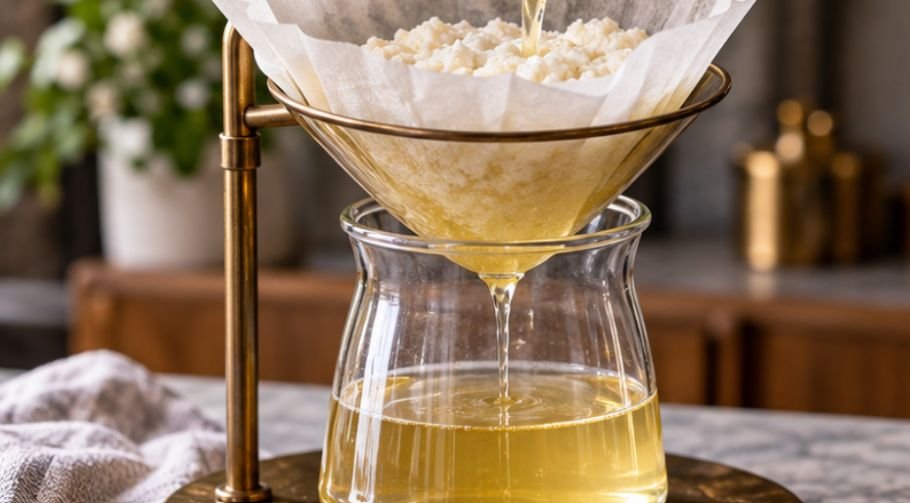
Line the sieve with a coffee filter or similarly fine filtration material and slowly pass the punch through again.
The first liquid may still look cloudy. That is normal.
As curds accumulate on the filter, they create an increasingly fine filtration layer. Once the liquid starts running noticeably clearer, carefully return that cloudy first portion to the top without disturbing the established curd bed.
A second complete pass is often the difference between merely translucent punch and a polished-looking drink.
Why Is My Milk Punch Still Cloudy?
Cloudiness usually has a mechanical explanation rather than a mysterious chemistry problem.
If almost no curds formed, your mixture may not contain enough acid. Add acidity cautiously rather than pouring in large amounts at once.
If curds formed but the finished liquid remains hazy, your filtration probably needs more time. Re-run the cloudy portion through the existing curd bed instead of replacing the filter immediately.
If filtration stops completely, the filter may be overloaded. Transfer the setup carefully or divide the batch rather than pressing on the curds.
And do not judge success by whether the finished drink resembles water. Tea, aged spirits, fruit, or dark sugars can leave a transparent amber or golden color. Clarified does not necessarily mean colorless.
Whole Milk Versus Alternative Milks

One common misconception is that plant-based milks can never be clarified.
Dairy whole milk is still the easiest recommendation for beginners because casein coagulation is predictable. However, professional testing has successfully clarified cocktails with alternatives such as almond and coconut milk under appropriate conditions.
The catch is consistency. Protein content, stabilizers, emulsifiers, and brand formulas differ considerably among plant products.
If your first priority is mastering the technique, learn with dairy before experimenting.
Another important point: filtering out visible curds does not make a dairy-based milk punch safe for someone with a milk allergy. Milk-derived proteins may remain, so the drink should still be treated as containing a dairy allergen.
Refrigeration Matters More Than Internet Shelf-Life Claims
Old stories sometimes describe clarified punches surviving for extraordinarily long periods. That should not be interpreted as food-safety guidance for a home bartender.
Refrigerate a finished batch promptly in a clean, tightly closed glass bottle. USDA guidance recommends keeping refrigerators at 40°F or below and warns against leaving perishable foods above that temperature for extended periods.
Clarification can improve stability, but it does not turn an amateur batch into a commercially shelf-stable beverage.
Pay Attention to the Alcohol Per Serving
A crystal-clear drink can taste deceptively gentle after harshness has been reduced.
The NIAAA defines one U.S. standard drink as containing 0.6 fluid ounces, or 14 grams, of pure alcohol.
Eight ounces of 80-proof spirit contain roughly 3.2 fluid ounces of pure alcohol, equivalent to about 5.3 U.S. standard drinks before filtration losses. If your finished batch produces five equal servings, each starts near one standard-drink equivalent.
Measure the actual final yield rather than assuming clarity means weakness.
Frequently Asked Questions
1. Why do I pour the cocktail into the milk?
Adding the acidic mixture gradually encourages large curds to form. Large, stable curds produce a better filtration bed and usually make clarification easier.
2. How long should clarified milk punch rest before filtering?
Thirty minutes is a practical beginner target, although some recipes work after 15 minutes. Longer resting can help curds settle before filtration.
3. Can I make clarified milk punch without coffee filters?
Yes. Fine cheesecloth, a nut-milk bag, or another very fine food-safe filter can work, although additional filtration passes may be necessary.
4. Does clarified milk punch still contain dairy?
Assume that it does. Removing visible curds does not guarantee removal of every milk protein, so dairy-allergy precautions still apply.
The Clearer Way to Think About Your First Batch
The best clarified milk punch for beginners is not the recipe with the most exotic ingredients. It is the one that lets you clearly observe the process: acid breaks the milk, curds form, patience builds a filter, and repeated gentle filtration produces clarity.
Start with pasteurized whole milk, lemon, tea, simple syrup, and one familiar spirit. Measure everything, pour the cocktail into the milk, and resist the temptation to rush the filter. Once you can consistently produce strong curds and a clear finished punch, experimentation becomes much easier. The strange-looking curdled bowl is not a problem to fix—it is the reason the technique works.
Leave a Reply