Category: Coffee & Café Drinks

  • How to Make a Latte at Home That Tastes Café-Made

    How to Make a Latte at Home That Tastes Café-Made

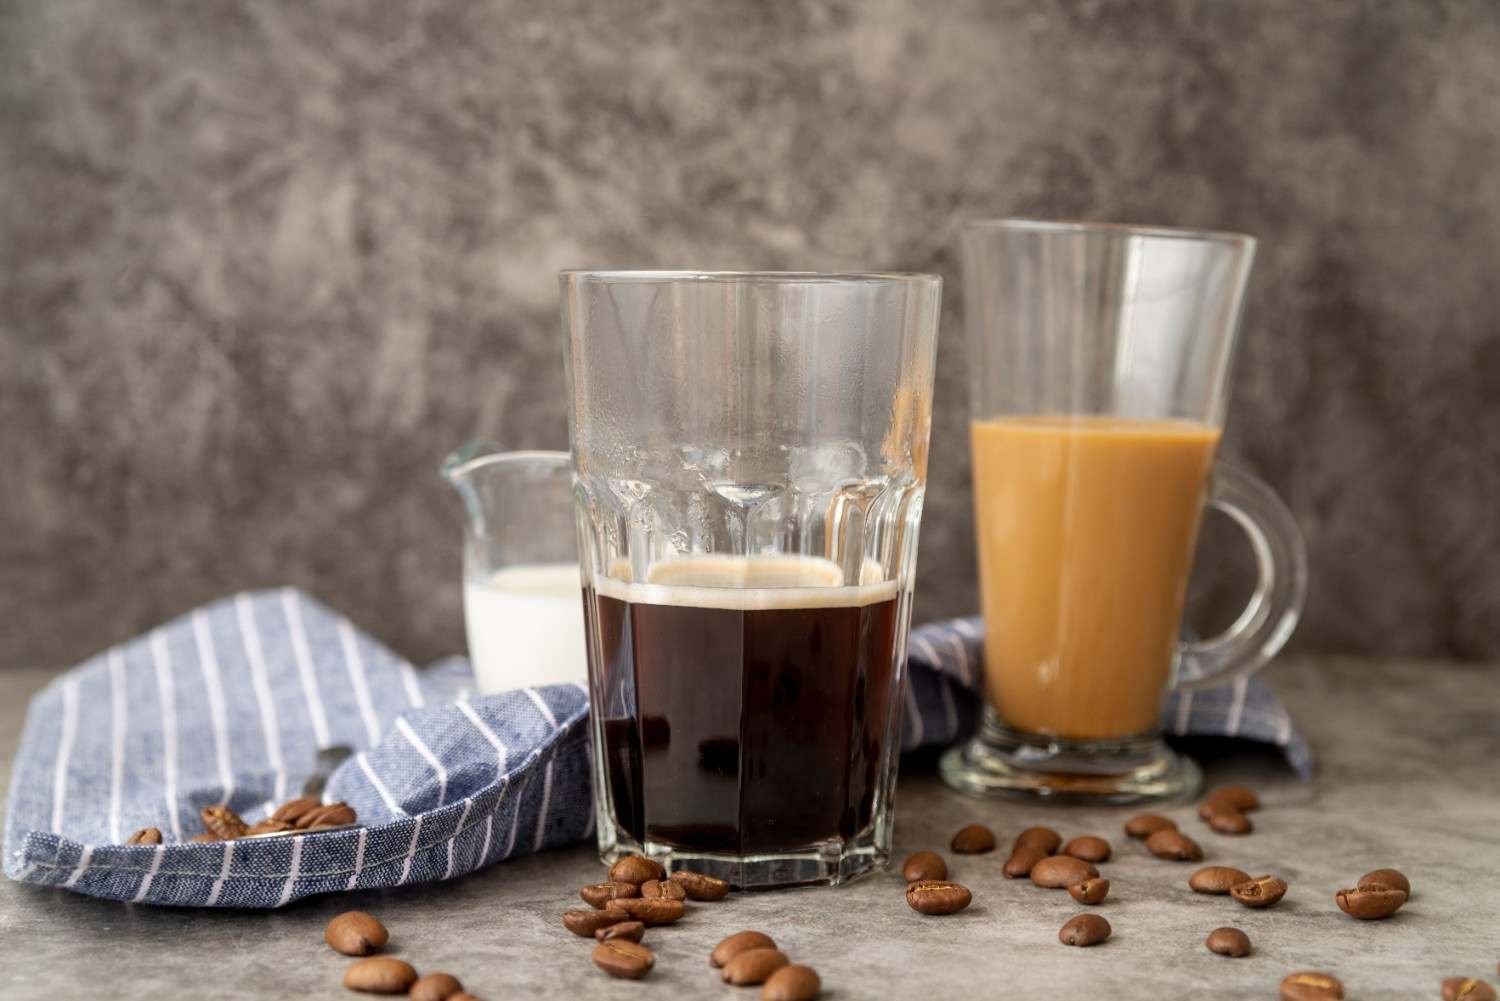
    There is a noticeable difference between coffee with warm milk and a latte that actually tastes as if it came from a good café. I noticed the biggest improvement when I stopped worrying about expensive equipment and focused instead on coffee strength, milk temperature, and texture. Those three details determine whether a homemade latte tastes rich and balanced or weak and overly milky.

    Learning how to make a latte at home is therefore less about owning a professional espresso machine and more about understanding the basic technique. With about 2 ounces of concentrated coffee, properly heated milk, and fine, glossy microfoam, I can make a smooth café-style drink using equipment ranging from an espresso machine to a Moka pot, AeroPress, or simple milk frother.
    What Do You Need for a Café-Style Latte?

    A classic latte starts with about 2 ounces of espresso, usually a double shot, followed by roughly 4 to 8 ounces of steamed milk depending on your cup size and preferred strength.

    For a typical 10- to 12-ounce American coffee mug, I find that two espresso shots with about 6 ounces of milk create a balanced drink. If you prefer a stronger coffee flavor, use less milk. If you prefer a creamier latte, add a little more.

    Whole milk produces a particularly creamy texture, but 2% milk also works well. For dairy-free options, barista-style oat milk is one of the easiest alternatives to steam and froth. Soy milk can also create stable foam, while almond milk generally produces a lighter texture.

    How Do You Make the Coffee Base?

    How Do You Make the Coffee Base?

    The coffee must be strong enough to remain noticeable after you add several ounces of milk.

    With an espresso machine, grind your coffee, tamp it evenly, and pull a double shot directly into your mug. A properly brewed espresso gives you the richest and most traditional latte base.

    If you do not own an espresso machine, you still have several practical options. A Moka pot produces concentrated coffee that works particularly well in milk drinks. An AeroPress can create a strong coffee concentrate, while capsule machines such as Nespresso offer consistent results with very little preparation.

    Strongly brewed drip coffee can also work, although I recommend using less water or additional coffee grounds so the flavor does not disappear beneath the milk. Instant coffee is another last-minute option; mixing a strong instant coffee concentrate into about 2 ounces of hot water gives you a workable base.

    If I am making a vanilla, caramel, or flavored latte, I stir the syrup into the hot coffee at this stage so it dissolves evenly.

    What Temperature Should Latte Milk Be?

    Milk temperature affects both taste and texture.

    I aim for approximately 140°F to 150°F. At that temperature, milk develops a pleasant natural sweetness while staying smooth enough to texture properly.

    Avoid boiling the milk. Overheated milk can taste cooked and may become more difficult to froth into silky microfoam.

    A kitchen thermometer is the easiest way to monitor temperature. If you use a metal milk pitcher, you can also judge by touch. The pitcher should feel very hot, but not reach the point where the milk is bubbling or boiling.

    How Do You Steam Milk for a Latte?

    A steam wand usually gives the most café-like texture.

    Start with cold milk in a metal pitcher. Place the steam wand tip just beneath the surface and angle the pitcher slightly so the milk begins to spin.
    During the first few seconds, allow a small amount of air into the milk. You may hear a light tearing or hissing sound. Do not keep adding air for too long, or you will create thick cappuccino-style foam.

    Next, lower the wand slightly so the milk continues spinning in a vortex. This circular motion breaks larger bubbles into fine microfoam.

    The finished milk should appear glossy and smooth, almost like wet paint.

    How Can You Froth Milk Without a Steam Wand?

    How Can You Froth Milk Without a Steam Wand?

    A handheld electric frother is one of the easiest alternatives. Heat the milk first in a saucepan or microwave, then place the frother slightly beneath the surface. Move it gently until you create small, even bubbles instead of a thick layer of dry foam.

    A French press can also work extremely well. Pour in the warmed milk and move the plunger up and down several times until the volume increases and the texture becomes creamy.

    You can even use a mason jar. Pour warm milk into the jar without filling it, secure the lid, and shake vigorously for about 30 seconds. After shaking, let the large bubbles settle before pouring.

    If you microwave the jar method, remove the metal lid first. Heat only the milk in a microwave-safe container.

    How Do You Pour a Latte Properly?

    Before pouring, I always tap the milk pitcher lightly on the counter and swirl it. Tapping helps remove larger air bubbles, while swirling keeps the foam integrated with the liquid milk.

    Pouring technique also matters.

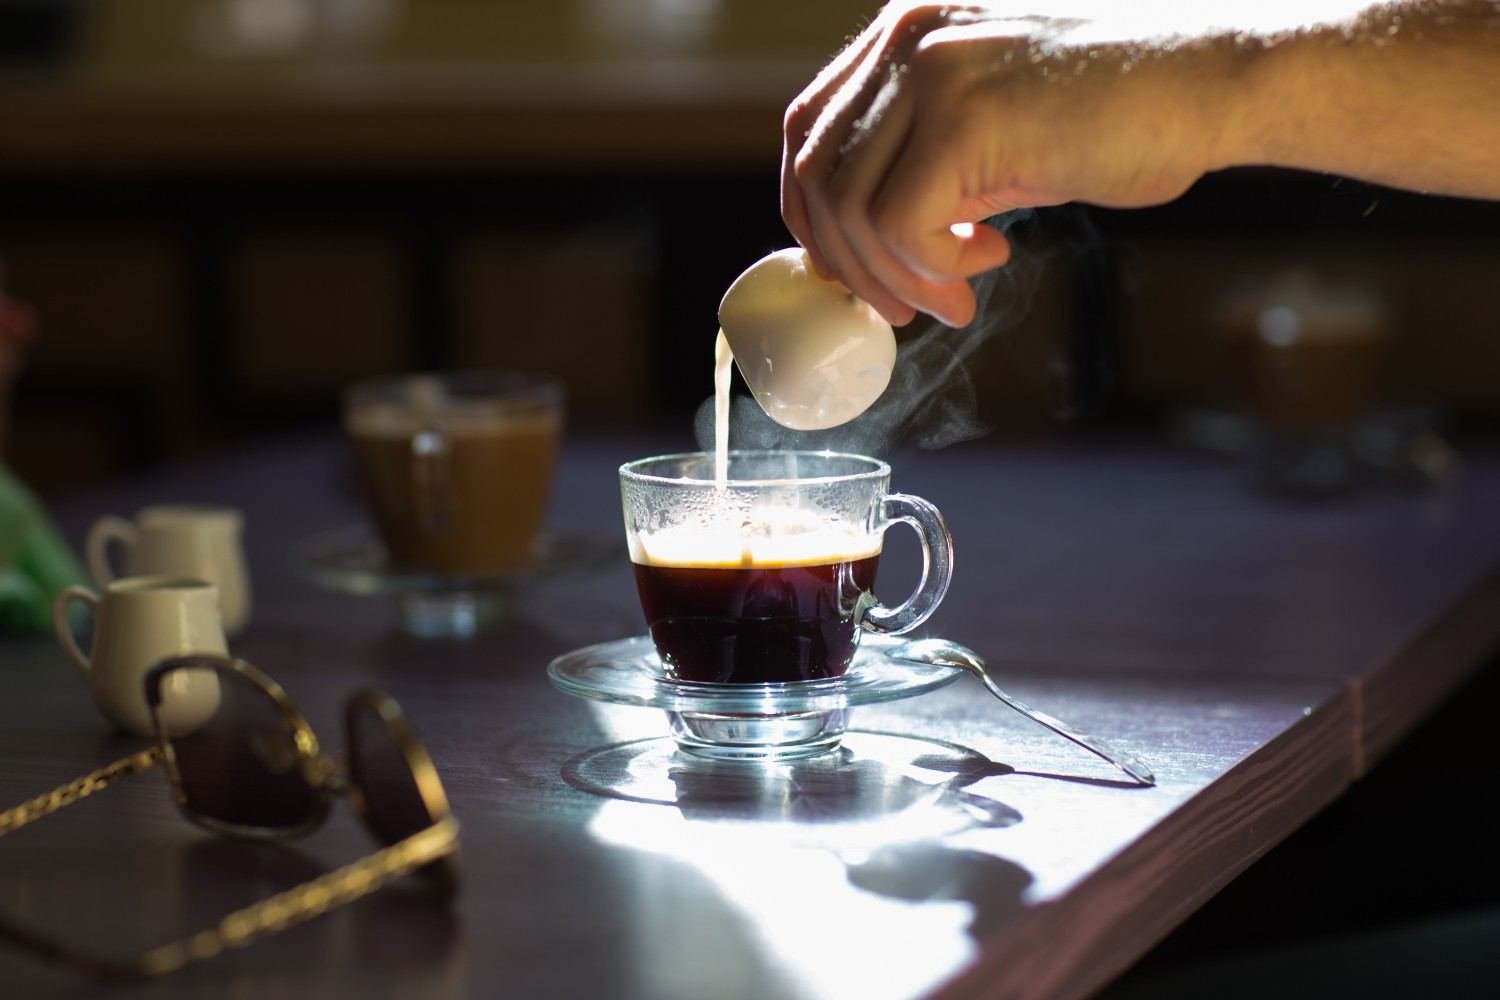
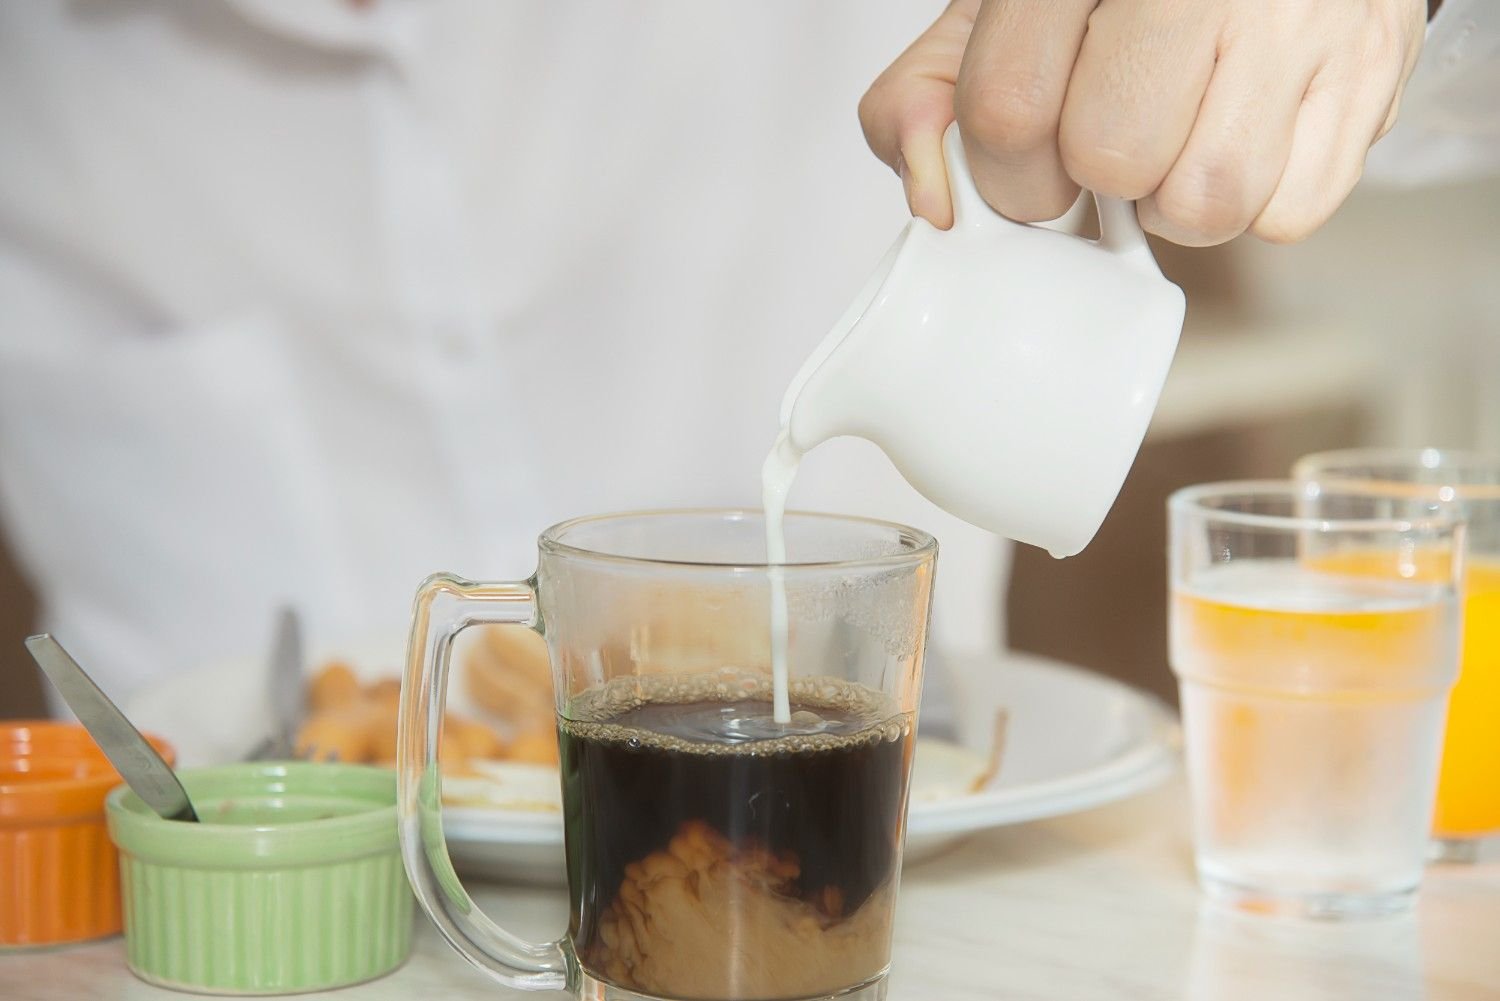
    Tilt the coffee cup slightly and begin pouring from a few inches above the espresso. The higher starting position helps the liquid milk sink beneath the surface and combine with the coffee.

    As the mug fills, gradually lower the pitcher closer to the surface. Pour a little faster near the end so the lighter microfoam moves onto the top of the drink.

    You do not need latte art to make a great latte. I recommend mastering smooth milk texture first. Once the milk consistently looks glossy and pours evenly, hearts and rosettas become much easier to practice.

    Why Does My Homemade Latte Taste Watery?

    Weak coffee is usually the main cause.

    If your latte tastes thin, first reduce the amount of milk. If it still tastes weak, strengthen the coffee base.

    Cup size can also create problems. Two espresso shots may taste balanced with 6 ounces of milk but disappear inside a very large 16-ounce drink.

    Using concentrated coffee is particularly important when making how to make a latte at home recipes without a traditional espresso machine. The milk naturally softens coffee flavor, so the base needs enough intensity to remain noticeable.

    Why Is My Latte Too Foamy?

    A latte should contain much less foam than a cappuccino.

    Large bubbles and thick foam usually mean too much air entered the milk. When using a steam wand, add air only during the first few seconds and then focus on creating a smooth vortex.

    With a handheld frother, avoid continuously holding the whisk directly at the surface. Keeping it slightly submerged creates finer bubbles and a creamier texture.

    Latte vs Cappuccino vs Flat White

    Latte vs Cappuccino vs Flat White

    These three drinks all combine espresso and milk, but their proportions and textures differ.

    A latte contains more steamed milk and only a thin layer of foam, making it mild and creamy. A cappuccino uses less milk and more foam, creating a stronger coffee flavor and lighter mouthfeel.

    A flat white generally contains finely textured milk with less overall milk than a typical American latte. That allows the espresso flavor to remain more prominent.

    Can You Make an Iced Latte the Same Way?

    Yes, but you can skip the steaming step. Brew two espresso shots and allow them to cool briefly. Fill a glass with ice, add cold milk, and pour the espresso over it. If you are choosing the best non dairy milk for coffee, oat, almond, and soy milk all work especially well in iced lattes.

    For flavored iced lattes, mix your vanilla, caramel, maple, or other syrup into the warm espresso before adding the coffee to the ice. This helps the sweetener dissolve properly.

    Frequently Asked Questions (FAQs)

    1. Can I make a latte with regular coffee?

    Yes. Brew the coffee stronger than you normally would so the flavor remains noticeable after adding milk.

    2. What milk is easiest to froth?

    Whole milk is one of the easiest options for beginners because it creates stable, creamy foam. Barista-style oat milk is an excellent dairy-free choice.

    3. How much milk should I use for two shots of espresso?

    Around 6 ounces is a useful starting point, although you can use anywhere from about 4 to 8 ounces depending on how strong or creamy you want the drink.

    4. Can I make a latte without a milk frother?

    Yes. A French press, whisk, mason jar, or careful manual whisking can create usable foam.

    Final Sip

    Once I learned the proper ratio, milk temperature, and frothing technique, making café-style drinks at home became much easier. I no longer worry about owning professional equipment because a Moka pot, handheld frother, or French press can still produce an excellent result.

    The real secret to how to make a latte at home is consistency: brew concentrated coffee, heat the milk without scorching it, create fine microfoam, and adjust the milk quantity to suit your preferred coffee strength. With a little practice, you can build the same foundation into vanilla lattes, oat milk lattes, caramel drinks, iced versions, and seasonal café favorites.

  • How to Make Pumpkin Spice Latte at Home Without the Coffee-Shop Line

    How to Make Pumpkin Spice Latte at Home Without the Coffee-Shop Line

    The first cool morning of fall usually makes me want something more interesting than my everyday coffee. Instead of driving to a café and paying for a seasonal drink, I make my own version with real pumpkin, bold coffee, warm spices, and creamy milk. Once I learned how to make a pumpkin spice latte at home, I found that getting that familiar fall flavor was less about fancy equipment and more about balancing the ingredients correctly.

    The combination is simple, but the details matter. Strong coffee keeps the drink from tasting like sweet pumpkin milk, gently heated milk creates a smoother texture, and real pumpkin puree adds body without relying on flavored syrup. With a few grocery-store ingredients and about 10 minutes, I can make a rich, customizable pumpkin spice latte that feels right at home on a crisp fall morning.

    What Ingredients Do You Need for a Homemade Pumpkin Spice Latte?

    For one generous serving, I use 1 cup of dairy or plant-based milk, 1 to 2 tablespoons of plain pumpkin puree, 1/2 cup of strong brewed coffee or 2 shots of espresso, 1 to 2 tablespoons of maple syrup or sugar, 1/4 to 1/2 teaspoon of pumpkin pie spice, and 1 teaspoon of vanilla extract.

    Plain canned pumpkin works best. Pumpkin pie filling already contains sugar and spices, making it harder to control the final flavor. For a richer drink, I usually choose whole milk or creamy barista-style oat milk. When comparing the best non-dairy milk for coffee, I find oat milk especially suitable for a pumpkin spice latte because its creamy texture complements both espresso and warm fall spices.

    How Do You Make a Pumpkin Spice Latte Step by Step?

    Heat the Milk, Pumpkin, Sweetener, and Spice

    I add the milk, pumpkin puree, maple syrup or sugar, and pumpkin pie spice to a small saucepan. I whisk the ingredients together over medium-low heat until the mixture becomes hot and steaming.

    I do not let it boil. Gentle heating helps the milk remain smooth and prevents the pumpkin mixture from developing an overly cooked taste.

    Add Vanilla After Heating

    Once the pumpkin-milk mixture is hot, I remove the saucepan from the burner and stir in the vanilla extract.

    Adding vanilla after heating helps preserve more of its aromatic flavor instead of exposing it to several minutes of direct heat.

    Froth for 20 to 30 Seconds

    Add Vanilla After Heating

    Next, I froth the warm pumpkin-milk mixture for about 20 to 30 seconds. A handheld milk frother is the easiest option, but a whisk or immersion blender can also work.

    I look for fine, light foam rather than large bubbles. This simple step gives a homemade pumpkin spice latte a texture much closer to a drink from a coffee shop.

    Brew Espresso or Strong Coffee

    I prepare two shots of espresso or about 1/2 cup of strong brewed coffee and pour it into a large mug.

    A moka pot, AeroPress, French press, drip coffee maker, or instant espresso can all work if I do not own an espresso machine.

    Assemble and Serve

    I slowly pour the frothed pumpkin milk over the coffee and stir gently.

    For a classic café-style finish, I top the latte with whipped cream and add a light dusting of pumpkin pie spice or cinnamon.

    Can You Make a Pumpkin Spice Latte Without an Espresso Machine?

    Can You Make a Pumpkin Spice Latte Without an Espresso Machine?

    Absolutely. I can brew regular coffee stronger than usual, use instant espresso, or prepare concentrated coffee with a moka pot or AeroPress.

    The key is avoiding weak coffee. Pumpkin, milk, vanilla, and warm spices can easily overpower a mild brew. If my latte tastes more like sweet pumpkin milk than coffee, I strengthen the coffee before changing the other ingredients.

    This approach also makes the recipe practical for US households that have a standard drip coffee maker but no dedicated espresso machine.

    What Is the Best Milk for a Pumpkin Spice Latte?

    Whole milk gives the drink a rich, creamy texture and usually froths easily. Two-percent milk creates a slightly lighter latte while still providing good body.

    For a dairy-free pumpkin spice latte, oat milk is one of my favorite choices because its creamy texture pairs naturally with pumpkin and cinnamon. Soy milk also works well. Almond milk produces a lighter drink, although its texture can be thinner.

    Barista-style plant milks are especially helpful when I want better foam because they are formulated specifically for coffee drinks.

    Why Does My Pumpkin Spice Latte Taste Grainy?

    Some settling is normal because real pumpkin puree and ground spices contain solids. Too much pumpkin or spice, however, can make the latte noticeably gritty.

    I keep the pumpkin at about 1 to 2 tablespoons per serving and whisk the mixture thoroughly while heating. For an especially smooth drink, I can briefly blend the warm pumpkin-milk mixture before frothing.

    I also keep the spices balanced. Cinnamon should usually lead, while ginger, nutmeg, and cloves stay in the background. Too much clove or nutmeg can quickly overwhelm the coffee.

    How Do You Make an Iced Pumpkin Spice Latte?

    An iced pumpkin spice latte uses essentially the same flavors but requires a slightly different method.

    I warm a small amount of milk with the pumpkin puree, sweetener, and spice first so everything combines smoothly. I stir in the vanilla, allow the mixture to cool, and then pour it into a glass filled with ice, chilled espresso or strong coffee, and cold milk.

    Cold foam is optional, but it gives the finished drink a more polished coffee-shop texture.

    Can You Make the Pumpkin Mixture Ahead of Time?

    Can You Make a Pumpkin Spice Latte Without an Espresso Machine?

    Yes. I can combine pumpkin puree, sweetener, vanilla, and pumpkin pie spice ahead of time and refrigerate the mixture in a sealed container for a short period.

    When I want a latte, I stir a portion into warm milk and add freshly brewed coffee.

    I prefer making small batches because pumpkin naturally settles and is easier to remix when the mixture is fresh.

    Frequently Asked Questions (FAQs)

    1. Can I use canned pumpkin instead of fresh pumpkin?

    Yes. Plain canned pumpkin puree is convenient and gives consistent results. I avoid pumpkin pie filling because it usually contains added sugar and spices that can make the finished latte too sweet.

    2. Can I make a pumpkin spice latte with regular coffee?

    Yes. Strong regular coffee works well. I simply brew it more concentrated than my everyday cup so its flavor remains noticeable after I add the milk and pumpkin.

    3. What sweetener works best for pumpkin spice latte?

    Maple syrup pairs naturally with pumpkin and warm spices. Brown sugar creates a deeper caramel-like flavor, while regular granulated sugar also works if that is what I already have in my pantry.

    4. Can I make a pumpkin spice latte less sweet?

    Yes. I start with about 1 tablespoon of sweetener, taste the finished drink, and add more only when needed. Stronger coffee, vanilla, and balanced pumpkin pie spice can add plenty of flavor without excessive sweetness.

    A Better Fall Coffee at Home

    Once I have the basic method down, this seasonal drink becomes incredibly easy to customize. I can use oat milk, reduce the sugar, add stronger espresso, serve it over ice, or create a thicker layer of foam.

    For me, the best results come from bold coffee, real pumpkin puree, gently heated milk, and controlled spice. Those simple choices turn how to make pumpkin spice latte at home into a dependable fall coffee recipe instead of a once-a-year experiment.

  • Cold Brew Coffee Ratio for 64 oz: Exact Mason Jar Recipe

    Cold Brew Coffee Ratio for 64 oz: Exact Mason Jar Recipe

    Making a half-gallon batch of cold brew sounds simple until I try to fit coffee grounds and water into the same 64-ounce Mason jar. Coffee takes up space, absorbs water, and reduces the amount of finished brew I get after straining. That is why blindly pouring 64 ounces of water into a 64-ounce jar does not work.

    When I calculate the cold brew coffee ratio for 64 oz, I first decide whether I want ready-to-drink coffee or a concentrated base. For a smooth drink I can pour directly over ice, I start around 1:10. For concentrate that I plan to dilute later, I use approximately 1:5.

    How Much Coffee Do I Put in a 64 oz Mason Jar?

    For a standard half-gallon Mason jar, these measurements give me a practical starting point while leaving enough room for the grounds.

    Brew Style Coffee-to-Water Ratio Ground Coffee Water How I Serve It
    Ready-to-drink About 1:10 130 g, roughly 1.5 cups About 44 fl oz Pour over ice
    Concentrate About 1:5 225 g, roughly 2.5 cups About 40 fl oz Dilute before drinking

    I treat cup measurements as approximate because coffee volume changes with roast level and grind size. Whenever possible, I weigh my beans in grams.

    The concentrate measurement is also an approximate jar-friendly ratio rather than laboratory precision. Forty US fluid ounces of water weigh roughly 1,183 grams, so 225 grams of coffee produces a ratio close to 1:5.3.

    Why Can’t I Add 64 oz of Water to a 64 oz Jar?

    Why Can't I Add 64 oz of Water to a 64 oz Jar?

    A 64-ounce container has a total physical capacity of about half a gallon. Once I add several ounces of coarse coffee grounds, there is no longer room for a full 64 ounces of water.

    The grounds also swell as they become saturated.

    This distinction matters because “64 ounces of water” and “cold brew made in a 64-ounce container” describe two different recipes. If I actually use 64 fluid ounces of brewing water, I need a container larger than 64 ounces.

    For example, 64 fluid ounces of water weigh about 1,893 grams. At a 1:10 ratio, I would need roughly 189 grams of coffee. At a 1:8 ratio, I would need about 237 grams. Neither combination comfortably fits inside a standard half-gallon Mason jar.

    What Is the Best Ready-to-Drink Ratio for a 64 oz Jar?

    For ready-to-drink coffee, I like approximately 130 grams of coarse-ground beans with 44 fluid ounces of water.

    That works out close to a 1:10 coffee-to-water ratio by weight and gives me a smooth brew that usually does not require significant dilution. This balanced strength can also work well when making a latte at home, especially if I want to use cold brew as the coffee base.

    If I want a stronger glass, I can use a slightly higher coffee dose or reduce the water. I avoid making large changes until I have tasted the finished batch because cold brew strength also depends on grind size, bean choice, temperature, and extraction time.

    What Ratio Should I Use for Cold Brew Concentrate?

    When I want concentrate, I use about 225 grams of coffee with approximately 40 fluid ounces of water.

    The finished coffee will be intentionally bold. I normally begin by combining roughly equal parts concentrate and cold water or milk, then adjust according to taste.

    A concentrate works especially well when I want flexibility. I can pour it over ice, add dairy milk, use oat milk, or dilute it with water without brewing another batch.

    How Do I Make 64 oz Mason Jar Cold Brew?

    Step 1: How Coarse Should I Grind Coffee for Cold Brew?

    I grind the beans very coarse, aiming for a texture similar to coarse sea salt or raw sugar.

    Fine grounds expose more surface area and can make filtration difficult. They may also leave sediment in the finished coffee and create a muddier cup during a long extraction.

    Step 2: How Should I Mix Coffee and Water?

    I add the ground coffee to the Mason jar first and slowly pour filtered cold or room-temperature water over it.

    I gently stir until all visible grounds are wet. I do not aggressively shake the jar because my goal is simply to saturate the coffee evenly.

    I also avoid filling to the rim. A little headspace makes stirring and handling easier.

    Step 3: How Long Should I Steep a 64 oz Batch?

    How Long Should I Steep a 64 oz Batch?

    At room temperature, I generally start with about 12 to 16 hours.

    When brewing entirely in the refrigerator, I allow approximately 18 to 24 hours because extraction generally progresses more slowly at colder temperatures.

    I use these numbers as starting points rather than rigid rules. If my beans produce a strong brew quickly, I strain earlier. If the result tastes weak, I review the ratio, grind, and extraction time before changing everything at once.

    Step 4: What Is the Best Way to Strain Cold Brew?

    Once steeping is complete, I remove the grounds using a fine-mesh filter, reusable cloth coffee bag, or paper coffee filter.

    I avoid aggressively squeezing fine sediment through the filter because clarity improves the final texture.

    After filtering, I transfer the coffee to a clean, sealed container and refrigerate it.

    Why Do I Get Less Coffee Than the Water I Added?

    Coffee grounds retain a considerable amount of water in brewing, so final yield is always lower than starting water volume.

    If I put 44 ounces of water into my ready-to-drink recipe, I should not expect to collect 44 ounces after filtration. Some liquid remains trapped in the wet grounds, filter, and brewing vessel.

    This is one reason I focus on ratio rather than expecting the number printed on the jar to equal my final coffee yield.

    Can I Use a Stainless Steel Mason Jar Filter Basket?

    Yes, but capacity can become a limitation.

    Many built-in filter baskets are better suited to ready-to-drink recipes because they may hold only around 1 to 1.5 cups of coarse coffee comfortably. The exact amount varies by filter design.

    A large concentrate dose can overflow or become packed too tightly for effective water contact. When my filter basket is small, I use the ready-to-drink recipe or brew concentrate with a separate larger filter bag.

    How Do I Fix Cold Brew That Is Too Strong or Too Weak?

    If the coffee tastes too strong, I add cold water or milk gradually until it reaches the strength I want. This is particularly useful with concentrate.

    If it tastes weak, I first check whether I used enough coffee. Increasing the coffee dose during my next batch is usually more predictable than extending steeping indefinitely.

    I also check the grind. Excessively coarse grounds paired with a short extraction can taste thin, while fine grounds left too long may produce an unpleasantly heavy or bitter cup.

    How Long Does Homemade Cold Brew Last in the Refrigerator?

    How Long Does Homemade Cold Brew Last in the Refrigerator?

    I keep strained cold brew in a clean, tightly sealed container in the refrigerator. Some home cold-brew recipes suggest refrigerated storage for up to two weeks. For flavor, however, I prefer drinking my batch sooner rather than treating two weeks as a target. 

    While people often discuss the health benefits of coffee, proper storage still matters for preserving freshness, aroma, and overall drinking quality. I also remove all coffee grounds after brewing because leaving them submerged allows extraction to continue and can gradually change the flavor.

    FAQs About Making a 64 oz Batch

    1. How much coffee should I use for 64 oz of cold brew?

    If I mean a 64-ounce Mason jar rather than 64 ounces of water, I start with around 130 grams of coffee and 44 fluid ounces of water for ready-to-drink cold brew. For concentrate, I use roughly 225 grams with around 40 fluid ounces of water.

    2. Is a 1:10 ratio good for ready-to-drink cold brew?

    Yes. I find approximately 1:10 smooth enough to drink directly while still giving cold brew plenty of body. People who prefer stronger coffee can move toward a stronger ratio.

    3. Should I steep cold brew on the counter or in the refrigerator?

    Either method can work. I typically use 12 to 16 hours at room temperature or around 18 to 24 hours in the refrigerator, then adjust based on taste.

    4. Do I need to dilute cold brew concentrate?

    Usually, yes. A roughly 1:5 concentrate is designed to be stronger than normal ready-to-drink coffee. I start around a 1:1 dilution with water or milk and adjust from there.

    Final Thoughts

    The easiest way I have found to make consistent half-gallon cold brew is to stop treating jar capacity as water volume. Grounds require space and hold onto liquid, so I build the recipe around what actually fits.

    My preferred cold brew coffee ratio for 64 oz starts with approximately 130 grams of coffee and 44 ounces of water for an easy ready-to-drink batch. When I want concentrate, I move toward 225 grams of coffee with about 40 ounces of water and dilute it after brewing.

    Once I have the cold brew coffee ratio for a 64 oz set, the rest is straightforward: use coarse grounds, fully wet the coffee, allow enough extraction time, strain thoroughly, and refrigerate the finished brew. That gives me a repeatable Mason jar method without wasting beans or guessing at every batch.

  • Best Milk for Lattes: What Actually Makes a Creamier Cup

    Best Milk for Lattes: What Actually Makes a Creamier Cup

    I used to think a better latte depended almost entirely on stronger espresso or a more expensive machine. But after paying closer attention to what was happening in the milk pitcher, I realized that milk can completely change the drink. The same espresso can taste rich and balanced with one milk, then thin, sharp, or overly foamy with another.

    For me, choosing the best milk for lattes comes down to how well it balances creaminess, sweetness, microfoam, and espresso flavor. Whole dairy milk remains my most reliable choice for a classic café-style latte, while barista oat milk comes remarkably close when I want a plant-based option. 

    The real secret, however, is understanding why different milks behave so differently once heat and steam enter the equation.

    What Makes Milk Good for a Latte?

    Protein and fat matter most. Milk proteins help stabilize the tiny air bubbles created during steaming, while fat adds body and a smoother mouthfeel. A latte needs fine, integrated microfoam rather than a thick cap of stiff foam.

    I start with cold milk because it gives me more time to introduce air and create a smooth whirlpool. A useful target is about 140°F to 150°F. Whole Latte Love and Clive Coffee recommend roughly this range for sweetness and good texture.

    Is Whole Milk Best for a Creamy Latte?

    Is Whole Milk Best for a Creamy Latte?

    Whole milk is my most dependable choice for a traditional latte. In the United States, whole milk must contain at least 3.25% milkfat under federal standards. That fat gives the drink richness, while the protein helps create stable foam.

    It is also forgiving for latte art. Properly steamed, it becomes glossy and fluid enough for hearts, tulips, and rosettas. If creaminess and easy steaming matter most, whole milk is the benchmark I use.

    Is 2% Milk Good for Lattes?

    Yes. I use 2% milk when I want a lighter drink without losing too much body. It froths readily and can still form fine microfoam, although the finished latte feels slightly thinner than one made with whole milk.

    Can You Make a Latte With Skim Milk?

    You can, but the texture changes. Skim milk contains very little fat, so it can create plenty of foam but less of the velvety mouthfeel associated with a classic latte.

    I choose skim when reducing fat matters more than richness. For latte art or fuller texture, I prefer whole or 2% milk.

    What Is the Best Plant-Based Milk for Lattes?

    Oat milk is my first choice when I am avoiding dairy. A good barista oat milk has enough body to make the drink feel creamy, and its mild, lightly sweet flavor usually works well with espresso.

    I pay attention to “barista” or “barista edition” on plant-milk cartons. Oatly Barista Edition sold in the US, for example, contains rapeseed oil and dipotassium phosphate. Oatly says the latter acts as an acidity regulator that helps prevent separation in acidic coffee.

    Is Soy Milk Good for Frothing?

    Soy milk is a strong option because its protein can support stable foam. Its flavor is more noticeable than oat milk, and some products can separate when exposed to too much heat or acidic espresso.

    I get better results by starting cold, avoiding excessive steaming, and choosing a barista formula when possible.

    Is Almond Milk Good in a Latte?

    Is Almond Milk Good in a Latte?

    Almond milk makes a lighter latte with a distinct nutty flavor. Regular versions can feel thin and may be harder to texture consistently, so I prefer a barista-style almond milk for hot drinks.

    For maximum creaminess and latte art, I usually choose oat over almond. Almond works better when I want a lighter body and toasted flavor.

    What About Pea Milk and Lactose-Free Milk?

    Pea-protein milk can foam better than some lower-protein plant drinks, although flavor varies by brand. Lactose-free dairy milk can still provide familiar dairy texture and foam for people who avoid lactose but consume dairy protein.

    Does Barista Milk Really Make a Difference?

    For plant-based lattes, it often does. Barista versions are designed with foaming, heat stability, and coffee performance in mind. Formulas vary, though, so I compare taste, foam stability, ingredients, and nutrition labels rather than assuming every carton performs the same way.

    How Do I Steam Milk for Better Microfoam?

    How Do I Steam Milk for Better Microfoam?

    I begin with cold milk and introduce only a small amount of air near the start of steaming. Then I position the wand so the milk spins, helping larger bubbles break down into fine microfoam.

    For a latte, I use less aeration than I would for a cappuccino. I stop around 140°F to 150°F, swirl the pitcher, and pour soon afterward. Starting cold gives me a longer working window, while overheating can reduce sweetness and make the milk taste scorched. 

    The same steaming approach is useful when testing the best non-dairy milk for coffee, especially barista-style oat, soy, or almond milk, because these alternatives can react differently to heat.

    Frequently Asked Questions (FAQs)

    1. What Milk Do Most Coffee Shops Use for Lattes?

    Whole milk is a common default because it produces a creamy texture and consistent microfoam. Many US cafés also offer 2%, nonfat, oat, almond, soy, and other alternatives.

    2. What Is the Best Milk for Lattes for Latte Art?

    I recommend whole dairy milk for beginners because it is forgiving and creates glossy microfoam. Barista oat milk is my preferred dairy-free alternative.

    3. Is Oat Milk Better Than Almond Milk for Lattes?

    For texture, I usually prefer oat milk because it feels fuller and steams more smoothly. Almond milk works when I want a lighter body and nuttier flavor.

    4. Why Does Plant Milk Separate in Coffee?

    Heat and coffee acidity can destabilize some plant milks. A barista formulation, moderate steaming temperature, and careful pouring can reduce separation.

    Final Takeaway

    When I want a classic café-style latte, whole milk remains my first choice because it balances richness, protein, and reliable steaming performance. For a dairy-free drink, barista oat milk is the most versatile alternative I use.

    Soy, almond, pea, skim, 2%, and lactose-free milk can all work depending on what I value most. I match the milk to my priorities: creaminess, nutrition, flavor, dietary needs, or latte-art performance. That approach gives me a more satisfying cup.

  • How to Make Cold Foam Without Heavy Cream That Stays Fluffy

    How to Make Cold Foam Without Heavy Cream That Stays Fluffy

    That velvety layer floating over a cold brew may look like something that requires cream and professional café equipment, but I can recreate it at home with ordinary refrigerated milk. The secret is not adding more fat—it is choosing a milk with enough protein and aerating it correctly so tiny bubbles stay suspended.

    When I learned how to make cold foam without heavy cream, I found that cold skim milk often produced some of the lightest, fluffiest results. Low-fat dairy milk also works well, while high-protein soy milk and barista-style oat milk give me reliable dairy-free alternatives. With a handheld frother, French press, blender, whisk, or even a Mason jar, I can turn a few ounces of milk into a smooth topping for cold brew or iced coffee in minutes.

    What Is the Easiest Cold Foam Recipe Without Cream?

    For one serving, I use 1/4 cup of very cold skim, 1%, or 2% milk. If I want sweetness, I add 1 to 2 teaspoons of vanilla syrup, maple syrup, simple syrup, or powdered sugar. I may also add 1/4 teaspoon vanilla extract, a pinch of cinnamon, or a tiny pinch of salt. For a dairy-free version, I also consider the best non-dairy milk for coffee, especially options that froth well and maintain a smooth texture.

    I pour everything into a tall, narrow glass, leaving room for the milk to expand. Then I position a handheld frother just beneath the surface and move it gently up and down for about 20 to 30 seconds.

    I stop when the milk has expanded substantially, sometimes close to double its original volume, and the surface looks smooth and velvety rather than full of large, soapy bubbles.

    I serve the cold foam immediately over cold brew, iced coffee, an iced Americano, or an iced latte. Starbucks Coffee at Home also uses 1/4 cup of milk in several of its cold-foam recipes.

    Why Does Skim Milk Work So Well for Cold Foam?

    Why Does Skim Milk Work So Well for Cold Foam?

    Cold foam and whipped cream get their structure differently. Whipped cream relies heavily on fat, while milk foam depends more on proteins surrounding and stabilizing trapped air.

    Those small air pockets form the light microfoam that gives cold foam its cloud-like texture.

    Skim milk usually gives me the greatest volume. I use 1% or 2% milk when I want slightly more richness. Whole milk can still foam, but the finished topping generally feels denser and less airy.

    Milk proteins such as casein play an important structural role in dairy systems, while coffee-focused frothing guidance also identifies milk protein as important for trapping air and producing foam.

    Which Milk Is Best for Cold Foam?

    For a classic light topping, skim milk is my first choice. For something slightly creamier, 1% and 2% milk strike a useful balance between airy foam and richer mouthfeel.

    For dairy-free cold foam, I usually choose high-protein soy milk or barista-style oat milk. Plant-based products can behave very differently because protein levels, oils, stabilizers, and other ingredients vary between brands.

    Starbucks also notes that alternative milks can work for cold foam when you choose varieties that froth well, such as barista-style plant milks.

    Standard almond milk can foam, but I find the results less predictable. If it remains watery, I switch to a barista formulation rather than simply frothing it longer.

    How Can I Make Cold Foam Without a Frother?

    How Can I Make Cold Foam Without a Frother?

    You do not need dedicated coffee equipment to create homemade cold foam.

    Can I Make Cold Foam in a Mason Jar?

    Yes. I fill a clean Mason jar no more than halfway with cold milk, secure the lid tightly, and shake vigorously for about 30 to 60 seconds.

    The space inside the jar gives the milk room to expand. Starbucks’ general Mason jar frothing method similarly recommends filling the jar halfway before shaking it vigorously.

    The bubbles may be slightly larger than those produced by an electric frother, but this is one of the simplest no-equipment methods.

    Can I Make Cold Foam With a French Press?

    I pour cold milk into a clean French press, leave plenty of space above it, and rapidly move the plunger up and down until the milk becomes airy and noticeably increases in volume.

    I prefer watching the texture instead of following an exact time. Milk quantity, French press size, and pumping speed can all change how quickly the foam develops.

    Can I Use a Blender or Whisk?

    A blender works well when I am preparing several servings. I blend the cold milk for roughly 20 to 30 seconds and stop once fine foam appears.

    A hand whisk also works, although it requires more effort and usually creates a less uniform texture.

    How Do I Make Cold Foam Thicker?

    Temperature is one of the first things I check. I always use milk directly from the refrigerator.

    I also avoid adding too much sweetener. One or two teaspoons is usually enough for a single serving without weighing down the foam.

    A tall, narrow container helps a handheld frother incorporate air efficiently. I keep the frother close to the surface initially, then lower it slightly once the milk begins expanding. This helps refine large bubbles into finer microfoam.

    Why Is My Cold Foam Watery or Not Foaming?

    Milk choice is often the problem. Some low-protein plant milks struggle to hold air, so switching to soy milk or barista-style oat milk can improve the texture.

    Frother position matters as well. If I hold the frother too deep, it simply circulates the milk. If I hold it too high, it creates large bubbles and splashes.

    I keep the whisk just beneath the surface while introducing air and lower it slightly as the foam builds.

    I also make cold foam immediately before drinking my coffee. Foam naturally begins losing trapped air as it sits, so fresh foam gives me the best texture.

    Cold Foam vs Sweet Cream Cold Foam: What Is the Difference?

    Cold Foam vs Sweet Cream Cold Foam: What Is the Difference?

    Regular cold foam is primarily aerated milk and does not need added sugar. It produces a lighter topping that allows the flavor of cold brew or iced coffee to remain prominent.

    Sweet cream cold foam tends to be richer and sweeter. Recipes may contain milk, cream, vanilla, sugar, or flavored syrup.

    However, heavy cream is not mandatory for every sweet foam. Starbucks publishes a vanilla cold-foam recipe made with 2% milk, powdered sugar, and vanilla extract.

    Frequently Asked Questions (FAQs)

    1. Can I make cold foam with regular 2% milk?

    Yes. I use 2% milk when I want a creamier topping than skim milk provides while still keeping the foam relatively light and airy.

    2. Can I make cold foam with oat milk?

    Yes. Barista-style oat milk is usually my first choice because it is formulated to perform better when frothed. Regular oat milk can work, but the results depend on the brand.

    3. Can I make cold foam without sugar?

    Absolutely. Sugar is optional. Plain refrigerated milk can foam without maple syrup, vanilla syrup, simple syrup, or powdered sugar.

    4. What is the easiest way to learn how to make cold foam without heavy cream?

    I start with 1/4 cup of refrigerator-cold skim milk and a handheld frother. I froth just beneath the surface for about 20 to 30 seconds, watch for a major increase in volume and fine microbubbles, and serve it immediately.

    Final Thoughts

    Once I mastered how to make cold foam without heavy cream, I stopped treating cream as essential for a café-style iced drink. Skim milk gives me a light and airy topping, 1% and 2% add more body, and barista oat milk or soy milk provide practical dairy-free alternatives.

    The technique makes the biggest difference. I start with cold milk, introduce air gradually, watch for fine microfoam, and avoid excessive sweetener, including artificial sweeteners, when I want the milk’s natural flavor to stand out. I also serve the foam immediately. With that simple approach, I can give homemade iced coffee or cold brew a creamy coffee-shop finish without making the drink unnecessarily heavy. 

  • What Is a Cortado Coffee? The Small Drink With a Bold 1:1 Balance

    What Is a Cortado Coffee? The Small Drink With a Bold 1:1 Balance

    Some coffee drinks are designed to be sipped slowly from a large cup, while others deliver their character in just a few concentrated ounces. A cortado belongs firmly in the second group. The first time I look at one, its simplicity stands out: espresso, a small amount of silky milk, and almost no thick foam competing for attention.

    So, what is a cortado coffee? It is a compact espresso drink traditionally made with roughly equal parts espresso and lightly steamed milk. A typical version combines about 2 ounces of espresso with 2 ounces of milk, creating a drink close to 4 ounces. That simple 1:1 balance lets the milk soften the espresso while keeping the coffee’s flavor noticeably bold.

    What Makes a Cortado Different From Other Espresso Drinks?

    A classic cortado uses roughly a 1:1 balance of espresso and milk. In many US specialty coffee shops, that means about 2 ounces of espresso plus 2 ounces of steamed milk for a drink close to 4 ounces.

    I treat 1:1 as a benchmark because cafés use different doses and glass sizes. The milk should soften the espresso without overwhelming it. For anyone comparing the best non-dairy milk for coffee, barista-style oat or soy milk can work especially well in a cortado because they can create a smooth texture without masking the espresso.

    The name comes from the Spanish verb cortar, meaning “to cut.” In this case, the milk cuts the intensity of the espresso.

    What Should Cortado Milk Texture Be Like?

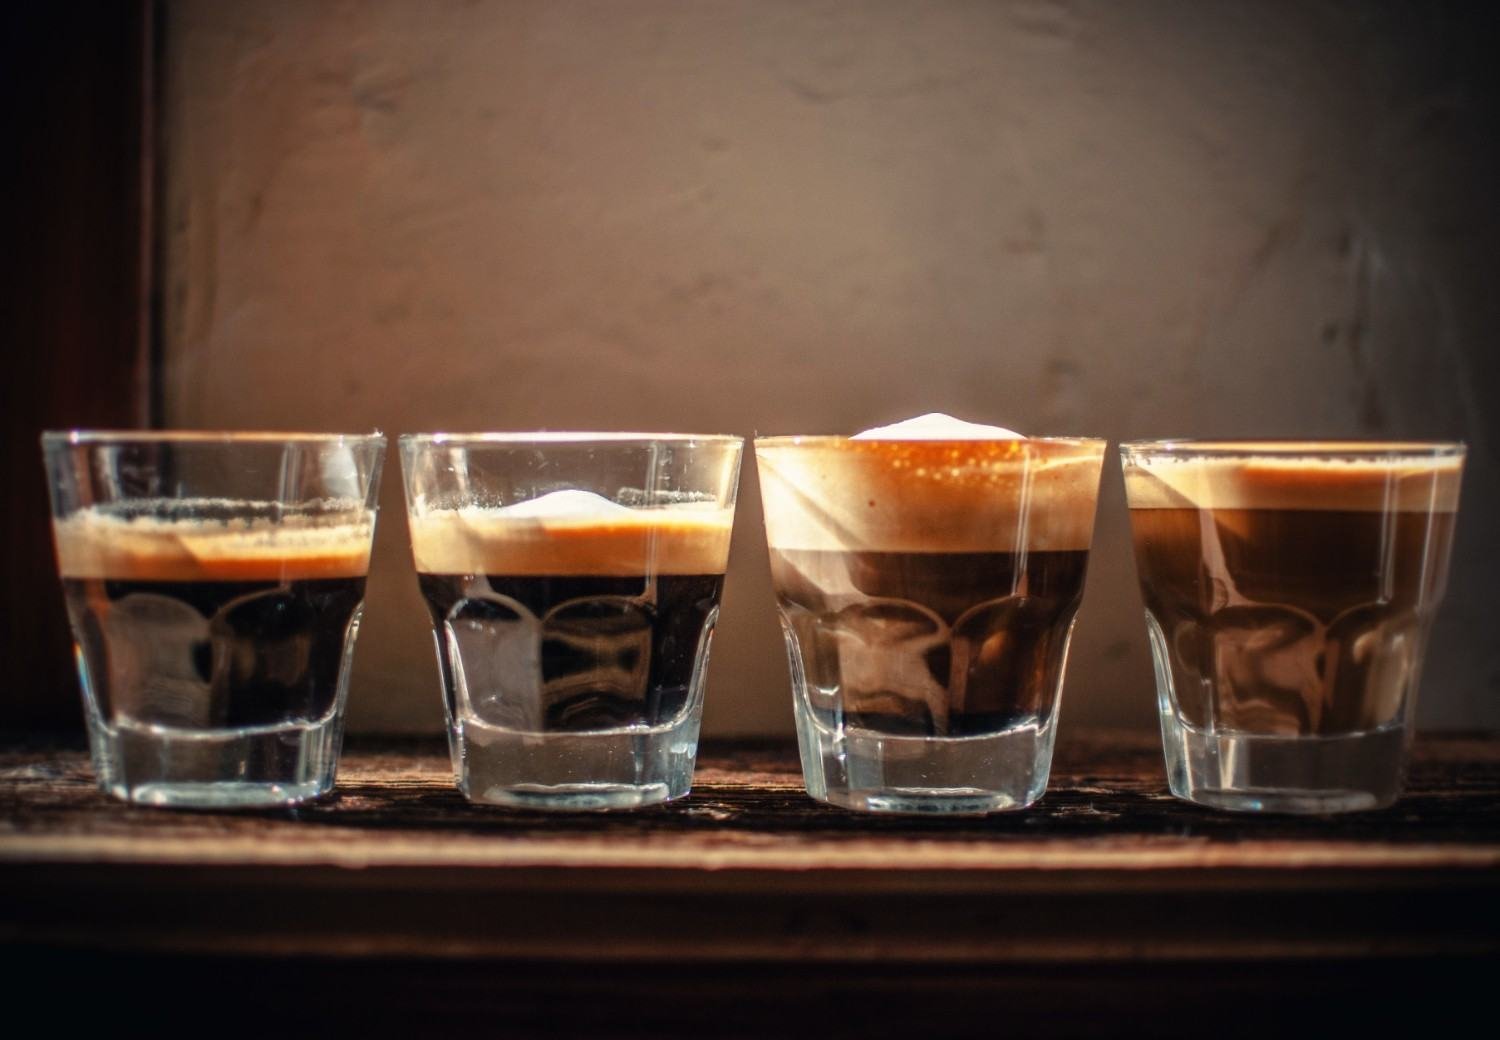
    A cortado should not have the tall foam cap you expect on a cappuccino. The milk should stay smooth, glossy, and fluid, with fine microfoam that blends into the espresso.

    Too much air can make it feel like a miniature cappuccino, while too much milk can push it toward latte territory. Modern recipes commonly use a small 4- to 5-ounce glass.

    What Does a Cortado Taste Like?

    What Does a Cortado Taste Like?

    To me, a good cortado tastes concentrated but rounded. The milk softens sharp edges while leaving the espresso’s roast character, acidity, sweetness, and body noticeable.

    It suits drinkers who find straight espresso too intense but a latte too milky. Chocolate, caramel, nutty, and fruit-forward notes can still come through.

    Because there is much less milk than in a latte, the quality and flavor of the espresso become more important. A poorly extracted shot will be harder to hide, while a balanced espresso can create an especially flavorful cortado.

    Why Is a Cortado Served in a Small Glass?

    Cortados are often served in a small clear glass instead of a large ceramic mug. In US specialty coffee culture, the drink is strongly associated with the Gibraltar-style tumbler, often around 4 to 4.5 ounces.

    The glass matches the compact serving size. Some American coffee shops even use “Gibraltar” for a closely related drink, although recipes can differ.

    The clear presentation also makes the drink visually distinctive. Instead of receiving a large cup filled mostly with milk, you get a compact espresso-and-milk drink designed to be finished while it is still warm.

    Cortado vs Latte, Flat White, Macchiato, and Cappuccino

    These figures are approximate because café recipes vary.

    Coffee Drink Typical Size Approximate Espresso-to-Milk Balance Milk Texture
    Cortado About 4 oz Around 1:1 Fine microfoam, minimal thick froth
    Macchiato About 2–3 oz Mostly espresso with a little milk Small amount of milk or foam
    Flat white Often about 5–6 oz or larger More milk than a cortado Silky microfoam
    Latte Usually 8 oz or larger Often around 1:3 or more More steamed milk, light foam
    Cappuccino Commonly around 5–6 oz More milk and foam than a cortado Aerated, foamy texture

    Cortado vs Latte: Which Tastes Stronger?

    Cortado vs Latte: Which Tastes Stronger?

    A cortado usually tastes stronger because it contains much less milk. US lattes commonly come in larger sizes, so the espresso flavor is more diluted.

    If I want a long, creamy coffee, I would choose a latte. When I want to taste more of the espresso while still having some milk, a cortado makes more sense.

    Cortado vs Flat White: Are They the Same?

    No. A flat white usually contains more steamed milk and emphasizes silky microfoam. A cortado stays smaller and closer to equal parts espresso and milk.

    Both drinks are smoother than a foam-heavy cappuccino, but the cortado generally gives the espresso more presence.

    Cortado vs Macchiato: Which Has More Milk?

    The cortado has more milk. A traditional espresso macchiato uses only a small amount of milk or foam, while a cortado adds enough to noticeably soften the shot.

    That makes a macchiato more intense and espresso-forward, while a cortado offers a more balanced middle ground.

    Cortado vs Cappuccino: What Changes Most?

    Foam is the clearest difference. Cappuccino milk is more aerated; cortado milk remains flatter and more integrated with the espresso.

    A cappuccino therefore feels lighter and foamier, while a cortado feels denser and smoother.

    How Do You Make a Cortado at Home?

    I start with a double shot of espresso and roughly the same volume of milk. If my espresso measures close to 2 ounces, I use about 2 ounces of milk.

    I steam the milk gently, adding only enough air for a smooth, glossy texture. I avoid a thick foam cap, then pour the milk slowly into the espresso and serve it immediately.

    Whole milk works well, while barista-style oat milk is a popular dairy-free option in US cafés. Soy and almond milk can work too.

    The most common mistake is simply using too much milk. If the finished drink starts resembling a small latte, reducing the milk usually brings the espresso-to-milk balance back where it belongs.

    How Much Caffeine Is in a Cortado?

    How Much Caffeine Is in a Cortado?

    The caffeine comes from the espresso, not the milk. Many US cafés use a double shot, but the actual amount varies with the beans, dose, roast, and extraction.

    A cortado and a latte made with the same espresso shots can therefore contain similar caffeine even though the cortado tastes stronger.

    Is a Cortado Sweet?

    A traditional cortado does not require sugar or flavored syrup. Properly steamed milk adds natural sweetness and can make espresso taste less bitter.

    You can add sweetener, but the classic balance comes from espresso and milk alone. If you are used to flavored coffee shop drinks, a cortado may initially taste less sweet but considerably more coffee-forward.

    Frequently Asked Questions (FAQs)

    1. Is a cortado stronger than a latte?

    It usually tastes stronger because it has a higher proportion of espresso to milk. Caffeine depends on the espresso shots rather than the total drink size.

    2. What is a cortado coffee made of?

    What is a cortado coffee made from? A typical version combines espresso with roughly the same amount of lightly steamed milk, commonly around 2 ounces of each, with little thick foam.

    3. Is a cortado the same as a Gibraltar?

    They are closely related in US specialty coffee culture. “Gibraltar” often refers to a cortado-style drink served in a Gibraltar glass, although individual cafés may use slightly different recipes.

    4. Can you order a cortado with oat milk?

    Yes. Oat milk, especially a barista-style version, can create a smooth texture while keeping the drink dairy-free.

    Final Thoughts

    When someone asks me what a cortado coffee is, I describe it as espresso softened rather than hidden by milk. Its roughly 1:1 ratio, compact 4-ounce size, lightly steamed milk, and minimal foam give it a distinct place between a macchiato and milkier drinks such as the flat white or latte. 

    For readers exploring milk drink recipes, a cortado is also a simple example of how a small amount of milk can change the character of espresso without overpowering it.

    For US coffee drinkers who want clear espresso flavor without drinking a straight shot, the cortado is easy to appreciate. Keep the serving small, the milk silky, and the espresso at the center.

  • What Is Café au Lait? The Coffee That Keeps Milk Simple

    What Is Café au Lait? The Coffee That Keeps Milk Simple

    Some coffee drinks rely on espresso machines, precise foam, or carefully layered ingredients. Café au lait takes a much simpler route. I can start with the same brewed coffee I would drink at breakfast, add an equal amount of warm milk, and completely change its texture without hiding the flavor of the coffee.

    So, what is café au lait? It is a traditional French drink that combines strong brewed coffee with hot milk, commonly in a 1:1 ratio. Instead of using espresso like a latte, it starts with drip, filter, or French press coffee. That straightforward preparation makes it especially practical for US coffee drinkers who want a smooth, café-style drink without needing an espresso machine.

    What Does Café au Lait Mean?

    “Café au lait” is French for “coffee with milk,” which describes the drink almost perfectly.

    Traditionally, the drink is associated with breakfast in France. It may be served in a large mug or a wide, handleless bowl known as a bol. The wide opening makes it easy to hold with both hands and is also associated with dipping breakfast pastries such as croissants.

    In US coffee shops, the presentation is usually less formal. You are more likely to receive café au lait in a standard ceramic mug or takeaway cup, but the basic combination of brewed coffee and hot milk remains the same.

    What Is the Traditional Café au Lait Ratio?

    What Is the Traditional Café au Lait Ratio?

    The classic café au lait ratio is approximately 1:1.

    That means I might combine 4 ounces of strong brewed coffee with 4 ounces of hot milk for an 8-ounce drink. For a larger serving, the same principle applies.

    The ratio is flexible rather than rigid. If I prefer stronger coffee flavor, I can add a little more coffee. If I want a softer, creamier cup, I can slightly increase the milk.

    The goal is balance. The coffee should still taste clearly present rather than disappearing behind the milk.

    What Kind of Coffee Is Used in Café au Lait?

    Traditional café au lait uses brewed coffee rather than espresso.

    Drip coffee works particularly well for an American-style home preparation because most households already have a standard coffee maker. French press is another excellent choice because it produces a fuller body and keeps more natural coffee oils in the cup.

    Filter and pour-over coffee can also work, although I usually brew them slightly stronger than normal so the flavor remains noticeable after adding an equal quantity of milk.

    Medium-dark and dark roasts tend to pair well with milk. Chocolate, caramel, toasted nut, and brown sugar notes generally remain recognizable even after the coffee is diluted.

    What Milk Works Best for Café au Lait?

    Whole milk produces the richest traditional texture because its fat content gives the drink more body and natural sweetness.

    However, there is no requirement to use whole dairy milk. Reduced-fat milk works well if I want a lighter cup.

    For a dairy-free version, barista-style oat milk is one of my preferred alternatives because it has a creamy consistency and relatively neutral flavor. Soy milk provides good body, while almond milk makes the drink lighter and slightly nutty.

    The milk should be hot but does not need the highly polished microfoam used for a latte. Some cafés steam it lightly, while traditional versions may simply use hot or gently scalded milk with very little foam.

    Café au Lait vs Latte: What Is the Difference?

    The biggest difference between café au lait and a latte is the coffee base.

    A latte uses espresso combined with a relatively large amount of steamed milk and a thin layer of microfoam. Café au lait uses brewed coffee and generally follows a more balanced 1:1 coffee-to-milk ratio.

    That creates noticeably different flavors. A latte has concentrated espresso underneath a creamy milk texture, while café au lait tastes more like traditional brewed coffee softened and enriched with hot milk.

    Because brewed coffee plays such an important role in the final taste, I also pay attention to grind size, water temperature, and freshness to maximise coffee brew quality before adding the milk.

    For Americans who own a drip coffee maker but not an espresso machine, café au lait is also much easier to prepare at

    Café au Lait vs Cappuccino and Flat White

    Café au Lait vs Cappuccino and Flat White

    Cappuccino and flat white are both espresso-based drinks, so they differ fundamentally from café au lait.

    A cappuccino traditionally contains espresso, steamed milk, and a prominent layer of foam. Its airy milk texture is one of its defining characteristics.

    A flat white also uses espresso, often with finely textured microfoam. It usually has less foam than a cappuccino and a stronger coffee-to-milk flavor than a typical latte.

    Café au lait has little or no thick foam and depends on brewed coffee rather than espresso, giving it a softer but still coffee-forward profile.

    Is Caffè Misto the Same as Café au Lait?

    For American coffee drinkers, Caffè Misto is one of the closest equivalents.

    The term became particularly familiar through Starbucks, where a Caffè Misto combines brewed coffee with steamed milk. The preparation is conceptually very similar to café au lait and commonly uses approximately equal amounts of each.

    The terminology differs more than the basic idea.

    If I order a Caffè Misto in the US, I expect something much closer to café au lait than to a latte because the drink starts with brewed coffee rather than espresso.

    What Is New Orleans Café au Lait?

    New Orleans has developed one of America’s most recognizable regional versions of café au lait.

    New Orleans café au lait traditionally combines coffee with roasted chicory and hot or scalded milk. Chicory contributes a roasted, earthy, slightly bitter character that makes the drink distinct from a standard French preparation.

    The drink is strongly associated with the city’s café culture and is famously paired with beignets.

    For me, this variation is especially useful when explaining what café au lait is to a US audience because it shows how the French concept evolved into something uniquely connected to American regional food culture.

    How Does Café au Lait Compare With Café con Leche?

    Café con leche is another coffee-and-milk drink, but its preparation varies across Spain, Latin America, and US communities.

    It is commonly made with stronger coffee or espresso-style coffee combined with hot or scalded milk. Depending on the region, the coffee flavor can be more intense than in a traditional French café au lait.

    Both drinks share the idea of combining strong coffee with heated milk, but their coffee base, cultural traditions, and proportions can differ.

    How to Make Café au Lait at Home

    How to Make Café au Lait at Home

    I start by brewing strong coffee using a drip machine, French press, or pour-over brewer.

    While the coffee brews, I warm an approximately equal quantity of milk. I keep it hot but avoid aggressively boiling it because overheated milk can develop a cooked taste.

    I then combine equal portions of coffee and milk in a large mug.

    If I want a slightly more café-like texture, I lightly froth or steam the milk before pouring it. I do not aim for a thick cappuccino foam because café au lait should remain smooth and relatively flat on top.

    The result is a simple homemade drink that requires no espresso machine and very little specialized equipment.

    Does Café au Lait Have More Caffeine Than a Latte?

    Not necessarily.

    A latte contains espresso, while café au lait contains a larger quantity of brewed coffee. Because brewed coffee and espresso have different caffeine concentrations and serving sizes, either drink can contain more caffeine depending on how it is prepared.

    A large café au lait made with several ounces of strong drip coffee may contain as much or more caffeine than a small single-shot latte.

    The beans, brewing method, serving size, and number of espresso shots all influence the final amount.

    Frequently Asked Questions (FAQs)

    Is café au lait just coffee with milk?

    It is similar, but café au lait usually follows a deliberate preparation using strong brewed coffee and a substantial amount of hot milk, often close to equal proportions. Regular coffee with milk might contain only a small splash.

    Does café au lait contain espresso?

    Traditional café au lait generally does not contain espresso. Brewed coffee is one of its defining characteristics.

    Does café au lait have foam?

    It may have a small amount of foam if the milk is lightly steamed, but it does not normally have the thick foam associated with cappuccino.

    Can I make café au lait with plant-based milk?

    Yes. Oat, soy, and almond milk can all work. I prefer creamy barista-style oat milk when I want a texture closer to whole dairy milk.

    How do you pronounce café au lait?

    A common English approximation is “caf-ay oh lay.”

    Final Thoughts

    When I explain what is cafe au lait, I think of it as one of the easiest ways to turn everyday brewed coffee into a richer café-style drink. Strong coffee and hot milk in roughly equal amounts produce a smooth cup without requiring espresso equipment or complicated techniques.

    It is also useful to compare this drink with other milk-based coffees when learning what a cortado is, because a cortado typically uses espresso with a smaller amount of warm milk, creating a stronger and more concentrated flavor.

    I also like how much regional variation exists. The French version remains simple and breakfast-friendly, while New Orleans adds chicory and scalded milk for a distinctly American identity. Caffè Misto offers another familiar US interpretation, and café con leche shows how other coffee cultures approach the same basic combination differently.

    For anyone who enjoys brewed coffee but wants a creamier cup, café au lait remains one of the simplest classics to make at home.

  • How to Froth Oat Milk Without a Frother for Café-Style Foam

    How to Froth Oat Milk Without a Frother for Café-Style Foam

    A carton of oat milk and a cup of coffee can taste completely different once I add a layer of soft, creamy foam. The good news is that I do not need an espresso machine, steam wand, or another countertop appliance to get that texture at home.

    When I figured out how to froth oat milk without a frother, I realized that ordinary kitchen tools could do most of the work. A mason jar creates quick foam, a French press gives me a finer texture, and even a whisk, blender, or immersion blender can turn plain oat milk into a café-style topping.

    The real secret is not expensive equipment. I get better results by choosing the right oat milk, leaving enough room for it to expand, adding air efficiently, and keeping the temperature under control. In this blog, I’ll show the methods I use for both hot coffee and iced drinks, along with the fixes that help when oat milk refuses to foam.

    What Oat Milk Froths Best for Coffee?

    I usually choose refrigerated barista oat milk when I want foam for a latte or cappuccino-style coffee. These products are designed to perform more consistently in coffee, so they tend to create finer bubbles and hold their texture longer.

    Regular oat milk can still froth, although performance varies by brand. If one carton consistently creates thin or unstable foam, I try another variety before assuming my technique is the problem.

    For hot drinks, I usually aim for about 140°F to 150°F. I avoid boiling oat milk because excessive heat can negatively affect its flavor and texture.

    How to Froth Oat Milk in a Mason Jar

    How to Froth Oat Milk in a Mason Jar

    The mason jar method is my simplest option when I do not want to use any special coffee equipment.

    I pour cold or gently warmed oat milk into a clean glass jar, filling it no more than halfway. About one-third full works particularly well because the milk needs plenty of space to expand. Oat milk is also a popular choice when comparing the best non-dairy milk for coffee, especially for people who want a creamy texture without using dairy.

    I secure the lid tightly and shake the jar vigorously for 30 to 60 seconds. The milk should become visibly foamy and increase in volume.

    Next, I remove the lid. If I want hot foam, I microwave the uncovered jar in short intervals for up to about 30 seconds, depending on the microwave’s power and my preferred temperature. Gentle heating after shaking can also help the foam maintain its structure.

    I avoid shaking very hot liquid inside a tightly sealed jar because heat can create pressure. The mason jar generally produces larger bubbles than a French press, but it remains one of the fastest ways to improve homemade coffee.

    How to Froth Oat Milk With a French Press

    When I want finer, creamier foam, I usually choose a French press.

    I first warm the oat milk to approximately 140°F to 150°F. Then I pour it into a clean French press until the carafe is roughly one-third full.

    I pump the plunger rapidly up and down for about 30 seconds, concentrating much of the movement through the upper portion of the milk. As more air enters the liquid, I can usually feel additional resistance.

    Once the milk has expanded and looks creamy, I gently swirl the French press before pouring.

    Of the simple household methods I use, the French press usually creates the closest result to café-style microfoam.

    Can I Froth Oat Milk With a Whisk?

    Yes. A regular kitchen whisk works surprisingly well when I do not have a jar or French press available.

    I gently heat the oat milk to around 140°F to 150°F. I can whisk directly in a small saucepan or transfer the warm milk into a deep bowl if I want more room to work.

    Then I whisk vigorously for about one to two minutes, keeping the whisk relatively close to the surface so it pulls air into the milk.

    The resulting foam is usually lighter than French press foam, but it still adds texture to drip coffee, espresso drinks, and homemade lattes.

    Can I Froth Oat Milk in a Blender?

    Can I Froth Oat Milk in a Blender?

    A blender is particularly useful when I want to prepare more than one serving.

    For hot coffee, I warm the oat milk first, but I only put warm liquid into a blender if the manufacturer specifically says the container can safely handle it.

    I begin on low speed for a few seconds before gradually increasing the speed. Depending on the blender and oat milk, a substantial layer of foam can develop within approximately 20 to 45 seconds.

    If my blender is not designed for warm liquids, I blend refrigerated oat milk instead and heat it separately afterward. This avoids unnecessary pressure buildup inside the blender container.

    How to Froth Oat Milk With an Immersion Blender

    An immersion blender is one of my favorite options for a single serving.

    I pour warm oat milk into a tall container and position the blender head close to the surface. Then I move it gently up and down for around 20 to 30 seconds.

    Keeping the blade near the surface allows it to pull more air into the milk. I prefer a tall container because it helps contain splashes while giving the foam room to develop.

    Why Is My Oat Milk Not Frothing?

    When oat milk refuses to foam properly, I first check the milk itself. Very thin varieties may not hold bubbles as effectively as fuller-bodied or barista blends.

    Temperature also matters. Overheating oat milk can weaken its texture, while filling a mason jar or French press too high leaves too little room for air and expansion.

    I also keep my equipment clean. Oil, food residue, or other buildup on a whisk, blender, jar, or French press can interfere with foam formation.

    Finally, I pour the milk soon after frothing. Even good foam gradually separates and collapses if I allow it to sit too long.

    Hot Oat Milk Foam vs. Cold Oat Milk Foam

    I use warm foam for lattes, mochas, and other hot espresso drinks. Keeping the oat milk around 140°F to 150°F provides plenty of warmth without pushing it toward boiling.

    For iced coffee or cold brew, I usually start with refrigerated oat milk and froth it without heating.

    Cold oat milk foam tends to feel lighter, while warm foam integrates more smoothly with espresso. I choose the temperature based on the drink rather than following one universal frothing rule.

    Which Oat Milk Frothing Method Works Best?

    Which Oat Milk Frothing Method Works Best?

    For me, the French press produces the finest foam, while the mason jar wins for simplicity. A whisk works when I have almost no equipment, a full-size blender is convenient for larger batches, and an immersion blender is ideal when I only need one serving.

    Creating good foam is mainly about controlling air, heat, and milk quality. Paying attention to those three factors has made a noticeable difference in my homemade coffee.

    Frequently Asked Questions (FAQs)

    Can Regular Oat Milk Be Frothed?

    Yes. Regular oat milk can froth, although the texture and foam stability vary between brands. I usually get more consistent results from barista-style oat milk.

    Does Oat Milk Froth Better Hot or Cold?

    Both temperatures can work. I use cold oat milk for iced coffee and cold foam, while I warm oat milk to approximately 140°F to 150°F for hot lattes and espresso drinks.

    Why Does My Oat Milk Foam Disappear Quickly?

    Large bubbles collapse faster than fine foam. Thin oat milk, excessive heat, dirty equipment, or allowing the foam to sit too long can also cause it to break down faster.

    What Is the Easiest Way to Froth Oat Milk at Home?

    I find the mason jar method easiest because it requires virtually no special equipment. When I want finer and more consistent foam, I prefer using a French press.

    Final Thoughts

    Once I learned how to froth oat milk without a frother, I stopped treating an electric milk frother as essential for making better coffee at home. A mason jar gives me convenience, a French press creates finer foam, and a whisk, blender, or immersion blender gives me plenty of alternatives.

    The best results come from leaving enough room for expansion, controlling the temperature, keeping equipment clean, and choosing fuller-bodied oat milk when possible. With those basics in place, I can prepare creamy lattes, iced coffees, cold brews, and cappuccino-style drinks without adding another appliance to my kitchen counter.

  • Why Does My Cold Brew Taste Watery? 7 Fixes That Work

    Why Does My Cold Brew Taste Watery? 7 Fixes That Work

    Few things are more disappointing than waiting overnight for cold brew only to pour a glass that tastes thin and weak. When I hear someone ask Why does my cold brew taste watery, I usually start with three suspects: the coffee-to-water ratio, extraction, and dilution.

    Cold water extracts coffee much more slowly than hot water, so small brewing mistakes can noticeably affect flavor. Too little coffee, an extremely coarse grind, a short refrigerator steep, poor saturation, or too much water and melting ice can all leave cold brew tasting flat. Even choosing the best milk for lattes will not fully fix a weak cold brew base, so I focus on correcting the brew itself first. Fortunately, each problem has a practical fix.

    Is My Coffee-to-Water Ratio Making My Cold Brew Weak?

    The first thing I check is the coffee-to-water ratio. Eyeballing scoops can easily create inconsistent results because different coffees and grind sizes occupy different amounts of space.

    For a cold brew concentrate, I generally start around a 1:4 or 1:5 coffee-to-water ratio by weight. If I want ready-to-drink cold brew, I usually begin closer to 1:8 to 1:10 and adjust from there.

    A digital kitchen weighing scale makes this much easier. Measuring by weight gives me a repeatable recipe, while cups and tablespoons can lead to an unexpectedly weak brew.

    I also make sure I know which style I am making. Concentrate is intentionally strong and designed for dilution. Ready-to-drink cold brew starts with more water and normally needs little or no additional dilution.

    Can Grinding Coffee Too Coarse Make Cold Brew Watery?

    Can Grinding Coffee Too Coarse Make Cold Brew Watery?

    Cold brew usually works best with a coarse grind, but there is a difference between coarse and excessively coarse.

    If the grounds look like rough gravel, the water has less surface area available for extraction. That can leave the brew thin even after many hours.

    I prefer grounds closer to coarse sea salt. If my cold brew is consistently weak, I move the grinder slightly finer rather than immediately adding more brewing time.

    I do not go too fine, however. Fine grounds can create excessive sediment, clog filters, and produce muddy or overly harsh flavors. The goal is a consistent coarse grind that allows steady extraction.

    Does Cold Brew Taste Weak Because It Is Under-Extracted?

    Under-extraction is another common reason cold brew lacks body.

    Cold water pulls soluble compounds from coffee slowly, and brewing temperature matters. If I brew on the counter, 12 to 18 hours can be a useful starting range for many recipes. If I brew entirely in a cold refrigerator, extraction can take longer, so I may extend the steep closer to 18 to 24 hours depending on the grind and ratio.

    I judge the result by taste rather than the clock alone. Once the coffee has the strength and body I want, I can also experiment with the best milk for lattes if I plan to turn the finished cold brew into a creamier milk-based drink.

    How Can I Tell If Cold Brew Is Under-Extracted?

    Weakness by itself does not always mean under-extraction.

    If the coffee tastes watery but otherwise balanced, simple dilution may be the problem. If it tastes thin, sour, grassy, sharp, or hollow, I am more likely dealing with incomplete extraction.

    In that situation, I may steep longer, grind slightly finer, improve saturation, or use a stronger coffee-to-water ratio.

    Can Poor Saturation Cause Weak Cold Brew?

    Yes. Dry pockets inside the coffee bed can prevent water from extracting evenly.

    When I add water, I make sure all the grounds become wet. I gently stir the mixture at the beginning or press floating grounds beneath the surface.

    For a refrigerated batch, a light stir during brewing can sometimes help if the coffee is clearly clumping or floating, but I avoid aggressive or repeated agitation because it can increase sediment.

    A wide brewing container also gives the grounds more room to contact water evenly.

    Am I Diluting My Cold Brew Concentrate Too Much?

    Am I Diluting My Cold Brew Concentrate Too Much?

    Sometimes the brew itself is perfectly fine, but I weaken it while serving.

    A 1:1 concentrate-to-water ratio is common, but it is not a rule. Some concentrates taste much better with less dilution.

    I prefer to add water or milk gradually. I pour the concentrate, add a small amount of liquid, taste it, and continue only if needed.

    This is especially important with milk-based drinks because milk contributes its own water while also softening the perceived intensity of the coffee.

    Why Does My Cold Brew Become Watery After I Add Ice?

    If my first sip tastes strong but the drink becomes weak halfway through, ice is usually responsible.

    Small cubes and crushed ice melt quickly, especially during warm US summers. Instead of filling the glass with ice to chill warm coffee, I refrigerate the cold brew first and use fewer, larger cubes.

    Coffee ice cubes work even better. I freeze leftover cold brew in an ice tray and use those cubes in the next glass. As they melt, they maintain the coffee flavor rather than watering it down.

    Can Water Quality Change the Flavor of Cold Brew?

    Because cold brew is mostly water, water quality can make a noticeable difference.

    Strong chlorine flavors or unusual mineral levels in tap water can leave coffee tasting flat or unpleasant. If my tap water does not taste good by itself, I normally use filtered water.

    I also avoid relying on distilled water for everyday brewing. Coffee extraction benefits from some mineral content, and extremely low-mineral water can produce a cup that tastes dull.

    Good brewing water will not fix an incorrect ratio, but it can make an otherwise solid recipe taste cleaner and fuller.

    How Can I Fix Watery Cold Brew I Already Made?

    I rarely throw out a weak batch.

    If the problem is dilution, I simply serve it with less water, milk, and ice. I can also mix the weak brew with a stronger fresh batch.

    Another option is turning the coffee into ice cubes for future iced coffee. Weak cold brew also works surprisingly well in smoothies, protein shakes, iced lattes, baking recipes, and coffee-based desserts.

    If the batch clearly tastes under-extracted, I can steep a small amount of fresh coarse-ground coffee in part of the finished brew for several additional hours. It will not perfectly reproduce a properly brewed batch, but it can add more body and flavor.

    What Is the Best Cold Brew Ratio for Strong Coffee?

    What Is the Best Cold Brew Ratio for Strong Coffee?

    There is no single perfect ratio for every coffee.

    For concentrate, I typically begin around 1:4 or 1:5 by weight. For a ready-to-drink batch, I start around 1:8 to 1:10.

    Roast level, bean origin, grind size, brewing temperature, steep time, and personal preference all influence the final cup. I treat ratios as starting points and adjust one variable at a time.

    That approach helps me identify what actually improved the recipe instead of changing everything at once.

    FAQs About Weak and Watery Cold Brew

    1. Why is my cold brew weak after 24 hours?

    If cold brew remains weak after 24 hours, I check the ratio and grind before extending the brewing time. Too much water or extremely coarse grounds can produce weak coffee even during a long steep.

    2. Should I steep cold brew at room temperature or in the refrigerator?

    Both methods can work. Room-temperature brewing generally extracts faster, while refrigerator brewing may require more time. I adjust the steep based on taste, grind size, and coffee-to-water ratio rather than relying on one universal number.

    3. Can I steep cold brew for too long?

    Yes. A very long steep can eventually produce dull, woody, bitter, or overly heavy flavors. I normally start tasting the brew within the expected extraction window and stop once the flavor is balanced.

    4. Why does my cold brew taste sour and thin?

    Sour, thin cold brew often suggests under-extraction. I would try a slightly finer grind, a longer steep, better initial saturation, or a stronger coffee-to-water ratio.

    How Do I Keep Cold Brew From Tasting Thin Next Time?

    For consistent cold brew, I weigh the coffee and water, use an evenly coarse grind, fully saturate the grounds, allow enough extraction time, and chill the finished drink before serving.

    I also taste the concentrate before adding anything to it. If it already tastes weak, extra water or milk will only make the problem worse.

    Once I control ratio, grind, steeping temperature, saturation, water quality, and serving dilution, I rarely have to wonder why does my cold brew taste watery. A few measured adjustments usually turn a disappointing batch into a richer, smoother cup.

  • Why Does My Cold Brew Taste Bitter? Fix the Flavor Fast

    Why Does My Cold Brew Taste Bitter? Fix the Flavor Fast

    A batch of cold brew can look perfect in the pitcher and still deliver an unexpectedly harsh first sip. I have found that bitterness usually starts with small brewing decisions rather than one major mistake. When I wonder why my cold brew tastes bitter, I check how finely I ground the beans, how long they steeped, the brewing temperature, the coffee-to-water ratio, and even how well I filtered the finished drink.

    Cold brew is often associated with a smooth, mellow flavor, but cold water does not eliminate extraction problems. Fine coffee particles, an overly long steep, very dark beans, stale coffee, warm brewing conditions, or leftover sediment can all push the flavor in the wrong direction. 

    A strong concentrate can also taste bitter when the real solution is simply adding water or milk. Once I identify which issue is responsible, getting back to a balanced cup is usually straightforward.

    Why Does Cold Brew Become Bitter During Brewing?

    Cold water extracts coffee more slowly than hot water, which is one reason cold brew often tastes smoother than traditional hot coffee. However, slower extraction does not mean unlimited extraction.

    The longer coffee grounds remain in contact with water, the more soluble compounds move into the brew. When the process passes the flavor balance I want, bitterness and astringency can become more noticeable.

    Temperature also matters. Cold brew left at room temperature extracts faster than coffee steeped in the refrigerator. That means I pay closer attention to timing when brewing on the counter.

    Am I Steeping My Cold Brew Too Long?

    Am I Steeping My Cold Brew Too Long?

    Over-steeping is one of the first things I check.

    For most batches, I start around 12 to 16 hours. Some recipes work well closer to 18 hours, particularly when brewing in the refrigerator, but I avoid assuming that 24 hours will automatically produce better coffee.

    If my cold brew tastes woody, dry, or aggressively bitter, I shorten the next batch by two or three hours. Room-temperature brewing usually needs more careful timing because warmer water speeds extraction compared with refrigerated brewing.

    Is My Cold Brew Grind Size Too Fine?

    Fine grounds expose more coffee surface area to water. This speeds extraction and creates more tiny particles, or fines, that can pass through a filter.

    For cold brew, I prefer a coarse grind with a texture similar to raw sugar, coarse sea salt, or rough breadcrumbs. A burr grinder usually gives me more consistent particles than a blade grinder, which can produce a mix of large pieces and powdery coffee dust. Grind size matters just as much as choosing the best milk for lattes when I want more control over the final taste and texture of a coffee drink.

    If I see thick sediment at the bottom of my cold brew, grind consistency is one of the first things I change.

    Is My Cold Brew Bitter or Simply Too Concentrated?

    This is an important distinction because cold brew concentrate is supposed to taste intense.

    A ratio around 1:4 or 1:5 coffee to water can produce a strong concentrate designed to be diluted later. For a ready-to-drink batch, ratios closer to 1:8 to 1:10 may produce a more approachable cup, although the ideal ratio depends on the beans, grind, and personal taste.

    When a batch seems bitter, I pour a small amount into a glass and dilute it with cold water. If the harsh flavor disappears, concentration may have been the issue rather than severe over-extraction.

    I can also dilute concentrate with dairy milk, oat milk, or another milk alternative depending on how I plan to serve it.

    Can Dark or Stale Coffee Beans Make Cold Brew Bitter?

    Bean choice matters just as much as brewing technique.

    Very dark roast coffee naturally contains stronger roasted, smoky, and sometimes bitter flavors. Cold brewing may soften some sharp notes, but it cannot remove flavors already created during roasting.

    When I want a naturally sweeter cold brew, I usually choose fresh medium or medium-dark beans with chocolate, caramel, nutty, or brown-sugar tasting notes. Lighter roasts can also work, although they may produce brighter, more fruit-forward flavors.

    Stale or old pre-ground coffee can taste flat, woody, and harsh. I get better results when I store whole beans in an airtight container and grind them close to brewing.

    Can Warm Water or Poor Water Quality Cause Bitter Cold Brew?

    Can Warm Water or Poor Water Quality Cause Bitter Cold Brew?

    Although cold brew does not require ice-cold water throughout the entire process, excessively warm conditions can speed extraction. That matters most when the coffee already has a fine grind or a long steep time.

    Water quality also changes flavor. Since water makes up most of the finished drink, heavily chlorinated or unpleasant-tasting tap water can make the coffee taste worse.

    I prefer clean, good-tasting filtered water. I also avoid assuming distilled water is automatically ideal because some mineral content helps coffee extraction.

    Can Coffee Sediment Keep Making Cold Brew Taste Harsh?

    Tiny coffee particles can remain in the brew even after I remove the main grounds. These fines can make cold brew muddy, gritty, or unpleasantly astringent.

    I often use a second filtration step if the first filter lets too much sediment through. A paper coffee filter can remove fine silt and some coffee oils, producing a cleaner cup than a coarse mesh strainer alone.

    I also avoid leaving finished coffee sitting on spent grounds once the intended brewing time ends.

    Can Dirty Brewing Equipment Make Cold Brew Taste Bitter?

    Old coffee oils can oxidize and create stale flavors. If a cold brew recipe that usually tastes good suddenly becomes unpleasant, I inspect the equipment.

    I thoroughly clean jars, reusable filters, grinder components, lids, seals, and brewing containers. Mesh filters deserve special attention because fine coffee residue can collect inside them.

    Fresh beans cannot fully compensate for equipment coated with old coffee oils.

    How Can I Fix Bitter Cold Brew I Already Made?

    I usually try to rescue the batch before throwing it away.

    My first step is dilution. I gradually add cold water and taste until the flavor becomes balanced. Milk can soften bitterness and increase body, while ice naturally reduces concentration as it melts.

    A small amount of simple syrup can also balance bitterness when I want a sweetened drink. However, if the coffee tastes strongly burnt, stale, woody, or extremely astringent, adding sugar may only cover the problem rather than fix it.

    How Do I Prevent Bitter Cold Brew Next Time?

    How Do I Prevent Bitter Cold Brew Next Time?

    When troubleshooting a bitter batch, I change only one or two variables at a time. Otherwise, I cannot tell which adjustment actually helped.

    I start with fresh beans, a coarse grind, filtered water, and clean brewing equipment. I aim for roughly 12 to 16 hours as a starting steep time, strain the coffee thoroughly, and decide beforehand whether I am making concentrate or ready-to-drink cold brew. Since coffee can also contribute compounds people associate with the nutrition source of coffee, I prefer keeping the brewing process clean and controlled rather than masking poor extraction with extra sugar or heavy add-ins.

    I also refrigerate finished cold brew in a clean, airtight container. Oxidation and long storage can gradually make coffee taste dull or stale even when the initial extraction was good.

    FAQs About Bitter Cold Brew

    1. Why is my cold brew bitter even after only 12 hours?

    A shorter steep does not guarantee smooth coffee. The grind may be too fine, the brewing environment may be warm, the beans may be heavily roasted, or the coffee-to-water ratio may be too concentrated.

    2. Why is my cold brew bitter and weak at the same time?

    This can happen when fine particles over-extract while the overall coffee-to-water ratio remains too diluted. I would try a coarser grind and check the recipe before extending the steep time.

    3. Why does my cold brew taste burnt?

    A burnt taste often comes from very dark roasted beans rather than cold brewing itself. Switching to a medium roast can help determine whether the roast profile is responsible.

    4. Does cold brew become more bitter in the refrigerator?

    Its flavor can change during storage because of oxidation and gradual quality loss. I keep strained cold brew refrigerated in a clean, sealed container and make quantities I can drink while they still taste fresh.

    Final Thoughts

    The answer to why my cold brew tastes bitter is not always simply that I brewed it for too long. Steep time matters, but grind size, water temperature, concentration, roast level, bean freshness, filtration, water quality, equipment cleanliness, and the effect of time and roasting temperature can all influence the final flavor.

    I get the most consistent results by using coarse freshly ground coffee, filtered water, a controlled 12-to-16-hour starting window, proper filtration, and a ratio suited to whether I want concentrate or ready-to-drink coffee. Changing one variable at a time also makes it much easier to find the real cause and produce a smoother, sweeter cup the next time.